How to MCP Connect to Supabase
Step-by-step guide to connecting the Supabase MCP server to MCP clients like Claude Desktop and MCP Connect. Learn to configure Supabase authentication, manage databases with AI, and develop with visual protocol inspection.
Learn how to integrate Supabase's powerful backend platform with MCP Connect for seamless AI-powered database management
Keen to learn more about MCP from in-person experts? Check out our upcoming MCP Bangkok (16th October 2025) and MCP Singapore (23rd October 2025) meetups.
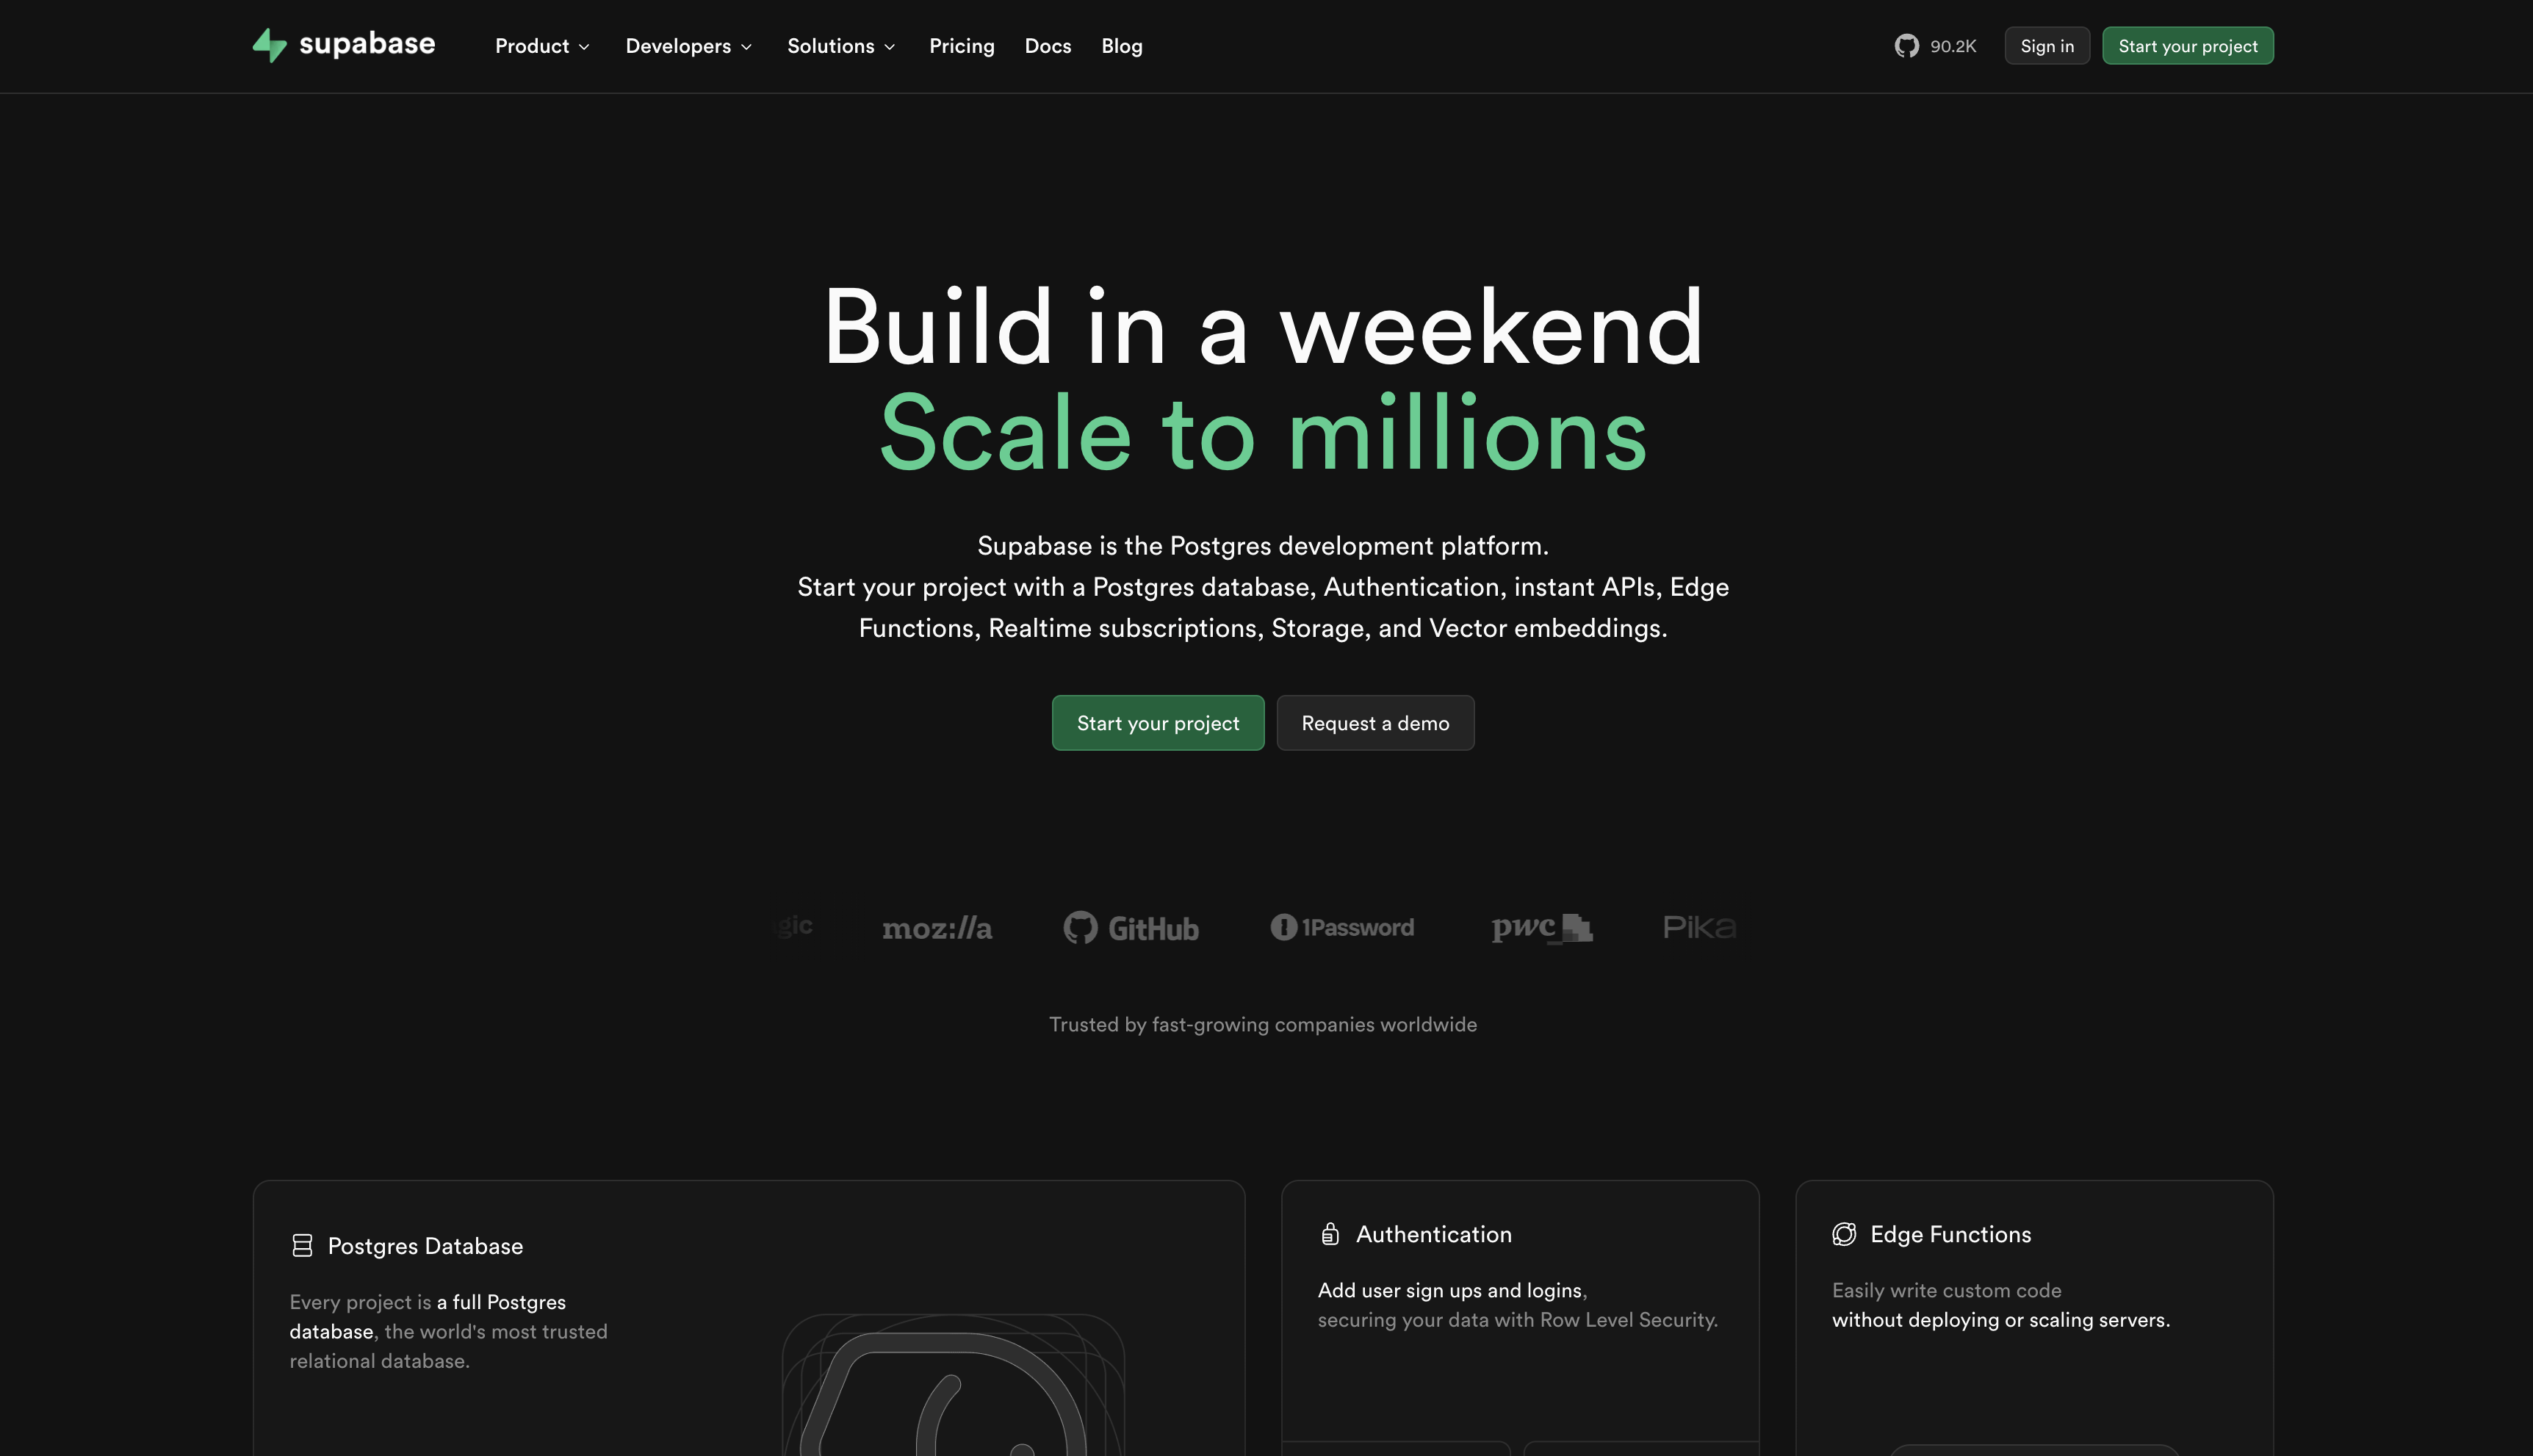
What is Supabase?
Supabase is an open-source Firebase alternative providing a complete backend-as-a-service platform. Built on PostgreSQL, it offers authentication, real-time subscriptions, storage, and serverless functions all with developer-friendly SQL capabilities.
Key Benefits:
- PostgreSQL Foundation: Full SQL power with built-in extensions
- Real-time Subscriptions: Instant updates across clients
- Built-in Authentication: Ready-to-use auth with multiple providers
- Row Level Security: Database-level security policies
- Auto-generated APIs: REST and GraphQL endpoints from your schema
Understanding Model Context Protocol (MCP)
Model Context Protocol (MCP) is an open standard by Anthropic enabling seamless integration between AI applications and external data sources. It allows AI models like Claude to securely access and interact with your databases, APIs, and tools.

Why MCP Matters:
- Standardized Integration: One protocol for all data sources
- Secure Access: Controlled, auditable data access
- Real-time Context: AI works with live information
- Tool Capabilities: Extend AI with custom functionality
Prerequisites
Before starting, you'll need:
- Node.js installed (for running the MCP gateway)
- A Supabase account (we'll create this together)
- NPX available in your terminal
Setting Up Your Supabase Project
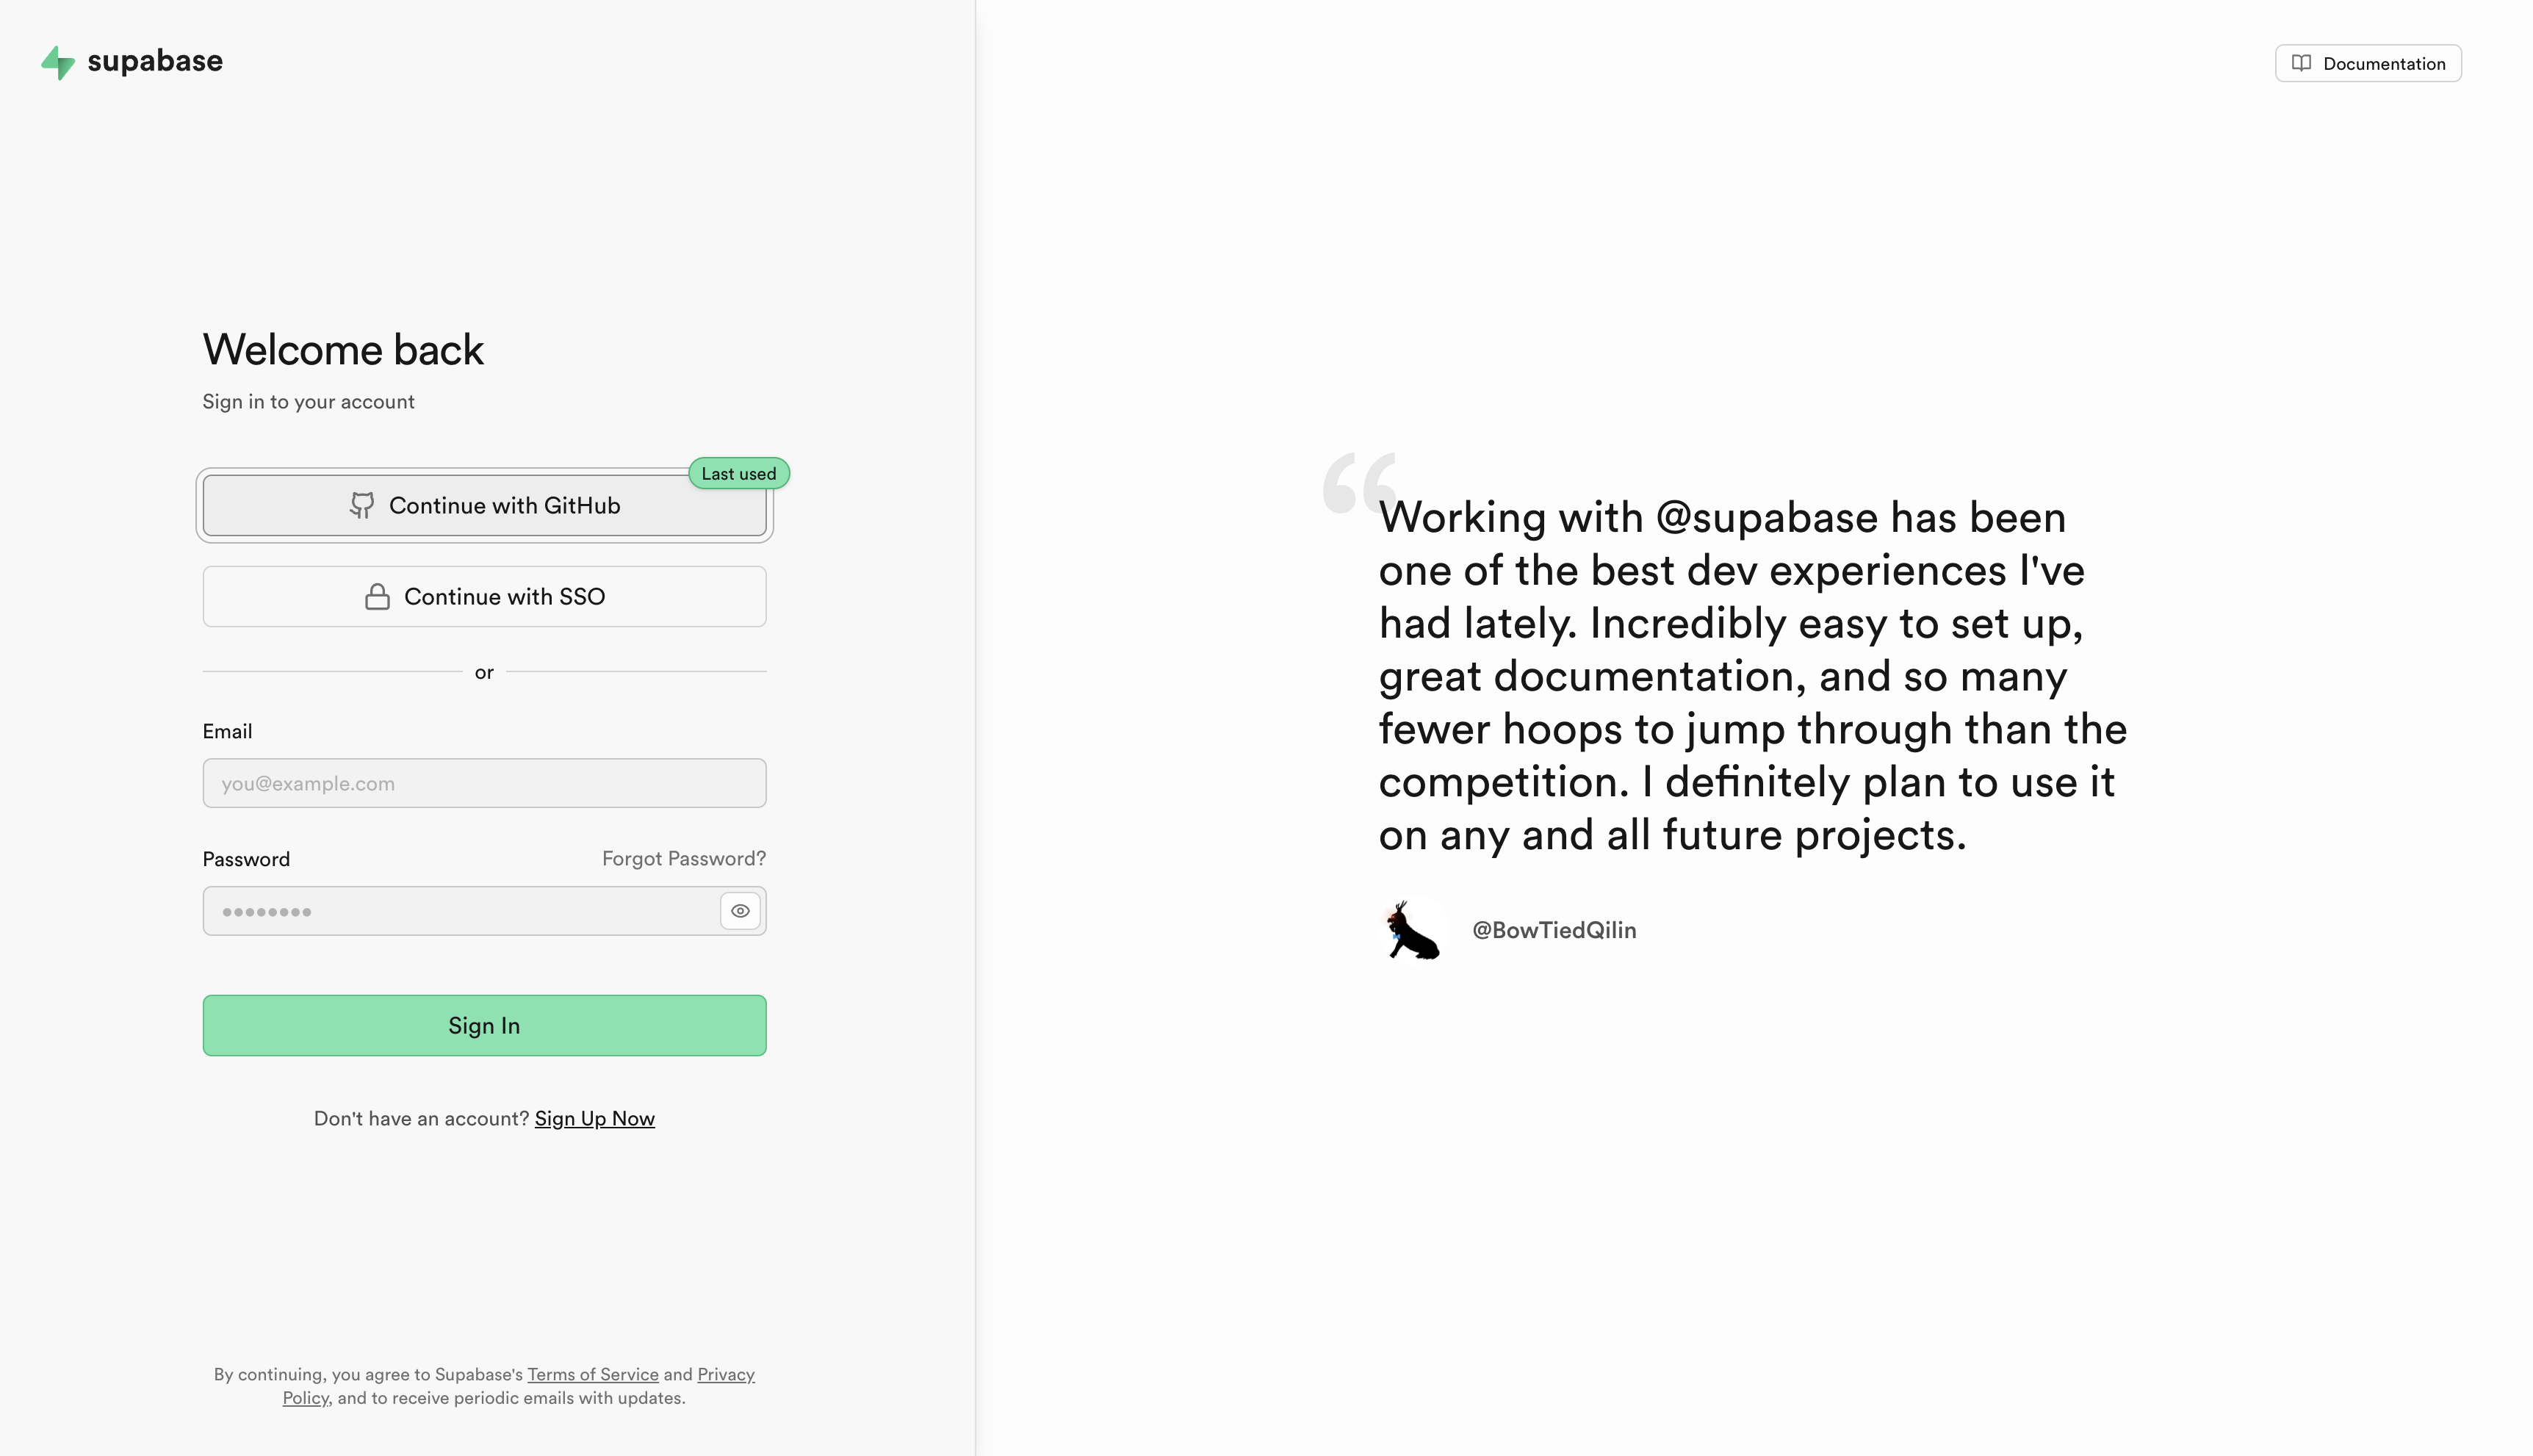
Step 1: Create Your Account
- Go to supabase.com
- Click "Start your project" or "Sign up"
- Sign up using GitHub, Google, or email
Step 2: Create an Organization
- Click "New organization"
- Enter an organization name
- Choose a plan (Free tier works great)
- Click "Create organization"

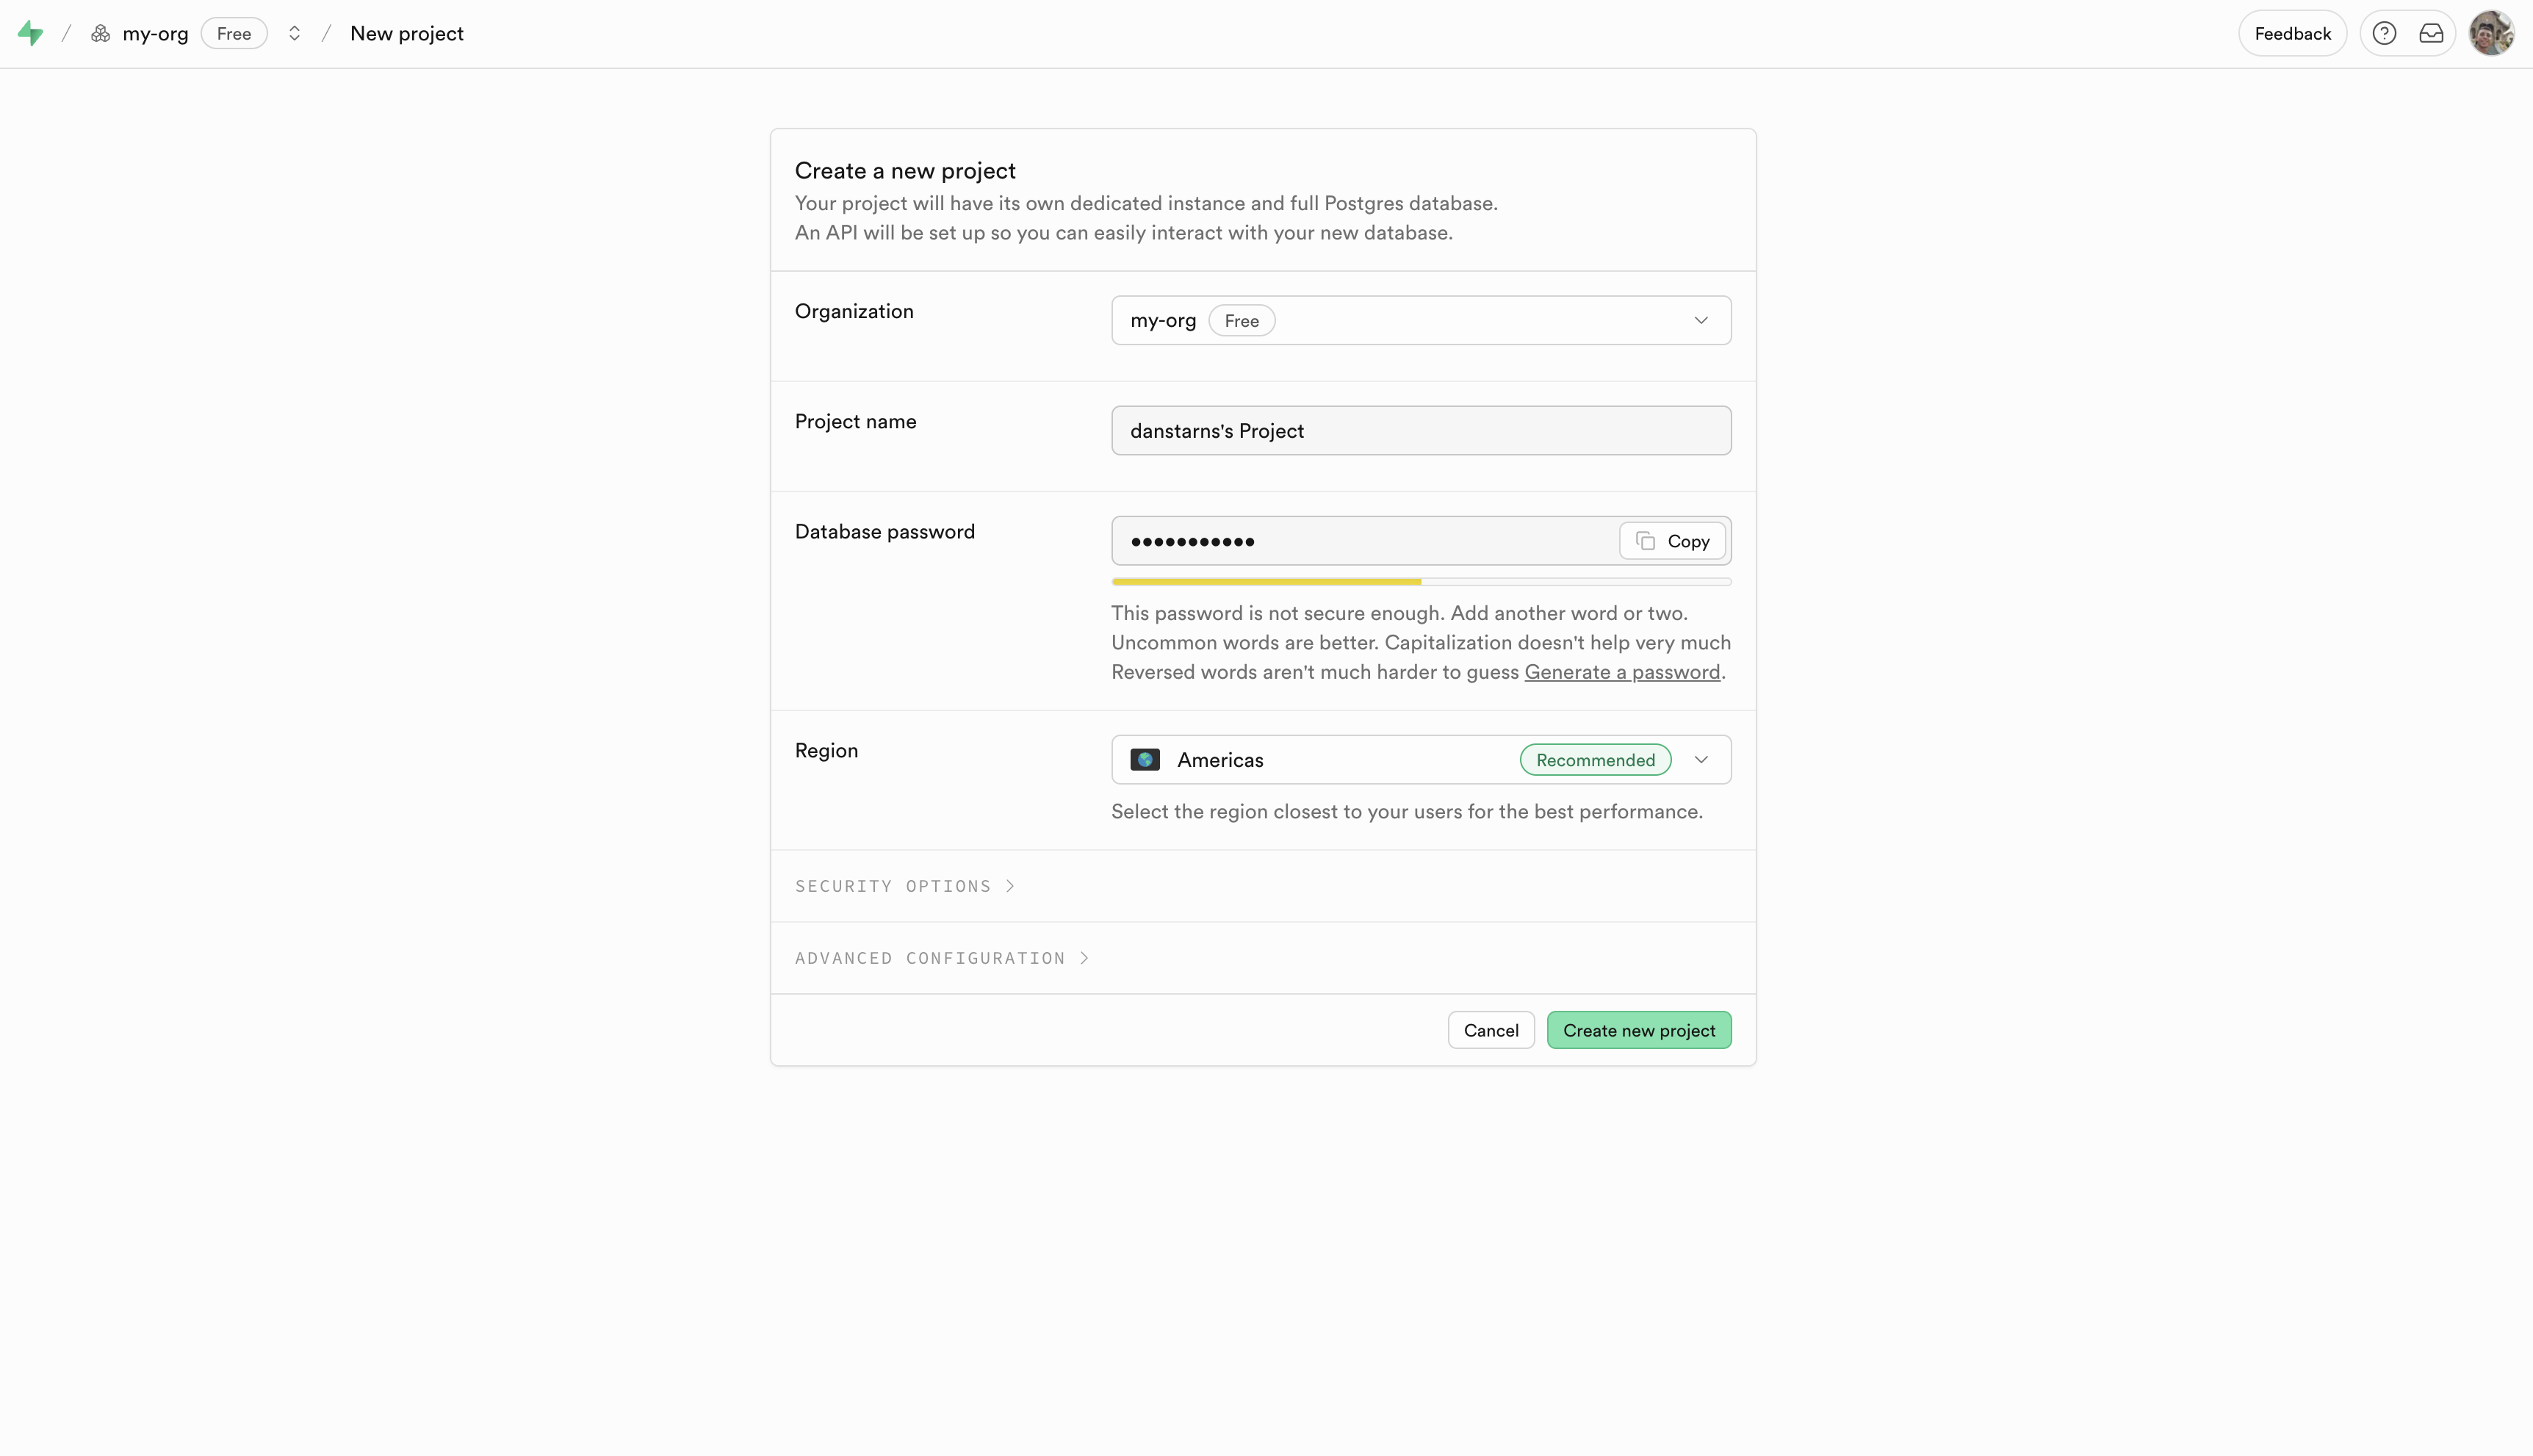
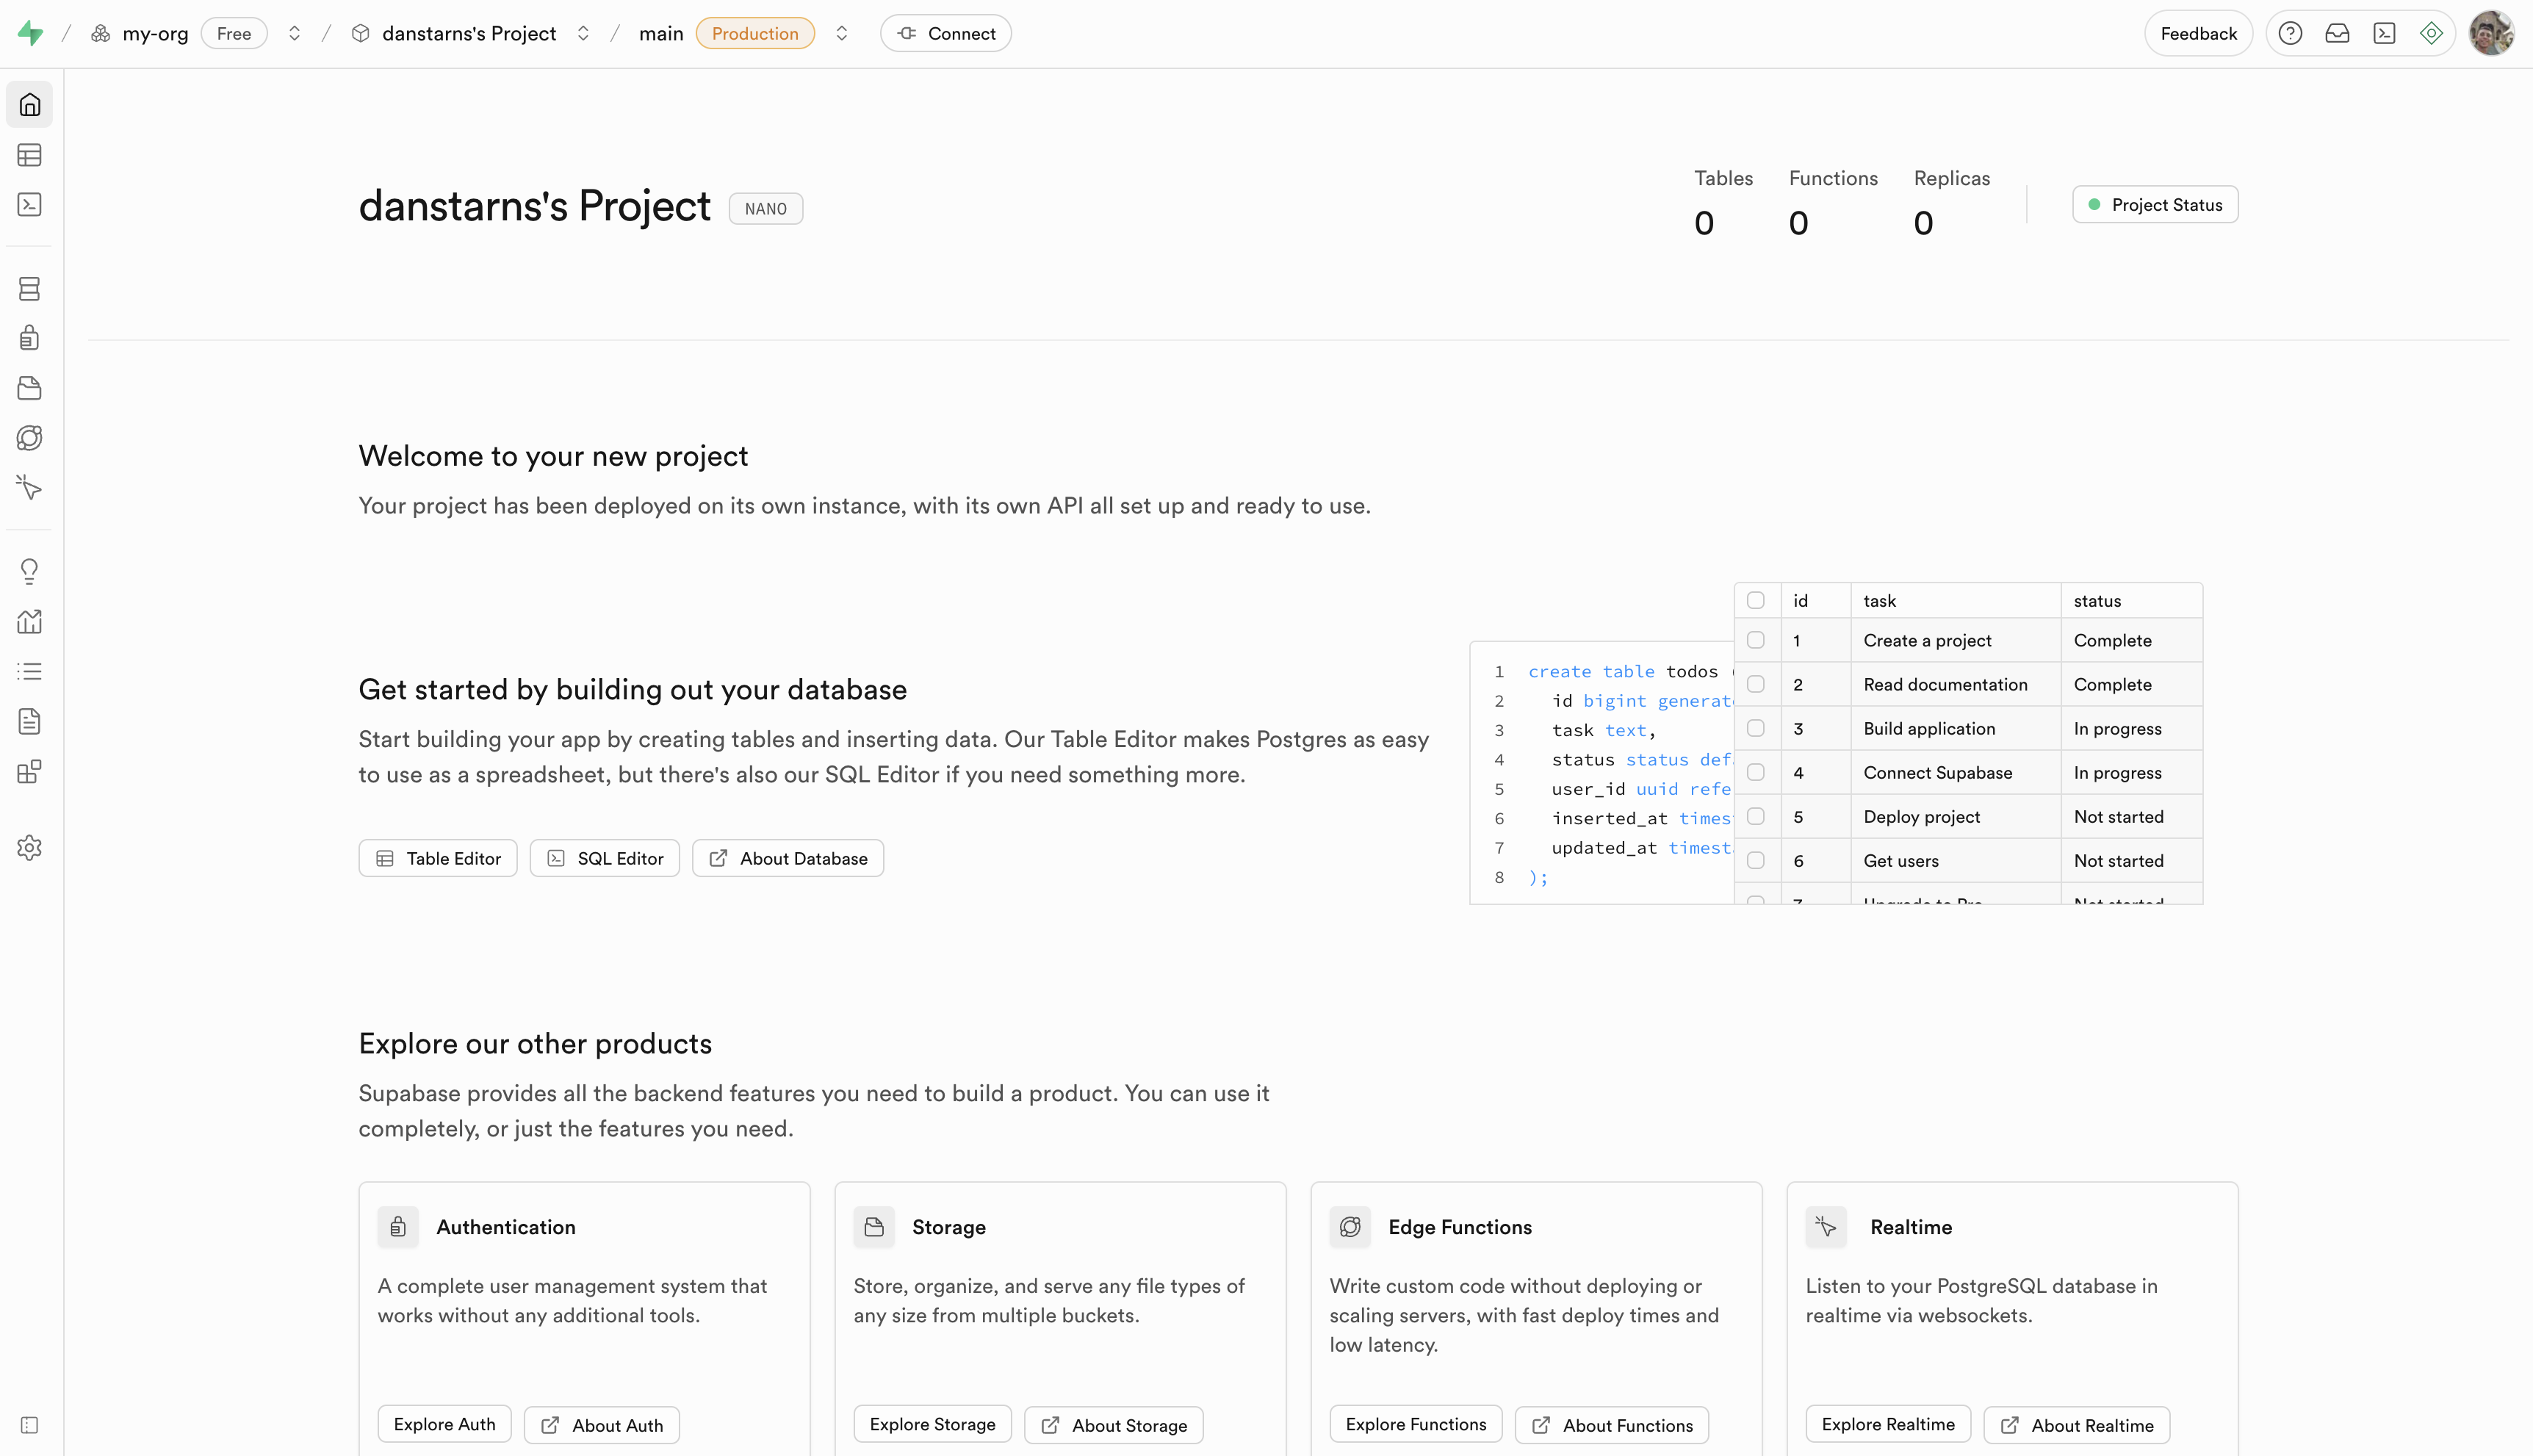
Step 3: Create Your Project
- Click "New project"
- Enter a Project name
- Generate a strong Database Password (save securely!)
- Select your Region
- Click "Create new project"
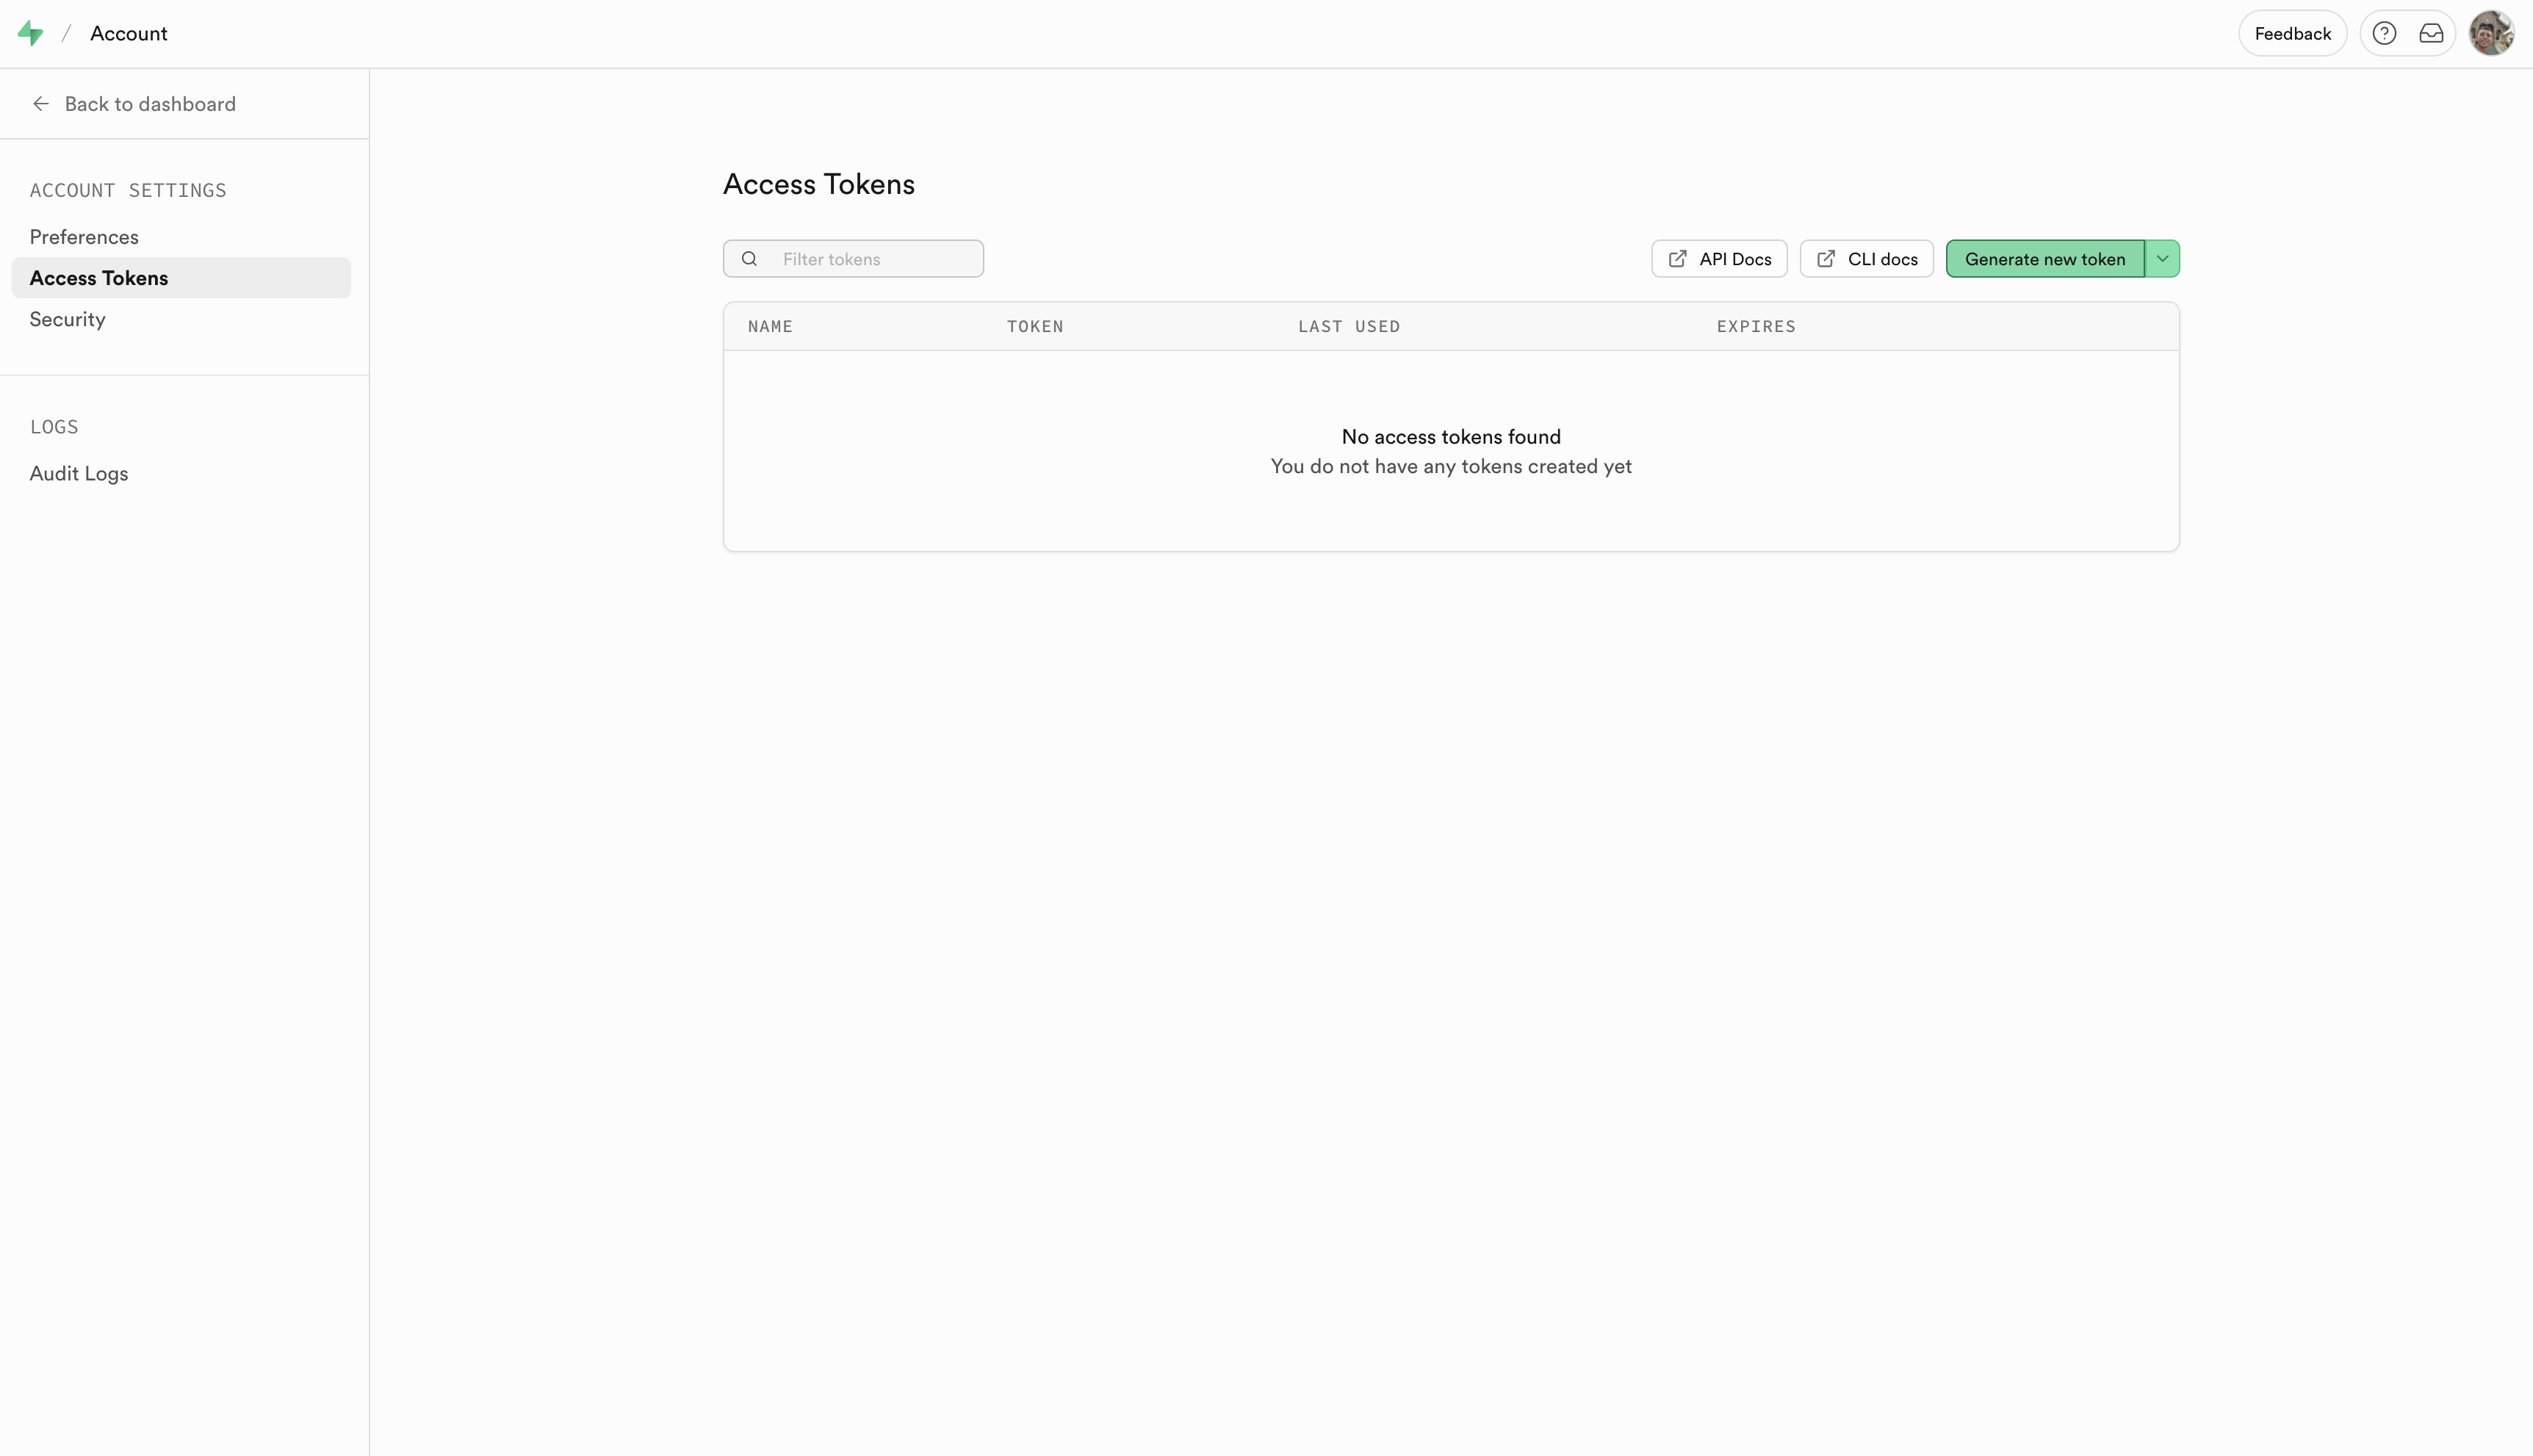
Step 4: Generate Your Access Token
- Click your profile icon (top right)
- Select "Access Tokens"
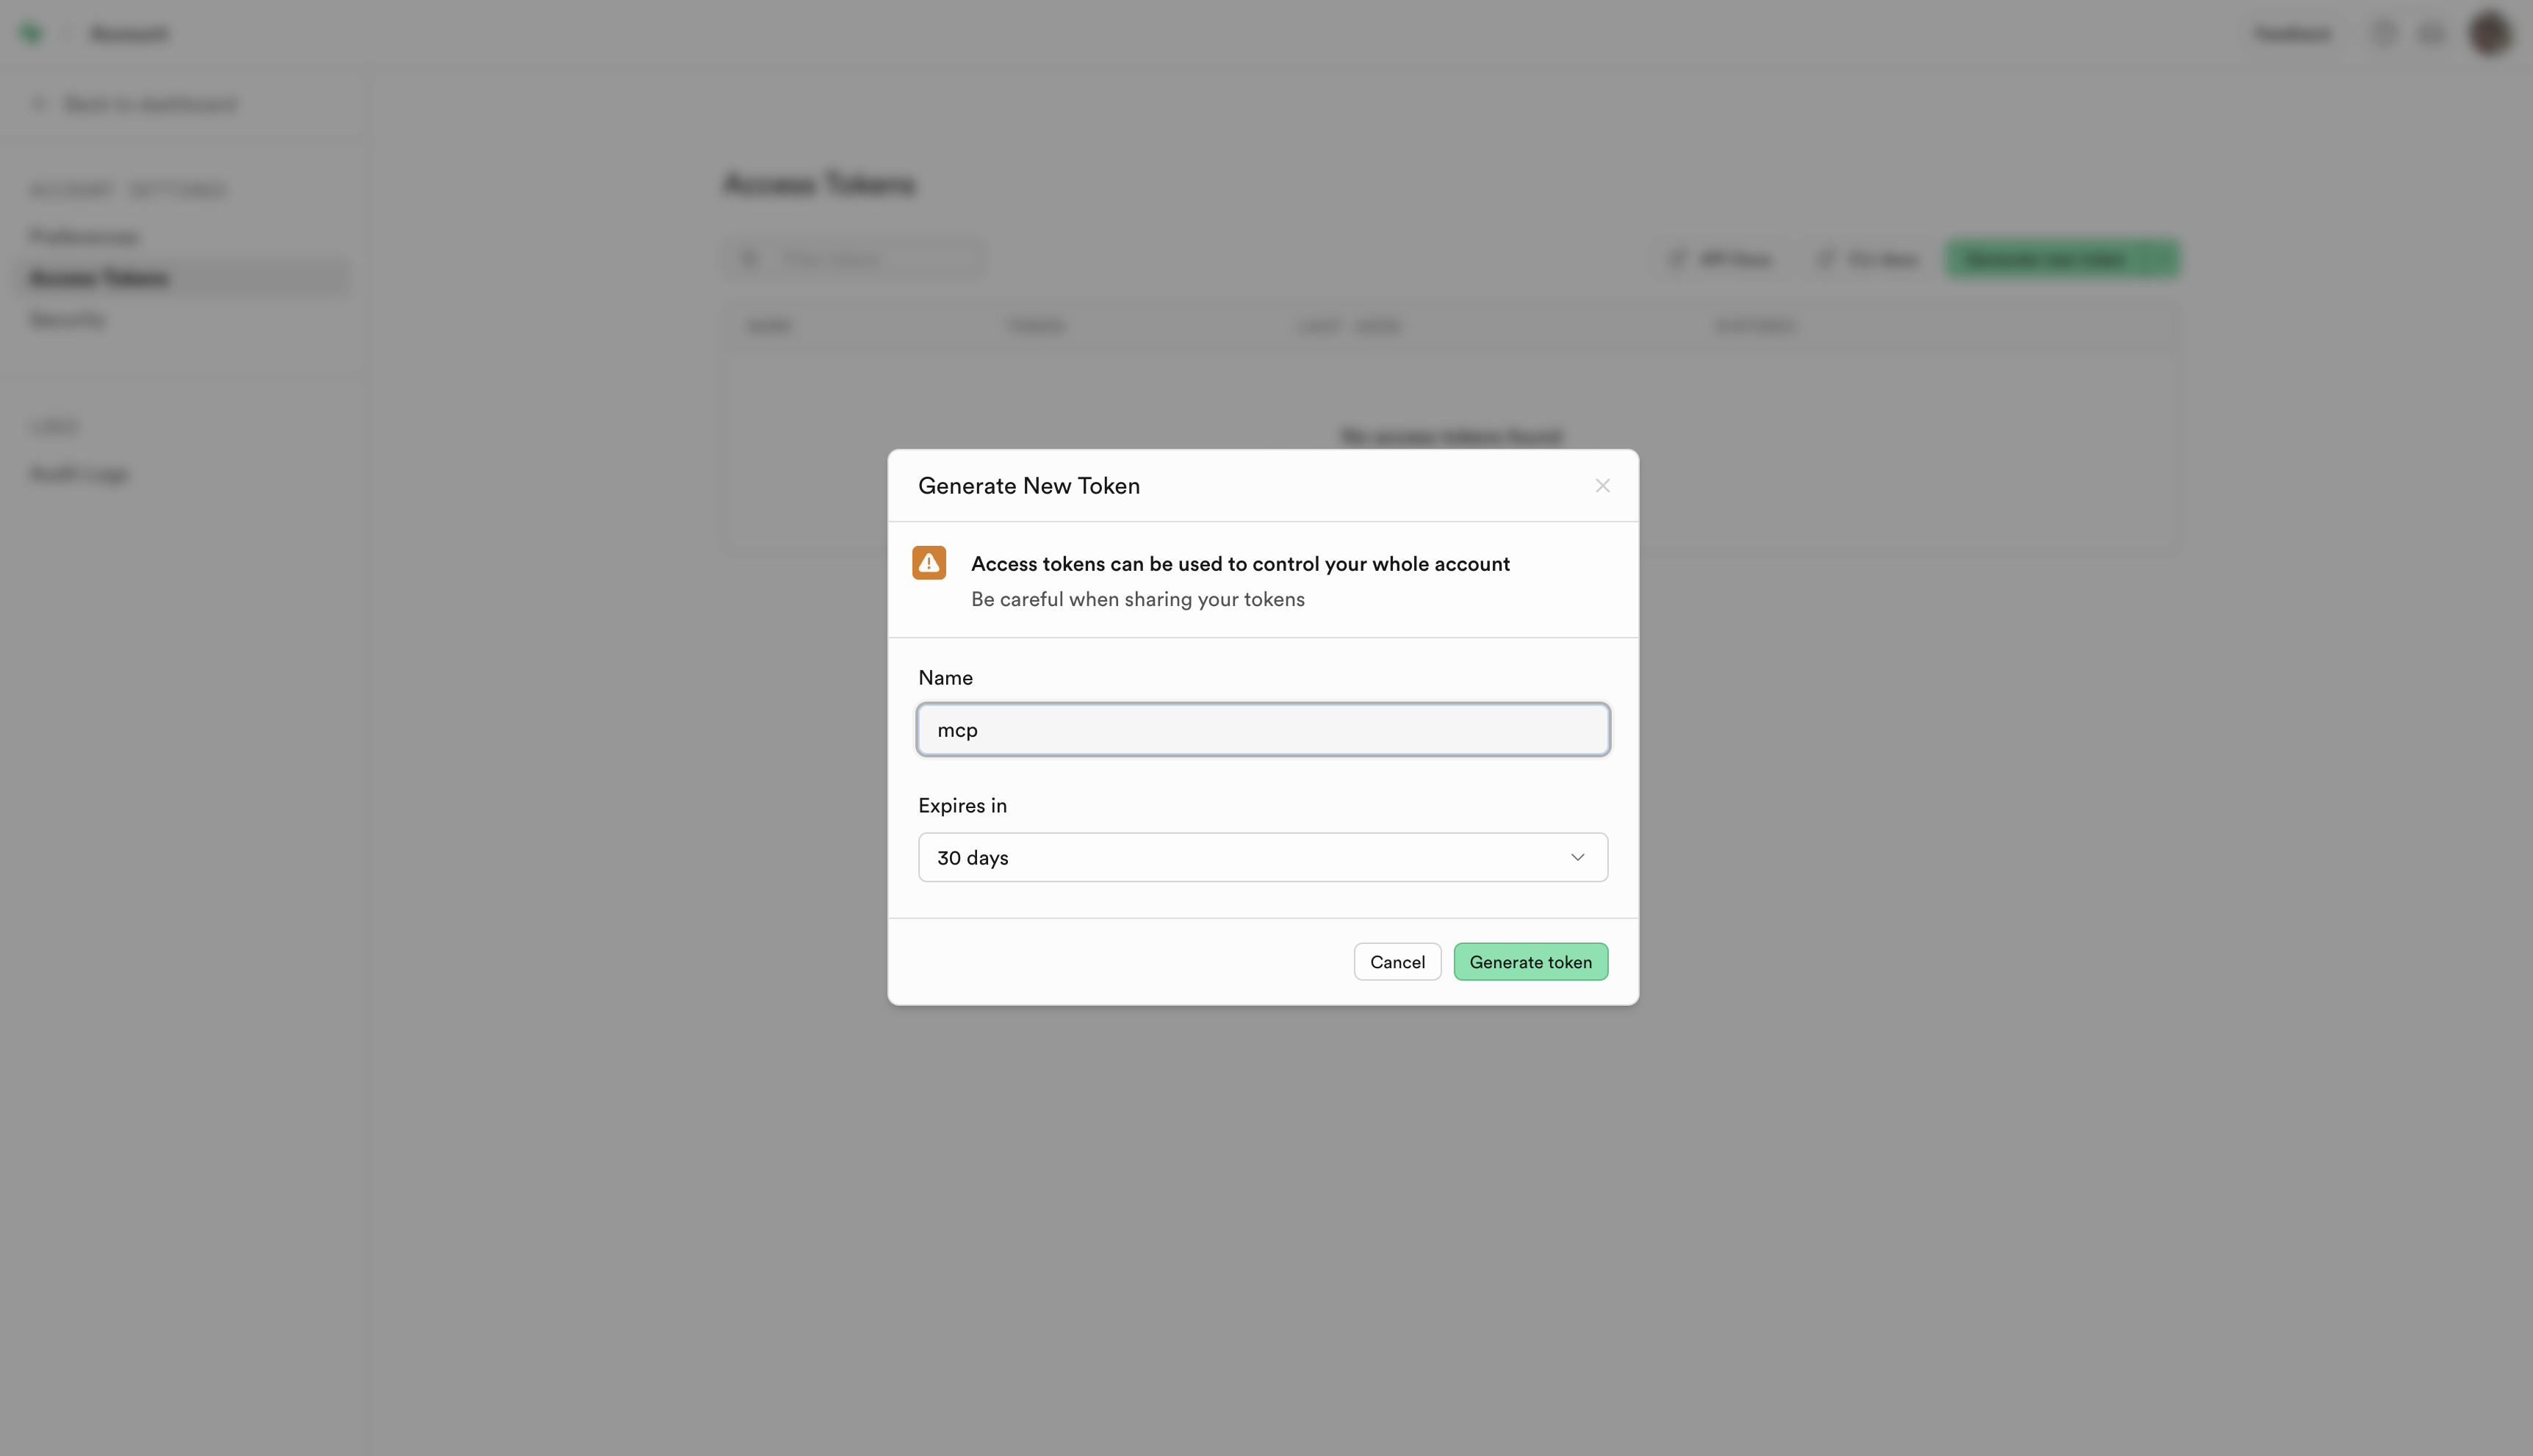
- Click "Generate new token"
- Enter a Token name (e.g., "MCP Token")
- Set expiration (or no expiration for development)
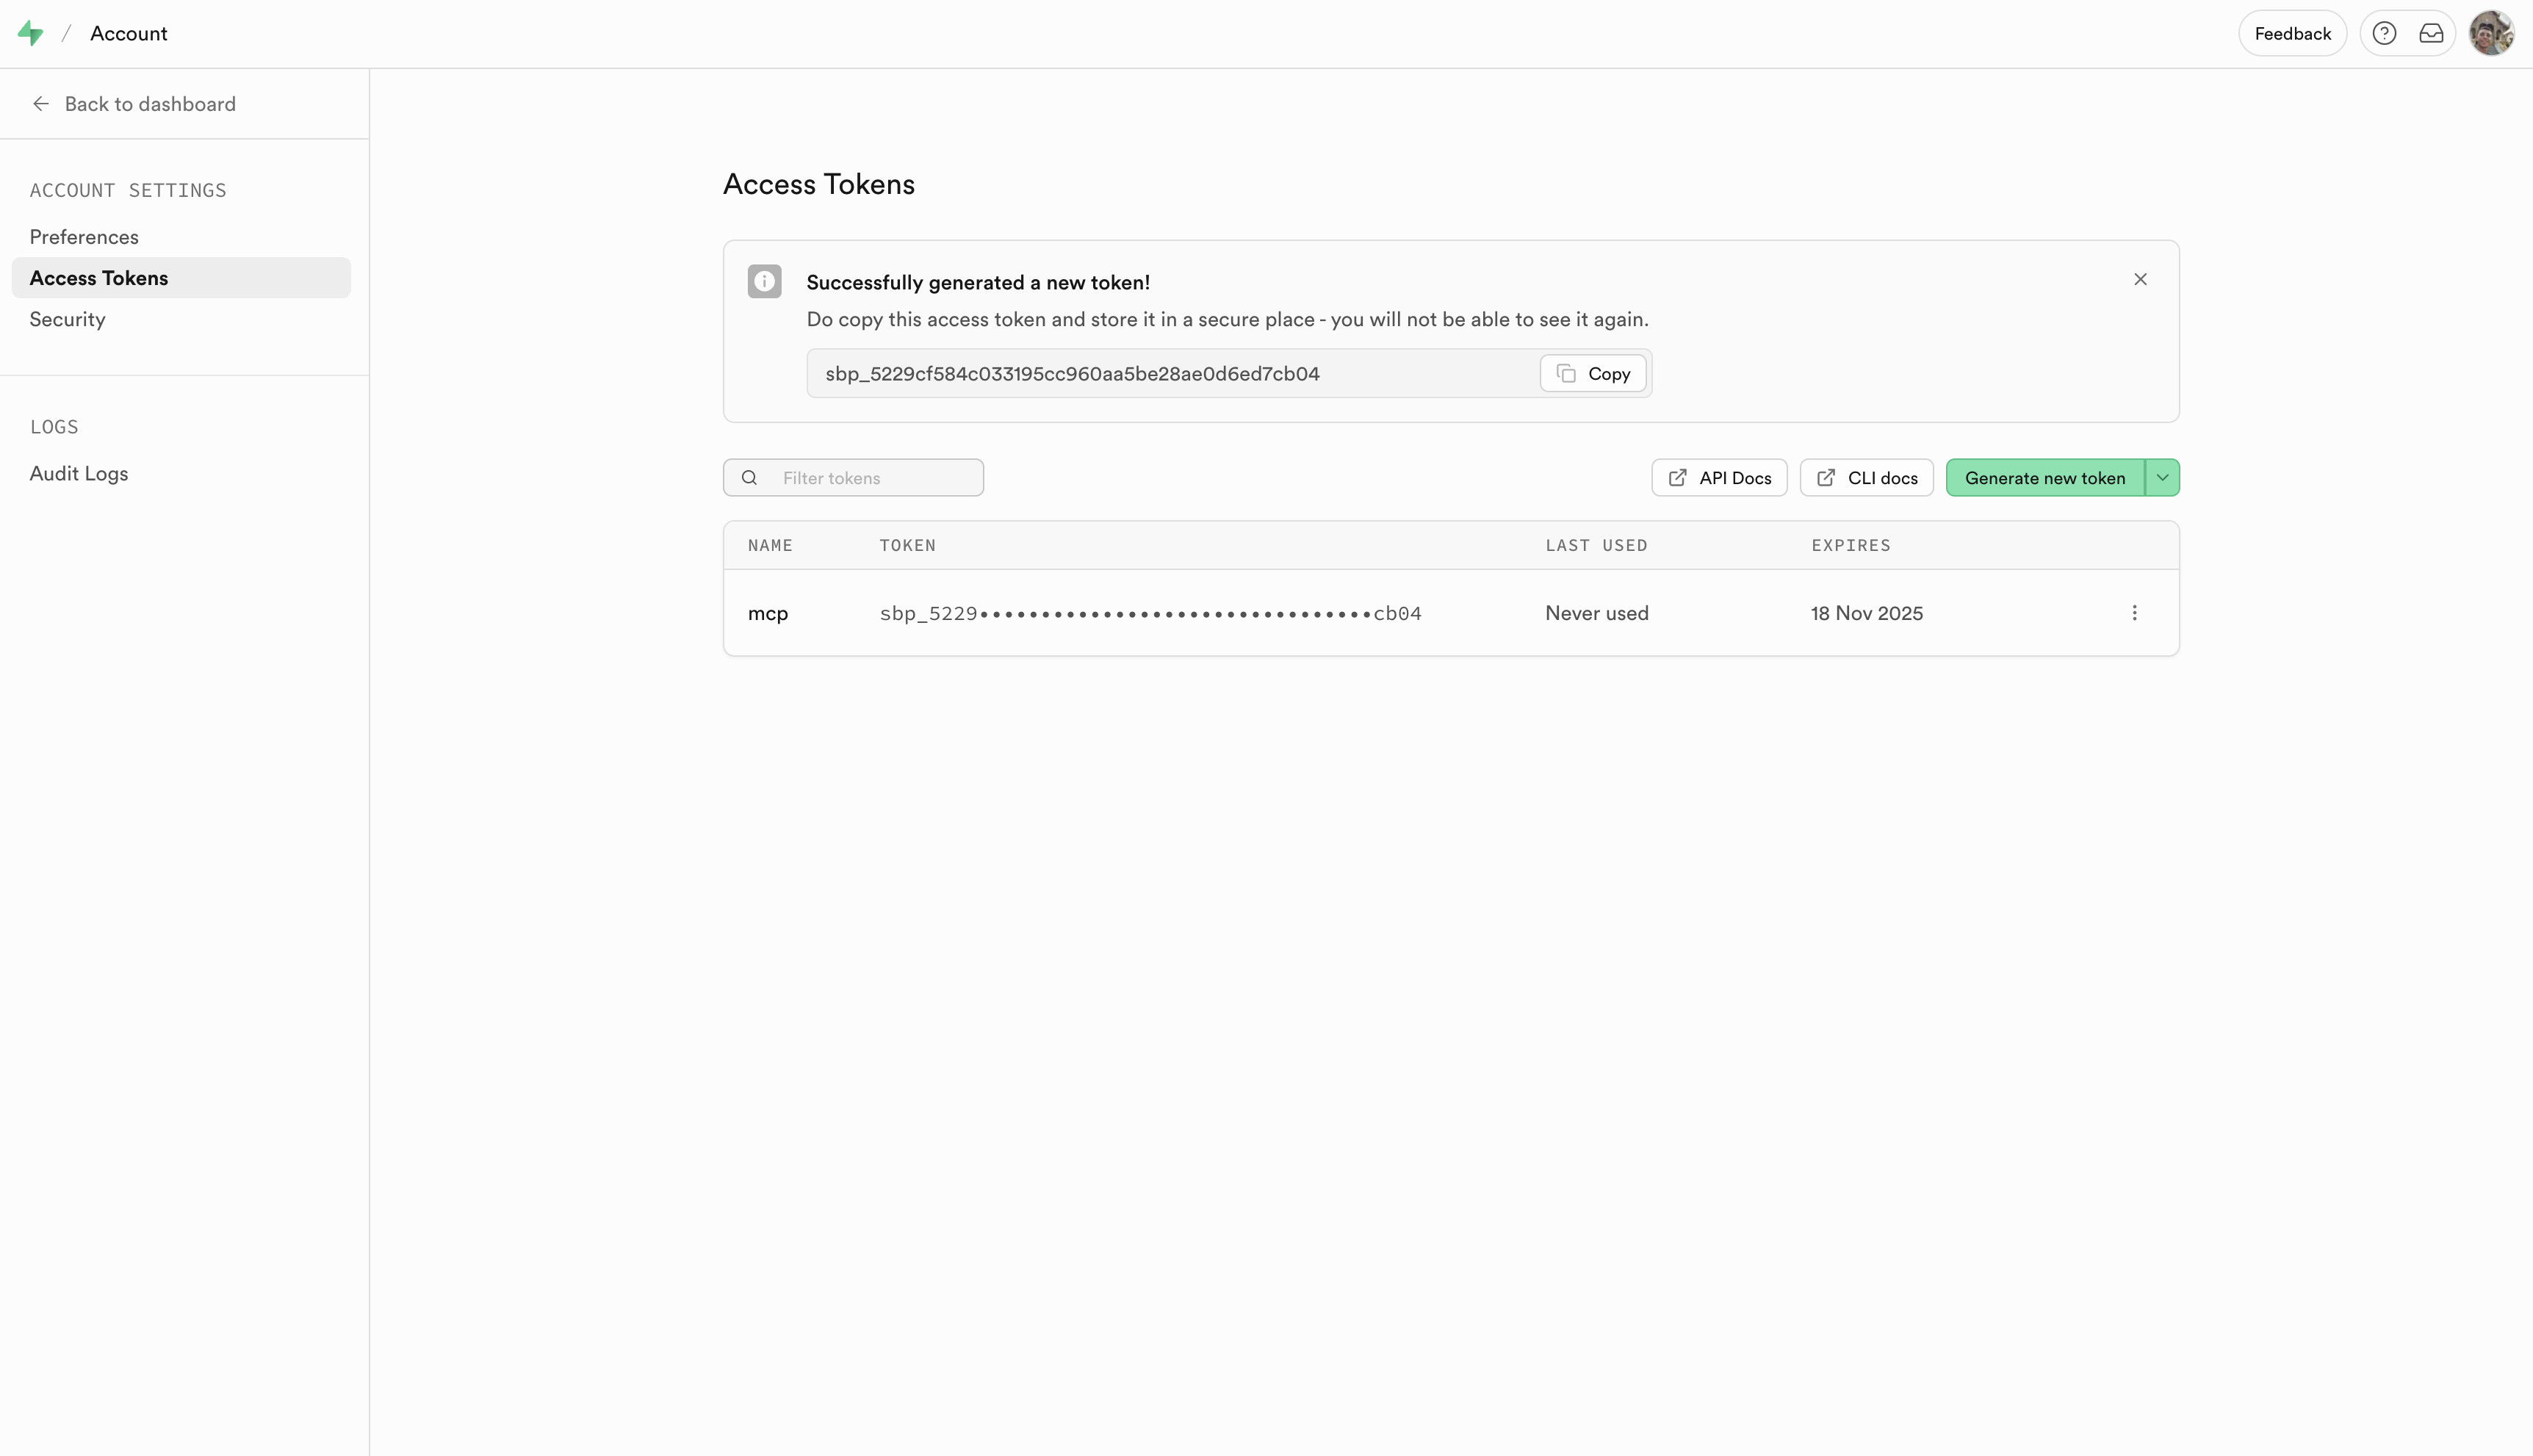
- Click "Generate token"
- Copy your token immediately you won't see it again!
Starting the Supabase MCP Server
Step 1: Export Your Access Token
export SUPABASE_ACCESS_TOKEN=sbp_your_token_here
Verify it's set:
echo $SUPABASE_ACCESS_TOKEN
Step 2: Start the MCP Gateway
For Claude Desktop:
npx -y supergateway \
  --stdio "npx -y @supabase/mcp-server-supabase@latest --access-token $SUPABASE_ACCESS_TOKEN" \
  --port 8000 \
  --baseUrl http://localhost:8000 \
  --ssePath /sse \
  --messagePath /message
For MCP Connect (with CORS):
npx -y supergateway \
  --stdio "npx -y @supabase/mcp-server-supabase@latest --access-token $SUPABASE_ACCESS_TOKEN" \
  --port 8000 \
  --baseUrl http://localhost:8000 \
  --ssePath /sse \
  --messagePath /message \
  --cors
Important: The --cors flag is required for MCP Connect (browser-based) but should be omitted for Claude Desktop.
Keep this terminal running!
Expected output:
[supergateway] Starting...
[supergateway]   - outputTransport: sse
[supergateway]   - port: 8000
[supergateway]   - CORS: enabled ("*")
[supergateway] Listening on port 8000
[supergateway] SSE endpoint: http://localhost:8000/sse
[supergateway] Child stderr: Supabase MCP Server running on stdio
Connecting to Claude Desktop
Step 1: Configure Claude Desktop
Find your configuration file:
- macOS:
~/Library/Application Support/Claude/claude_desktop_config.json - Windows:
%APPDATA%/Claude/claude_desktop_config.json
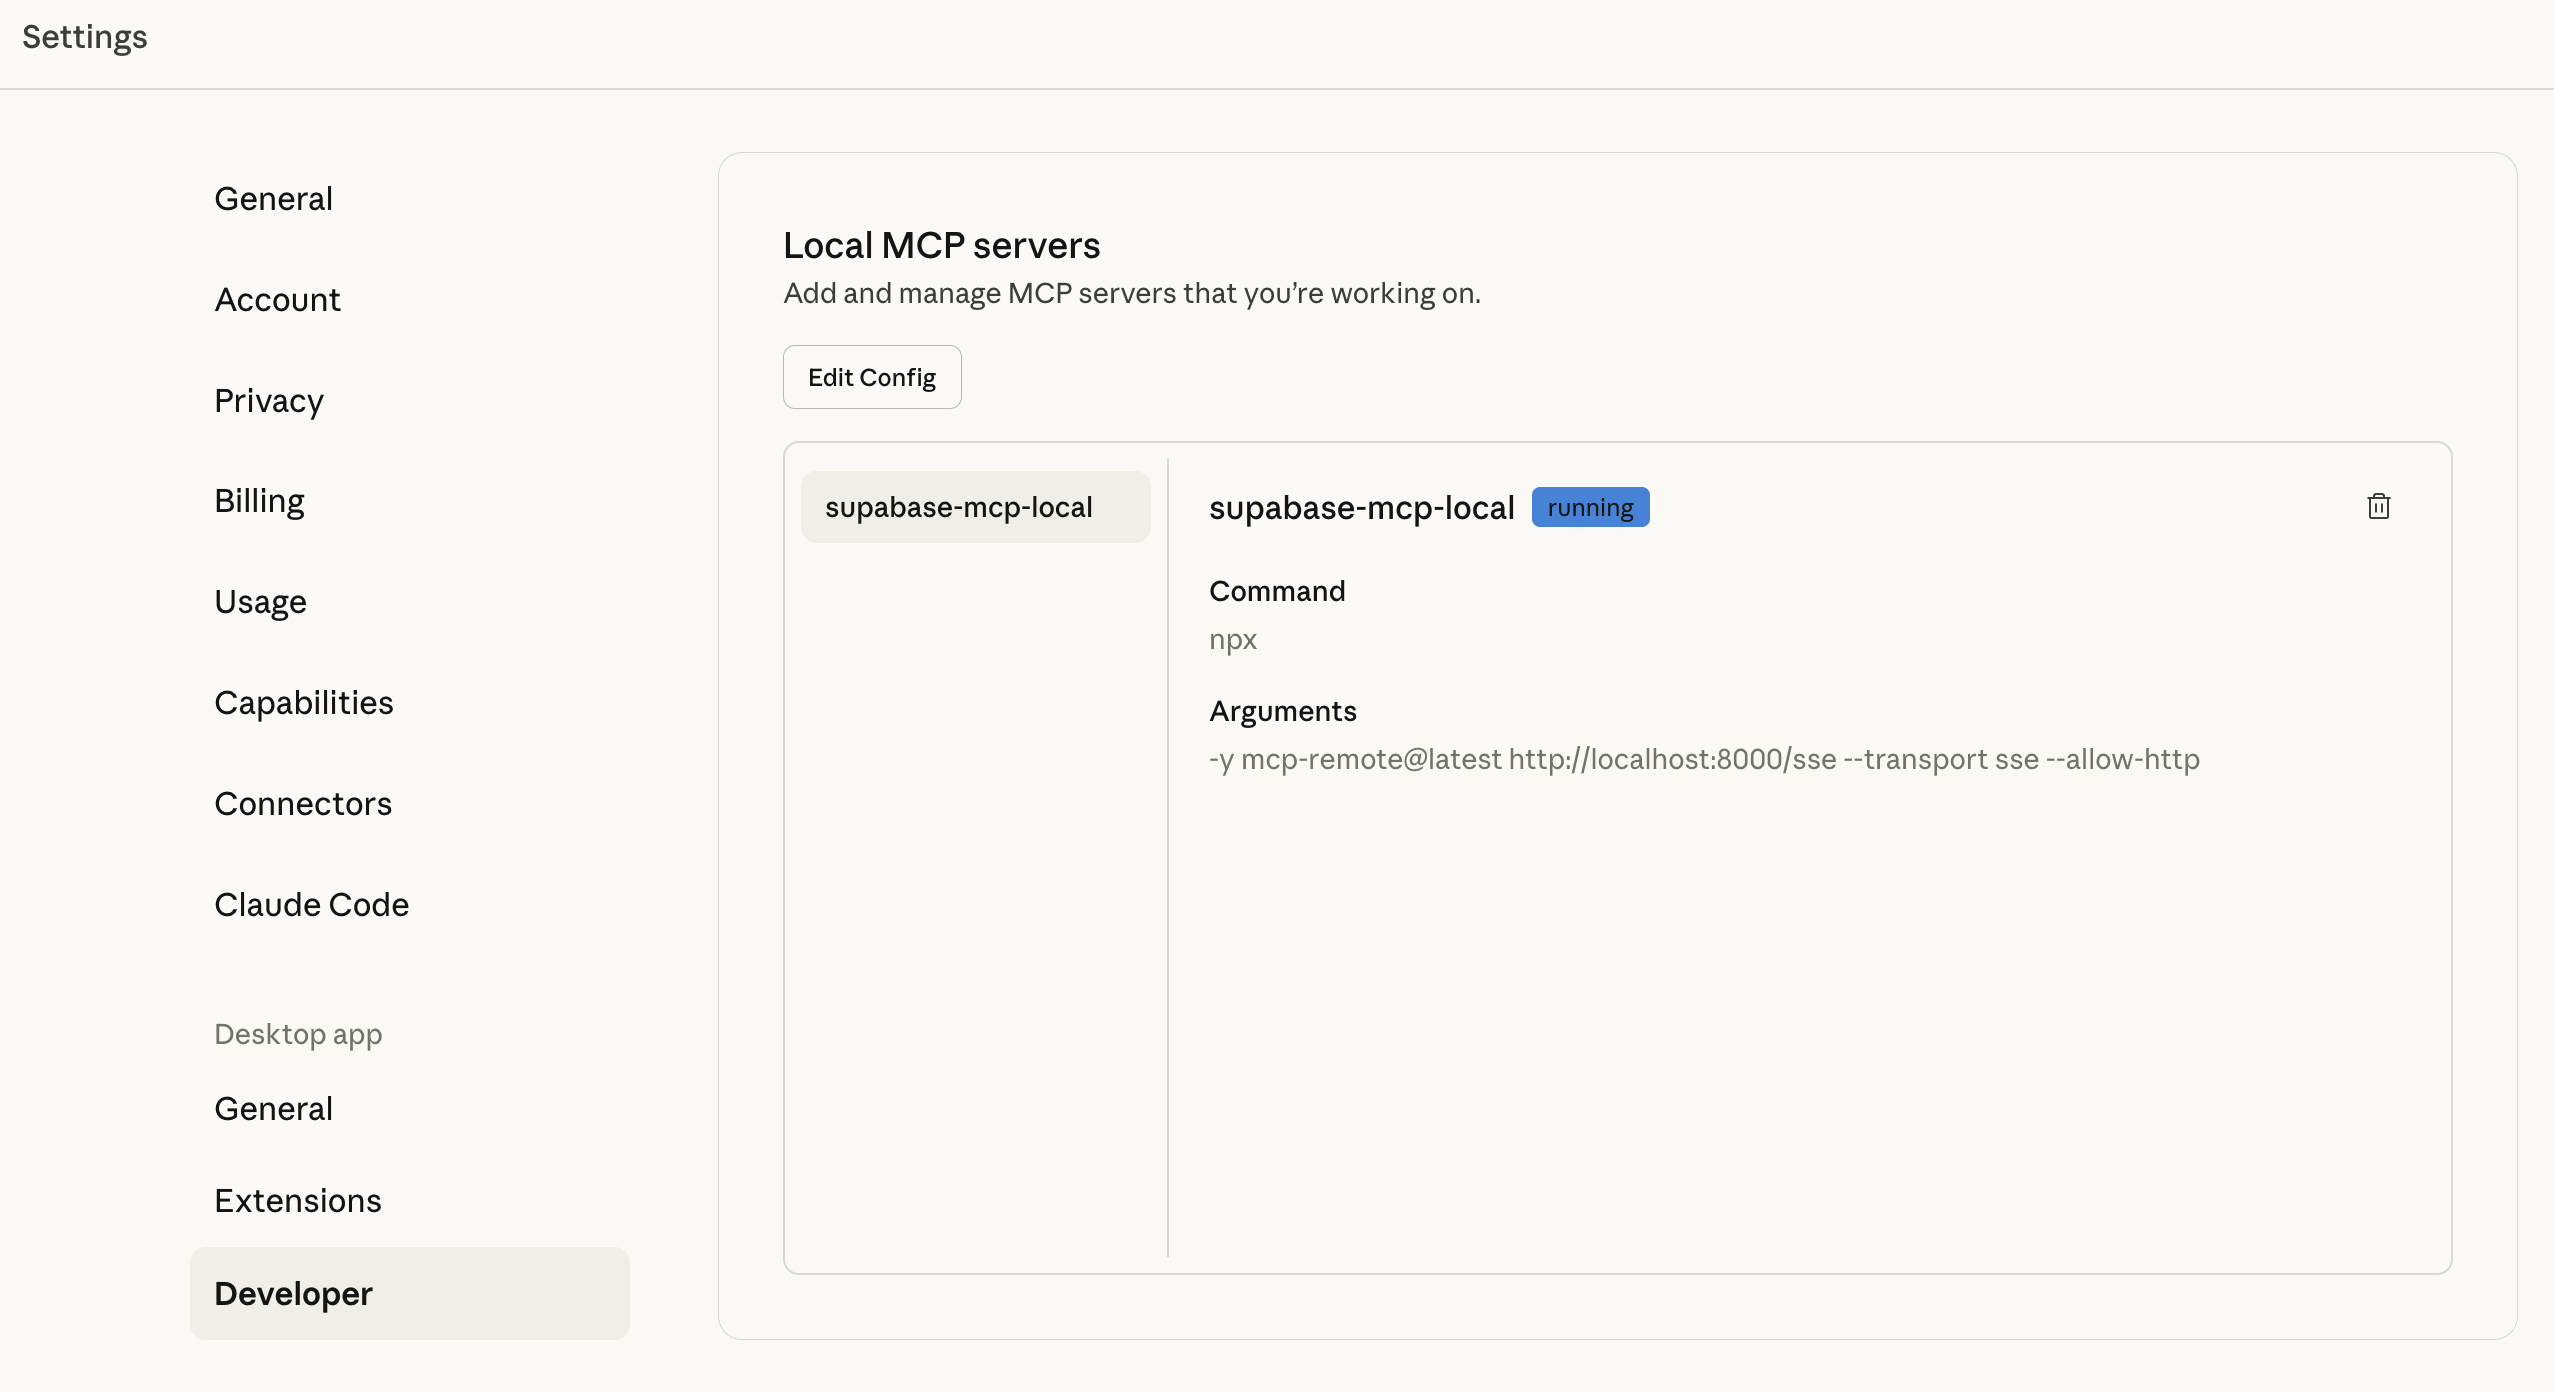
Add this configuration:
{
  "mcpServers": {
    "supabase-mcp-local": {
      "command": "npx",
      "args": [
        "-y",
        "mcp-remote@latest",
        "http://localhost:8000/sse",
        "--transport",
        "sse",
        "--allow-http"
      ]
    }
  }
}
Step 2: Restart and Test
- Quit Claude Desktop completely
- Relaunch the application
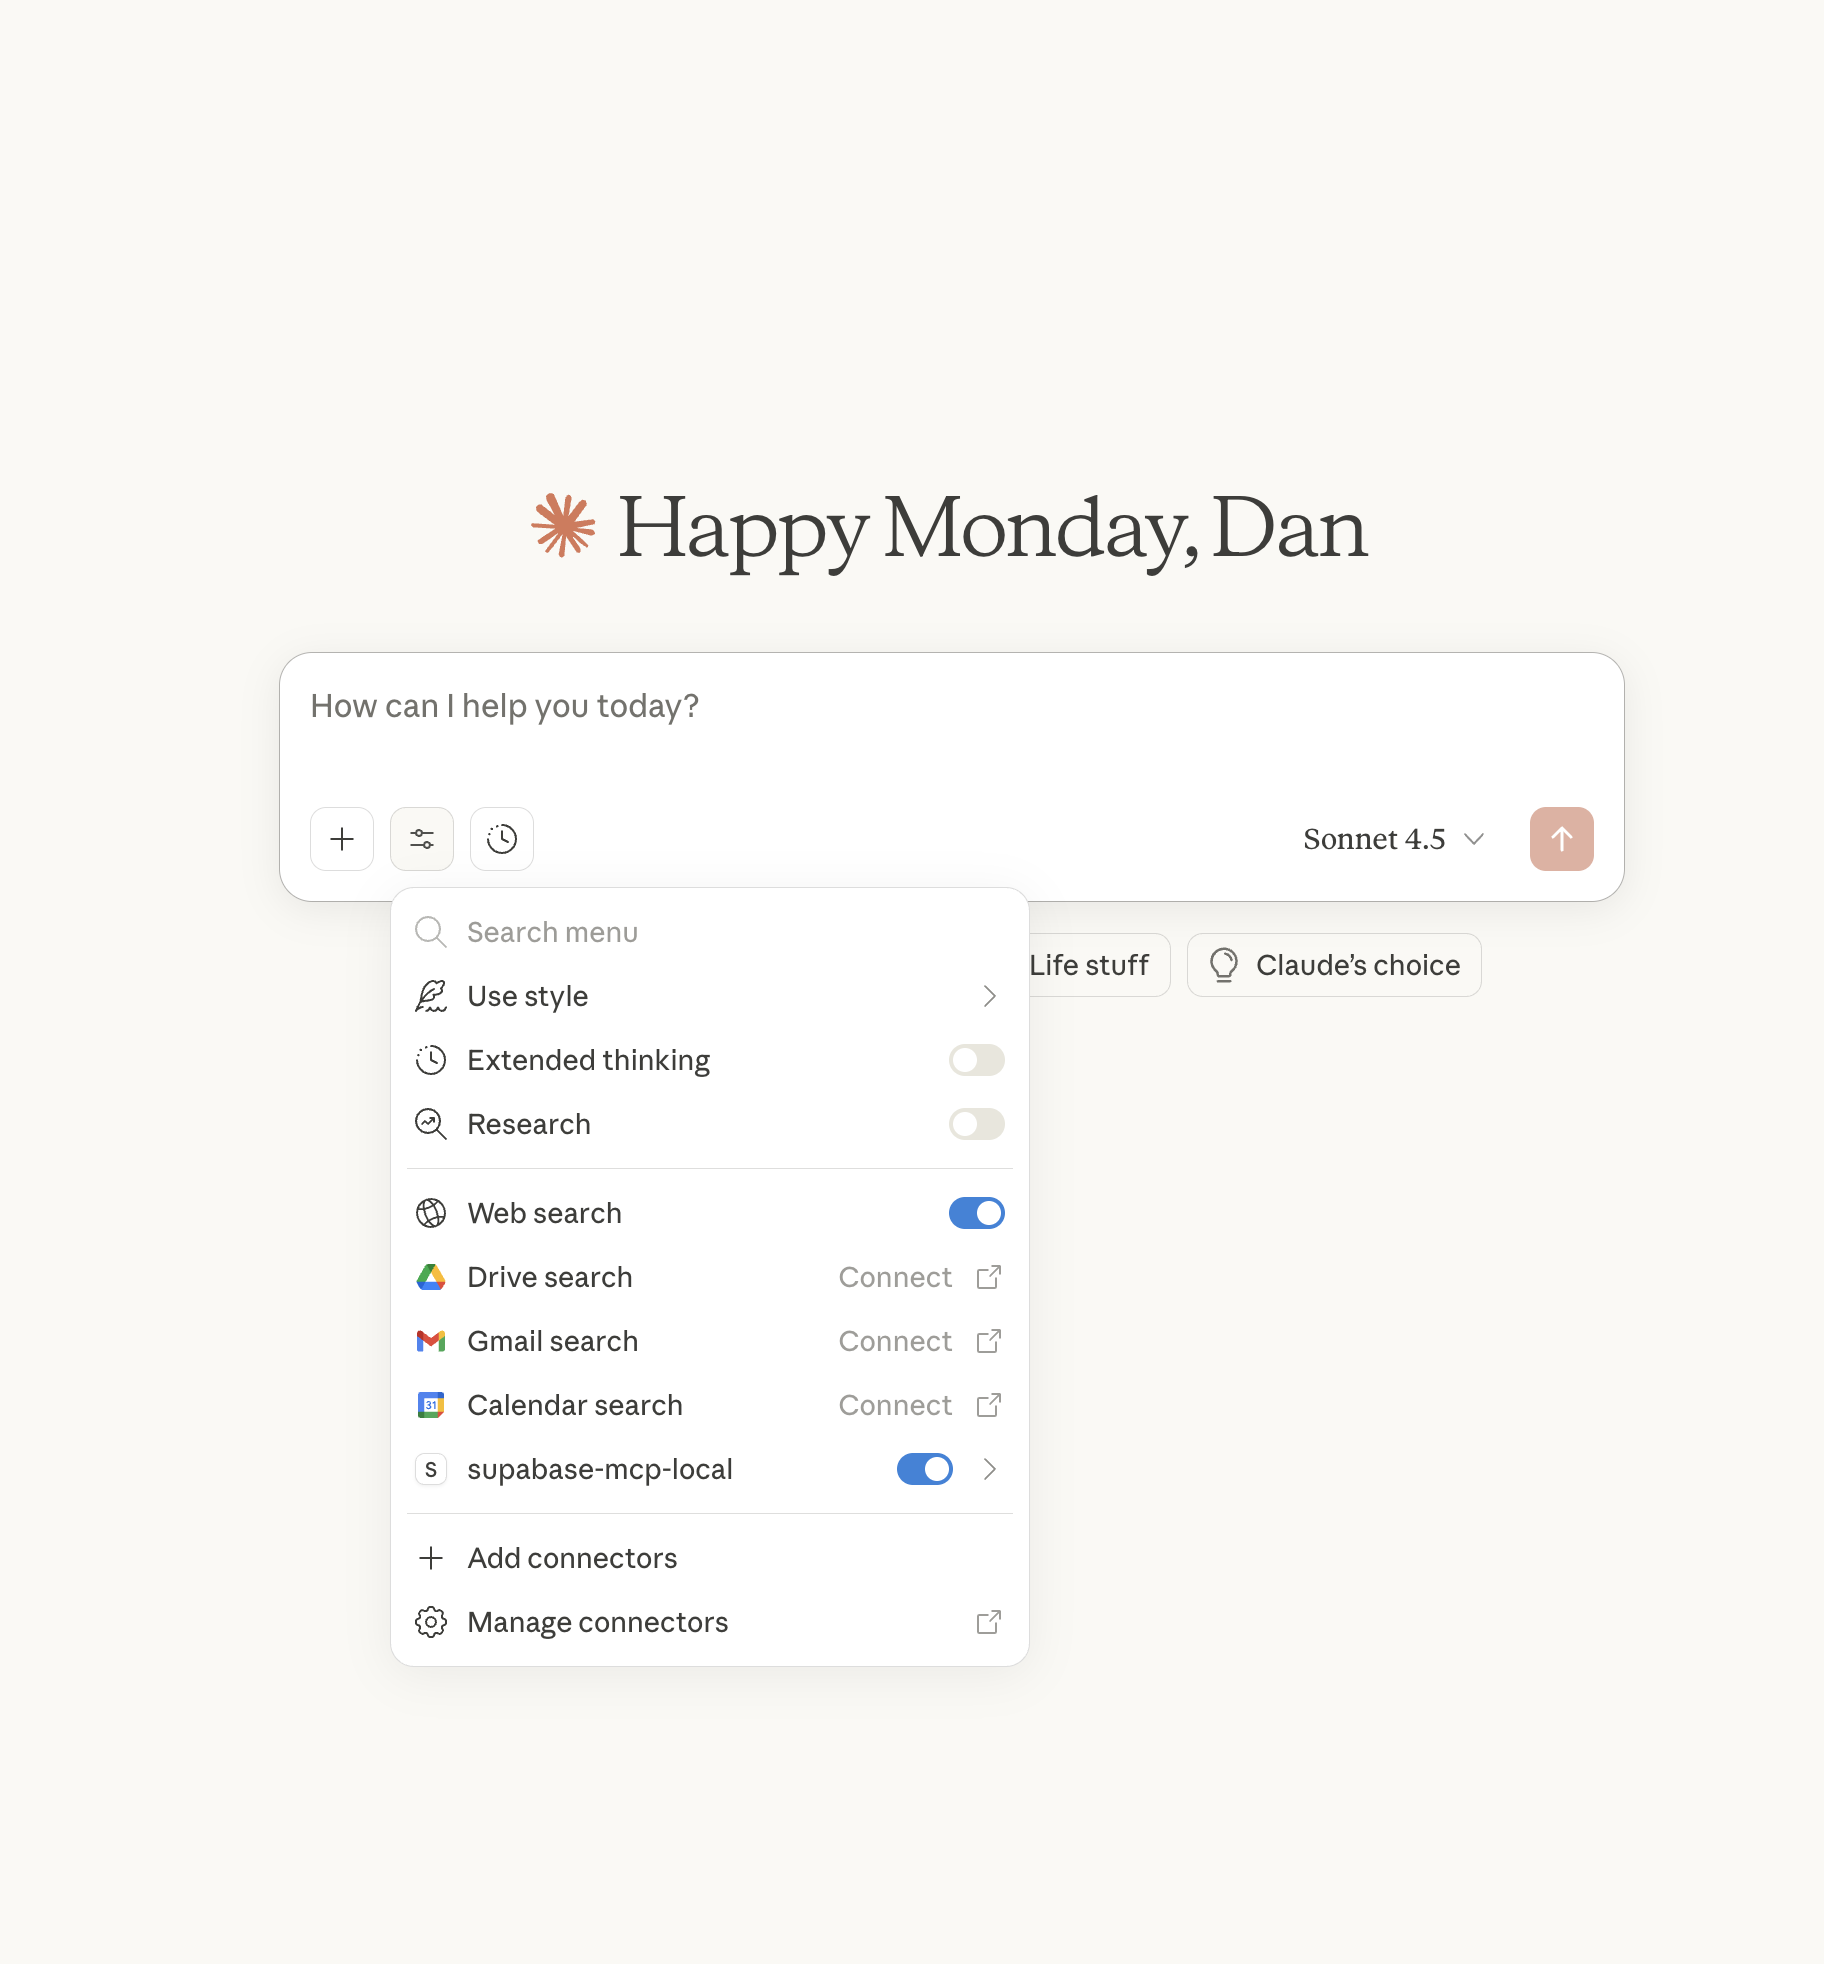
- Look for the tools indicator
Step 3: Build a Movies Database
Let's create a sample schema, populate it, and query it all through natural language!
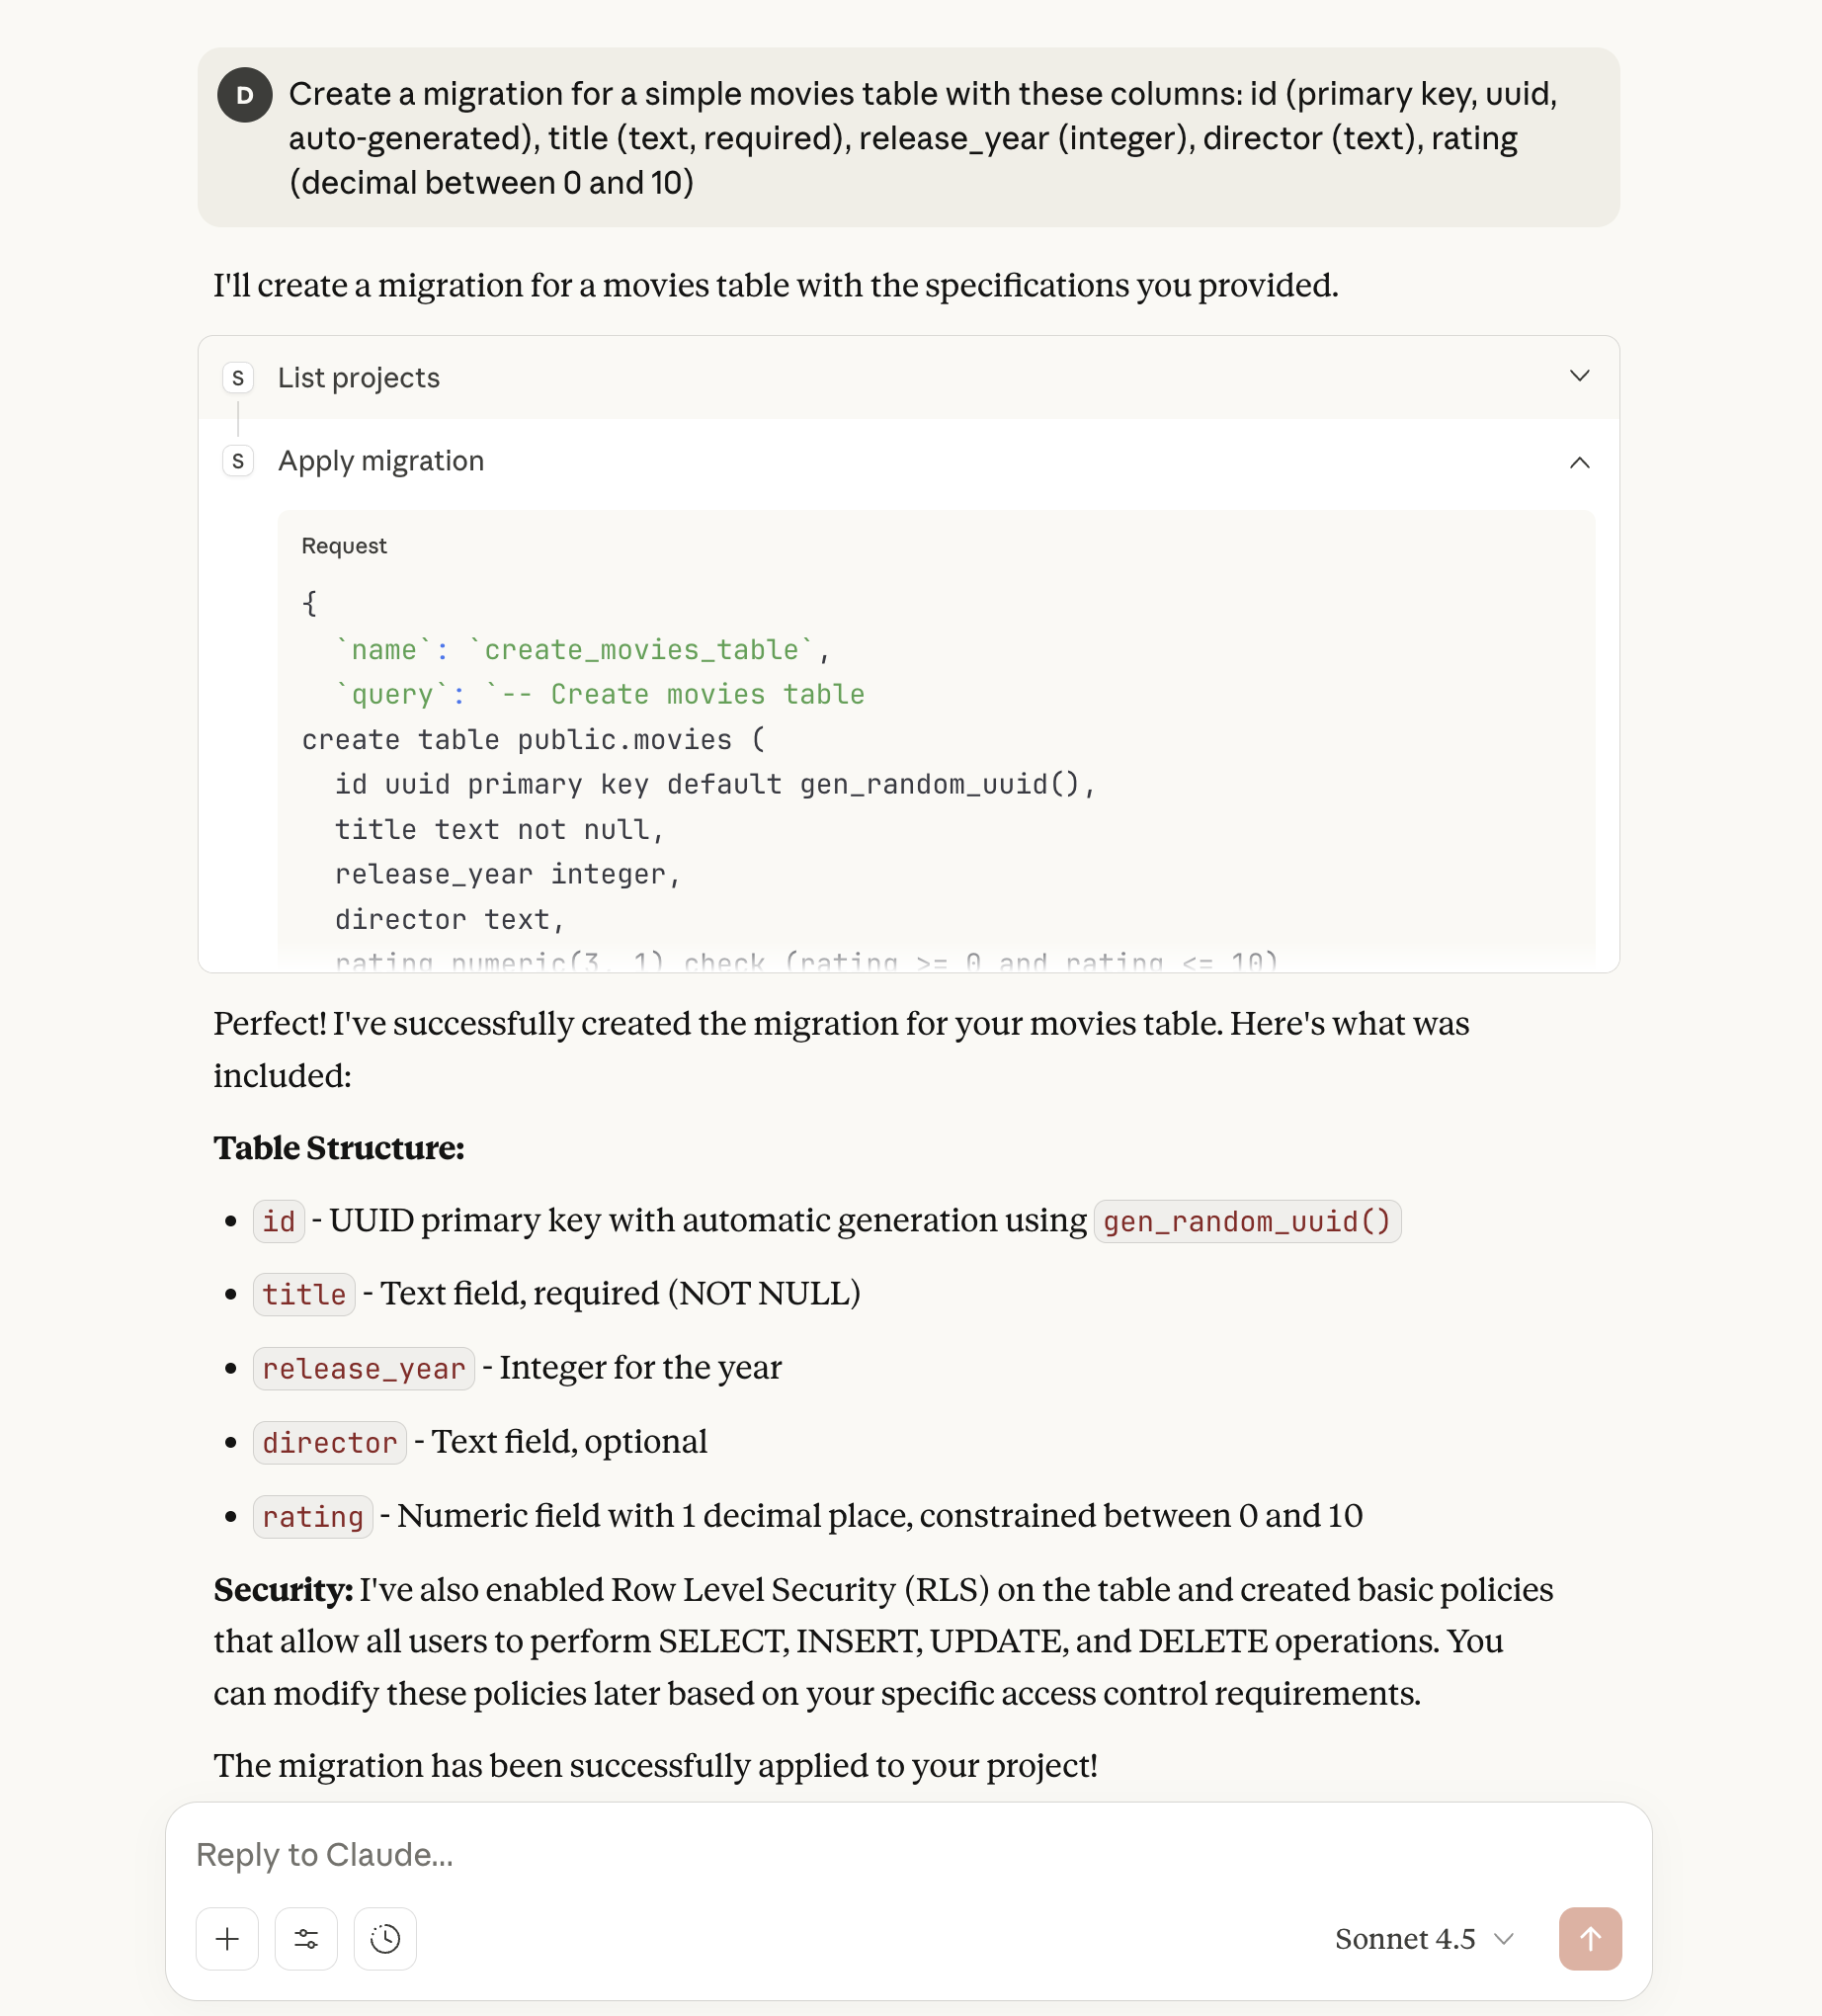
Prompt 1: Create the Schema (Migration Only)
Create a migration for a simple movies table with these columns:
id (primary key, uuid, auto-generated),
title (text, required),
release_year (integer),
director (text),
rating (decimal between 0 and 10)
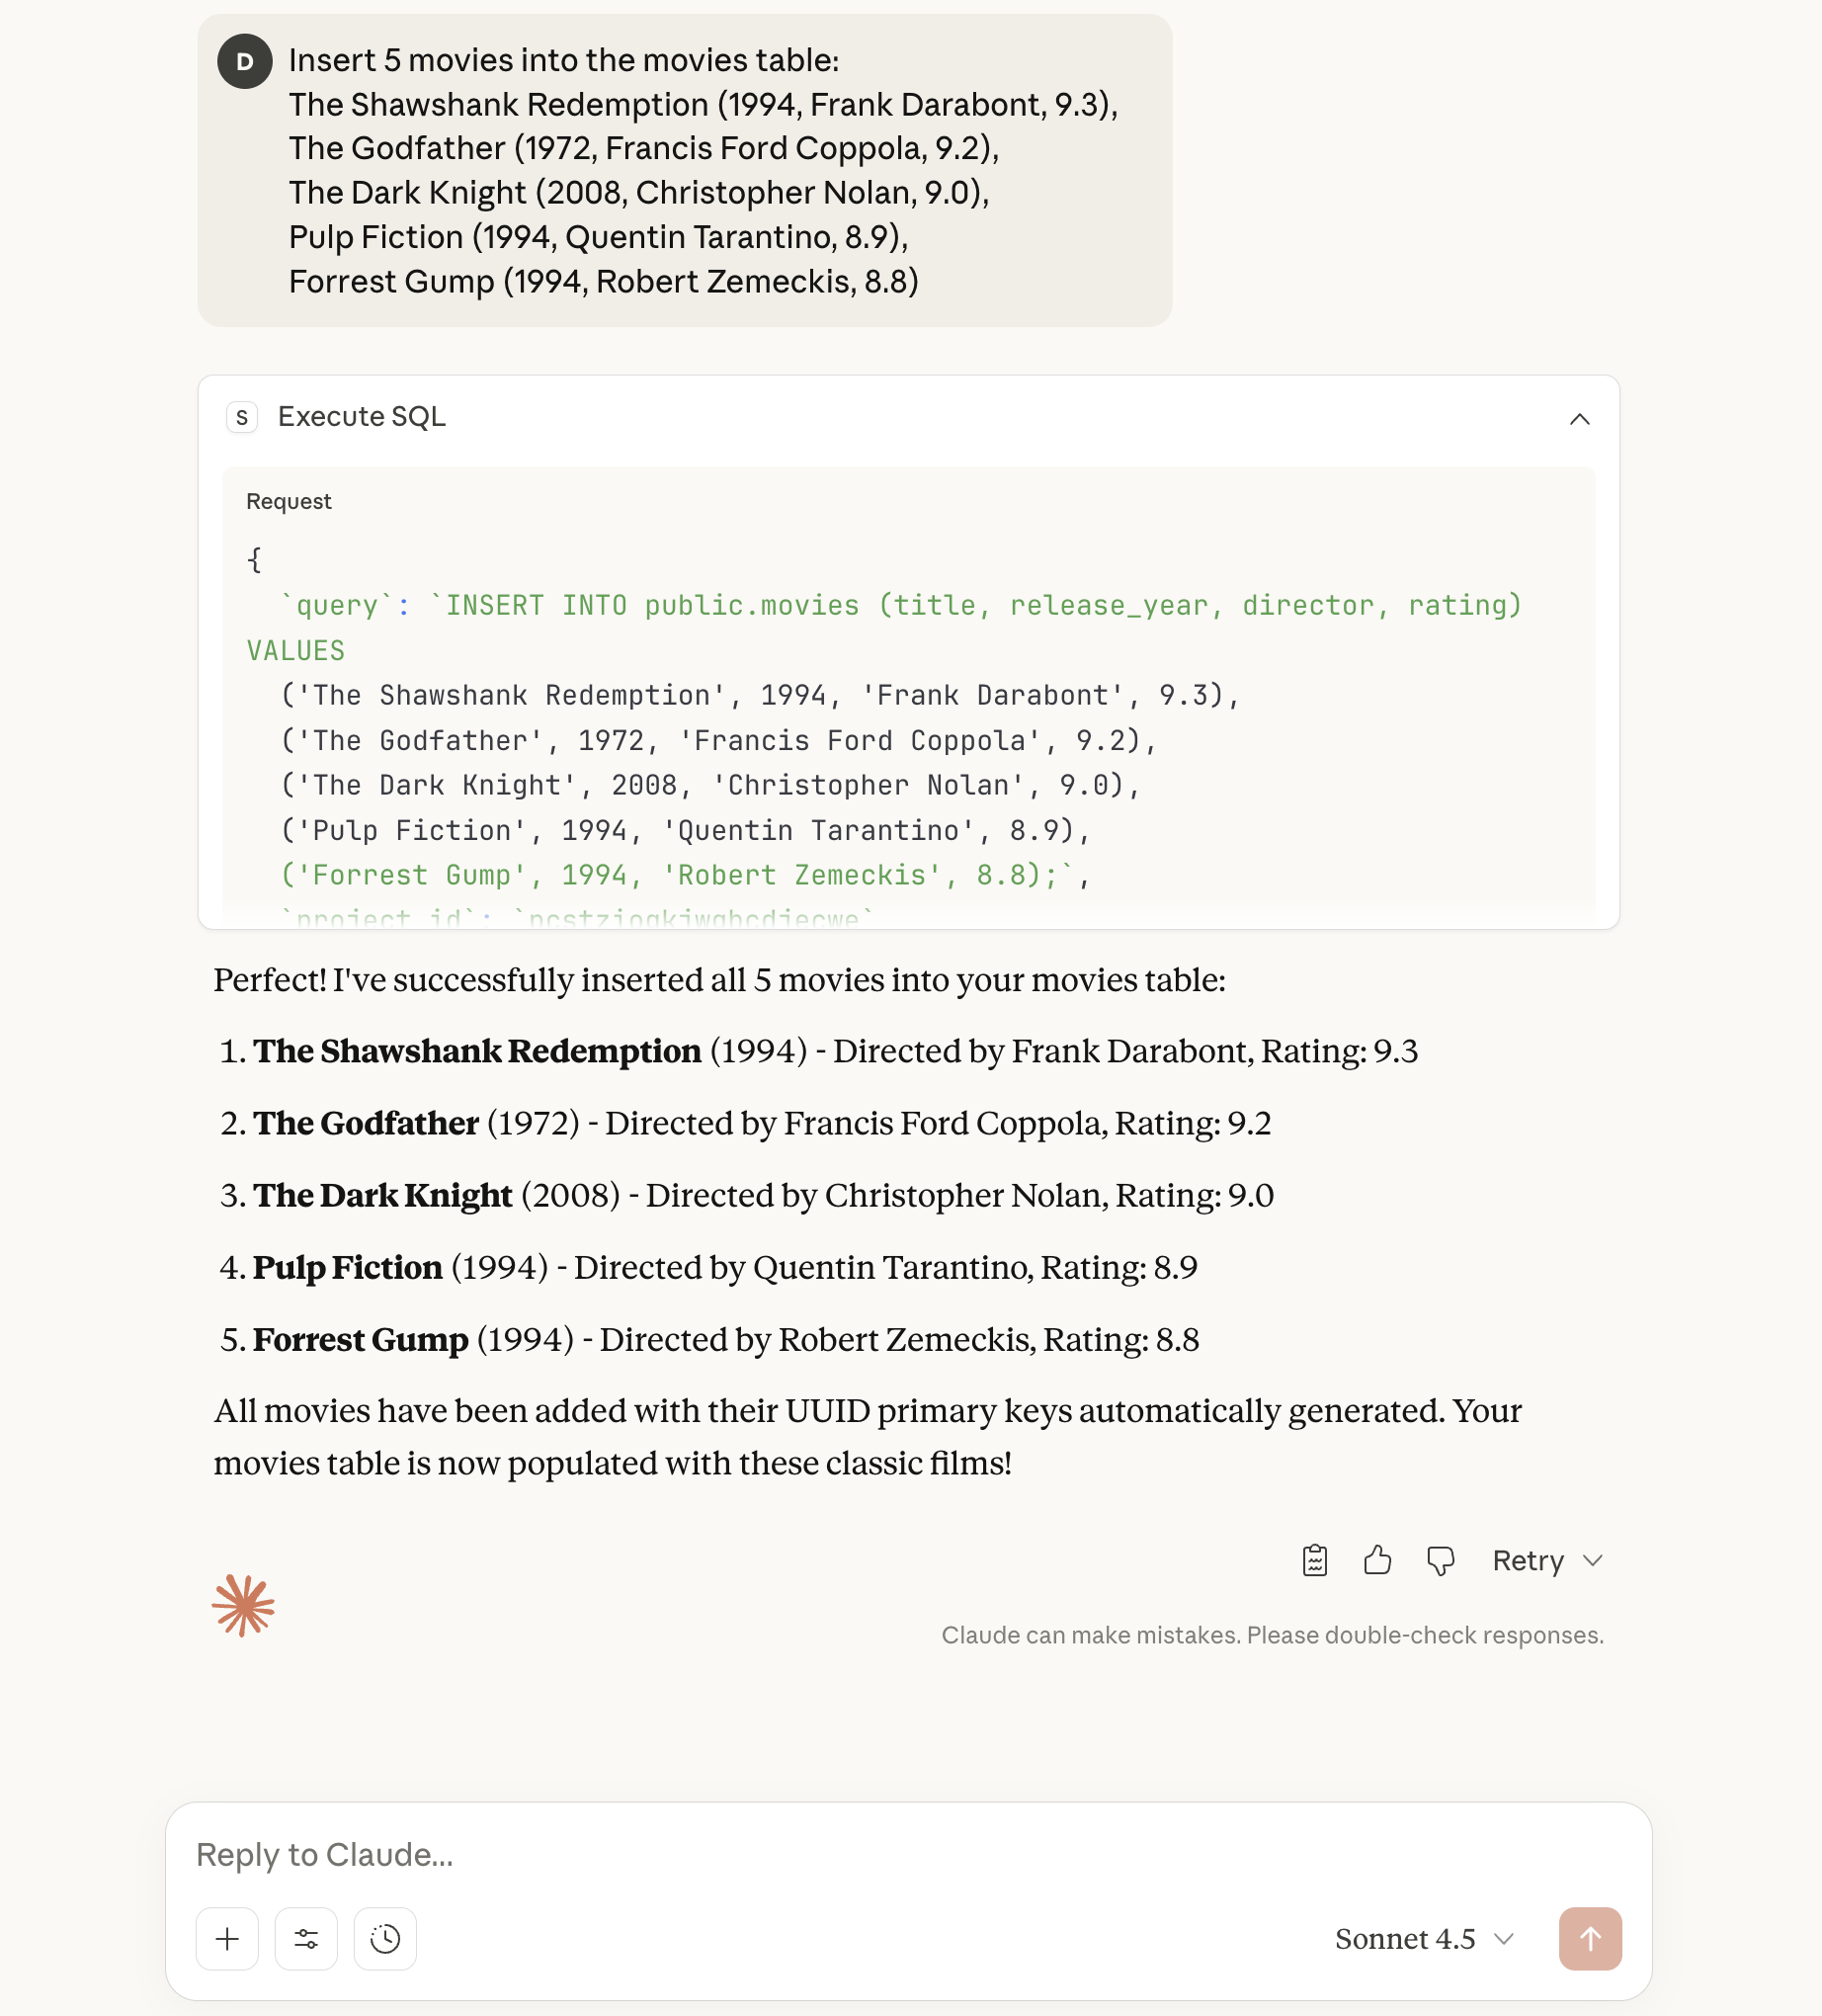
Prompt 2: Insert Sample Data
Insert 5 movies into the movies table:
The Shawshank Redemption (1994, Frank Darabont, 9.3),
The Godfather (1972, Francis Ford Coppola, 9.2),
The Dark Knight (2008, Christopher Nolan, 9.0),
Pulp Fiction (1994, Quentin Tarantino, 8.9),
Forrest Gump (1994, Robert Zemeckis, 8.8)
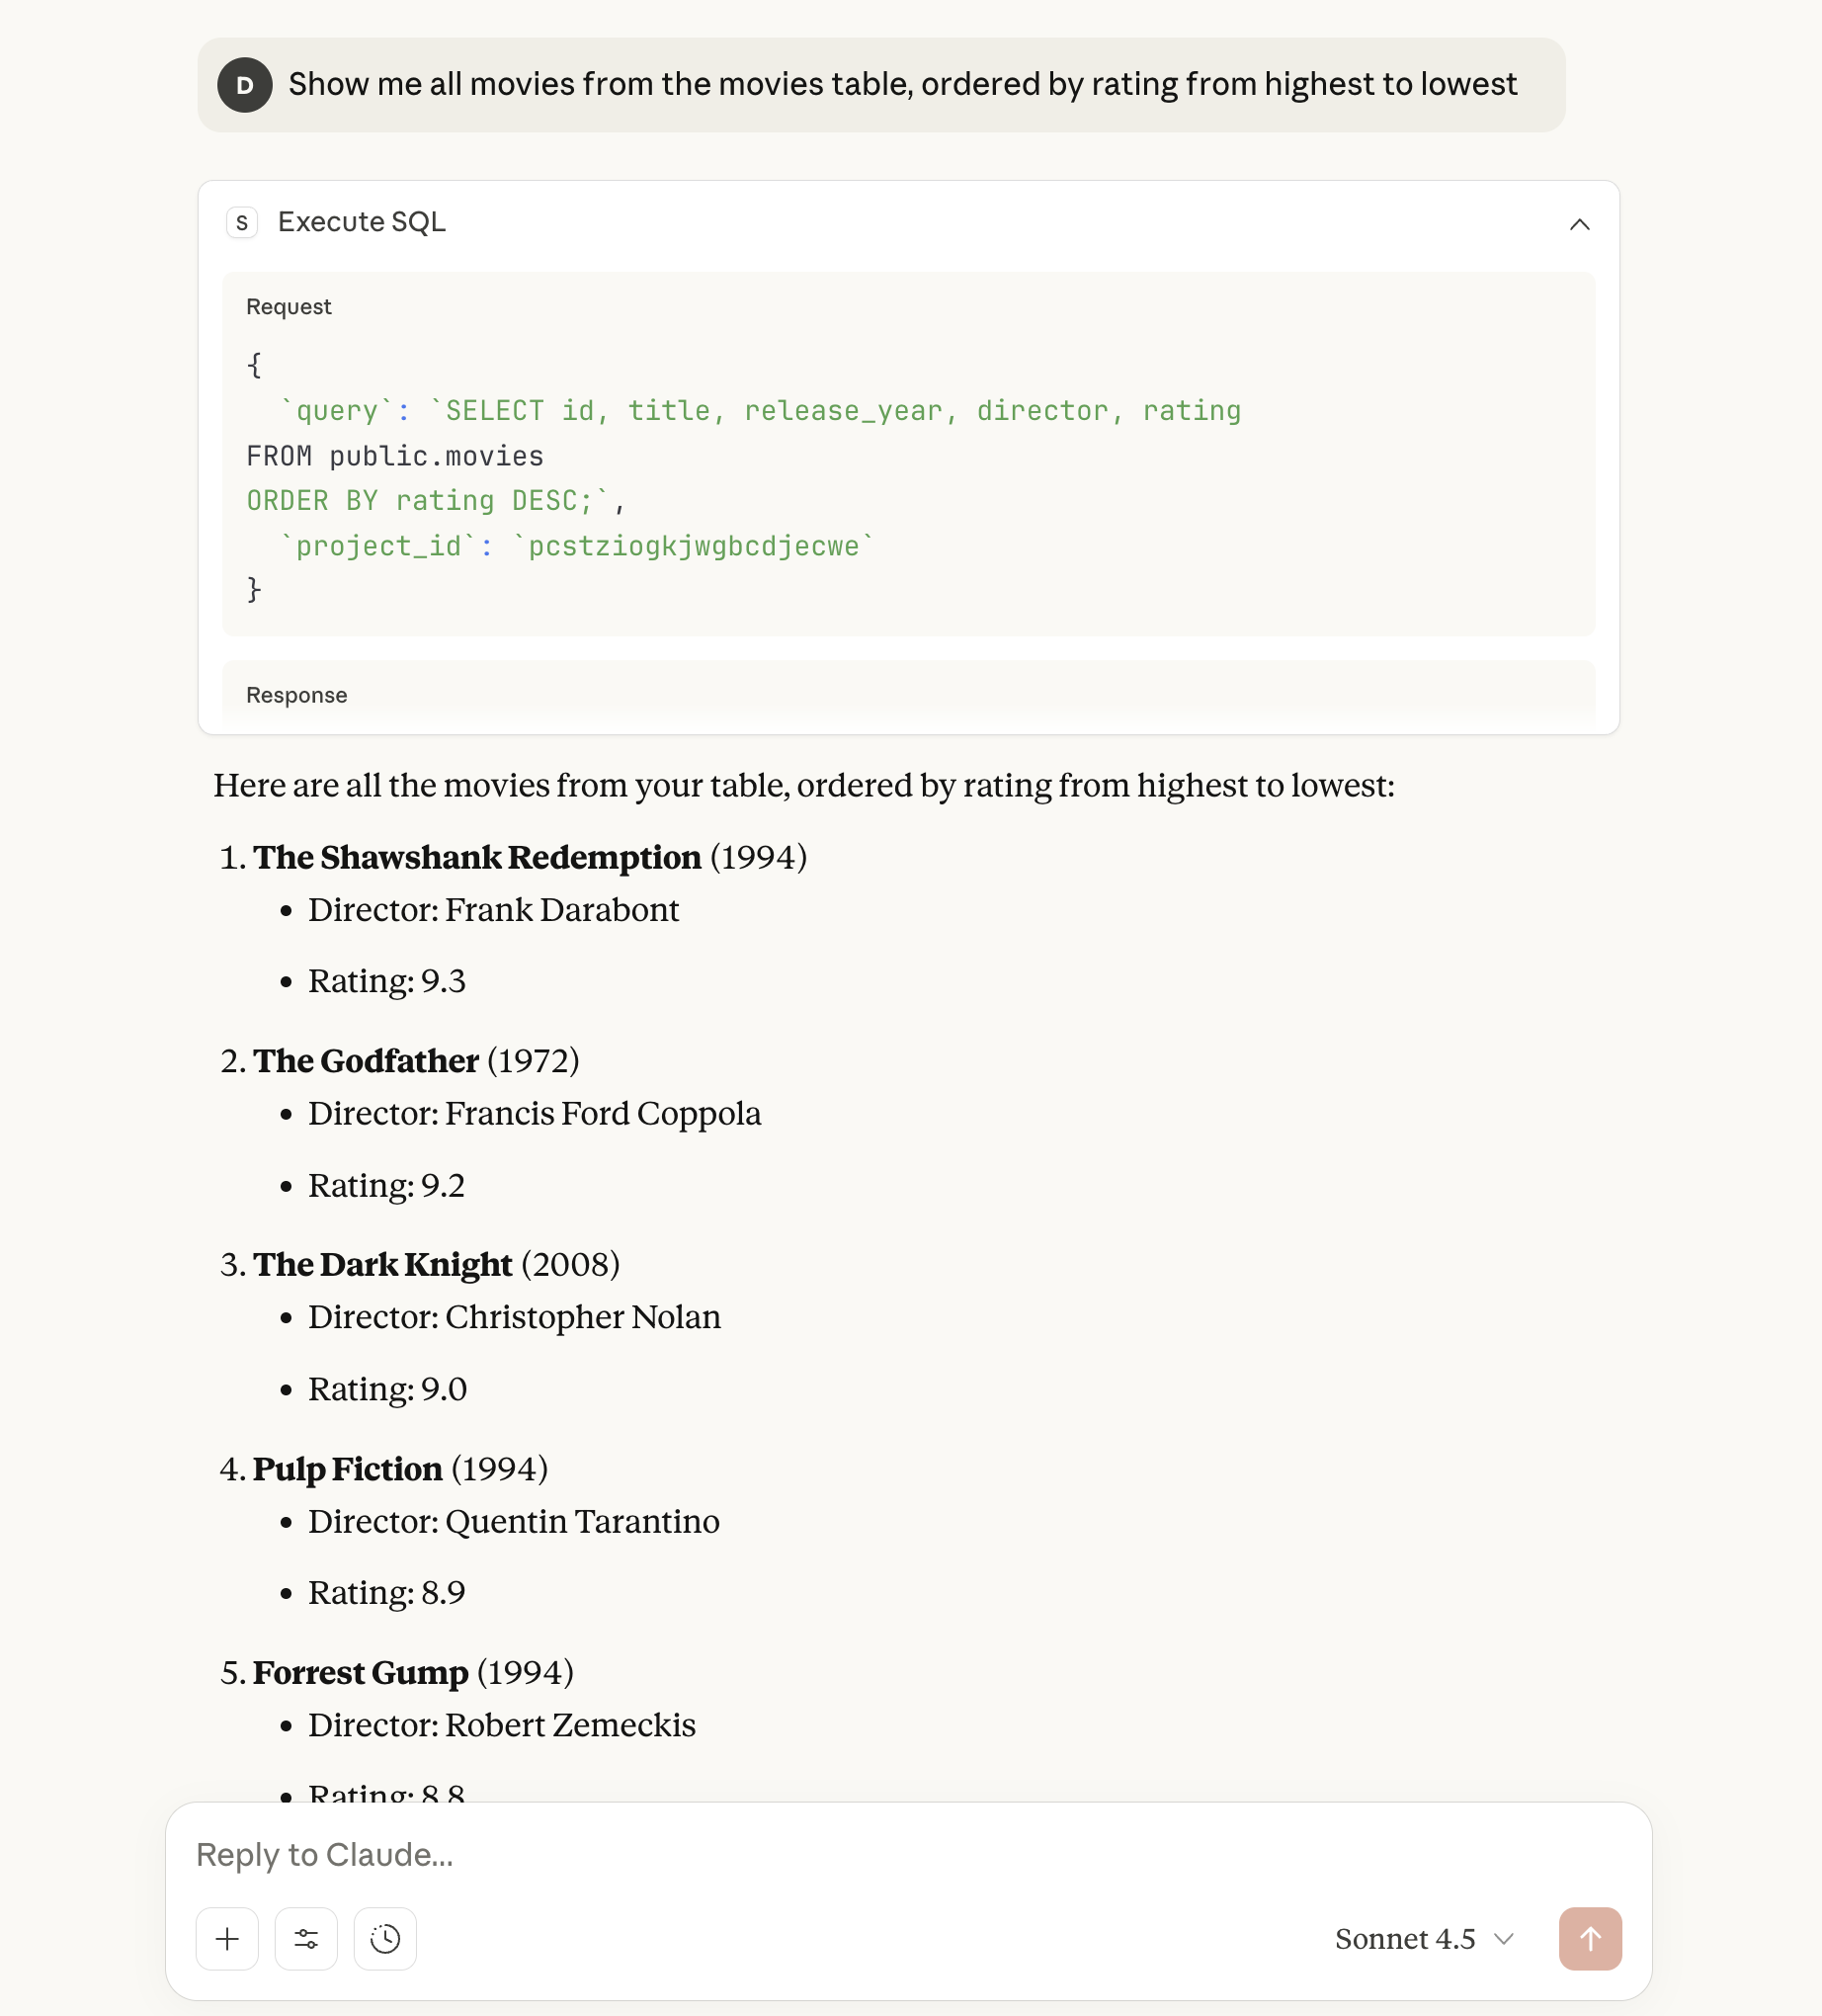
Prompt 3: Read the Data
Show me all movies from the movies table, ordered by rating from highest to lowest
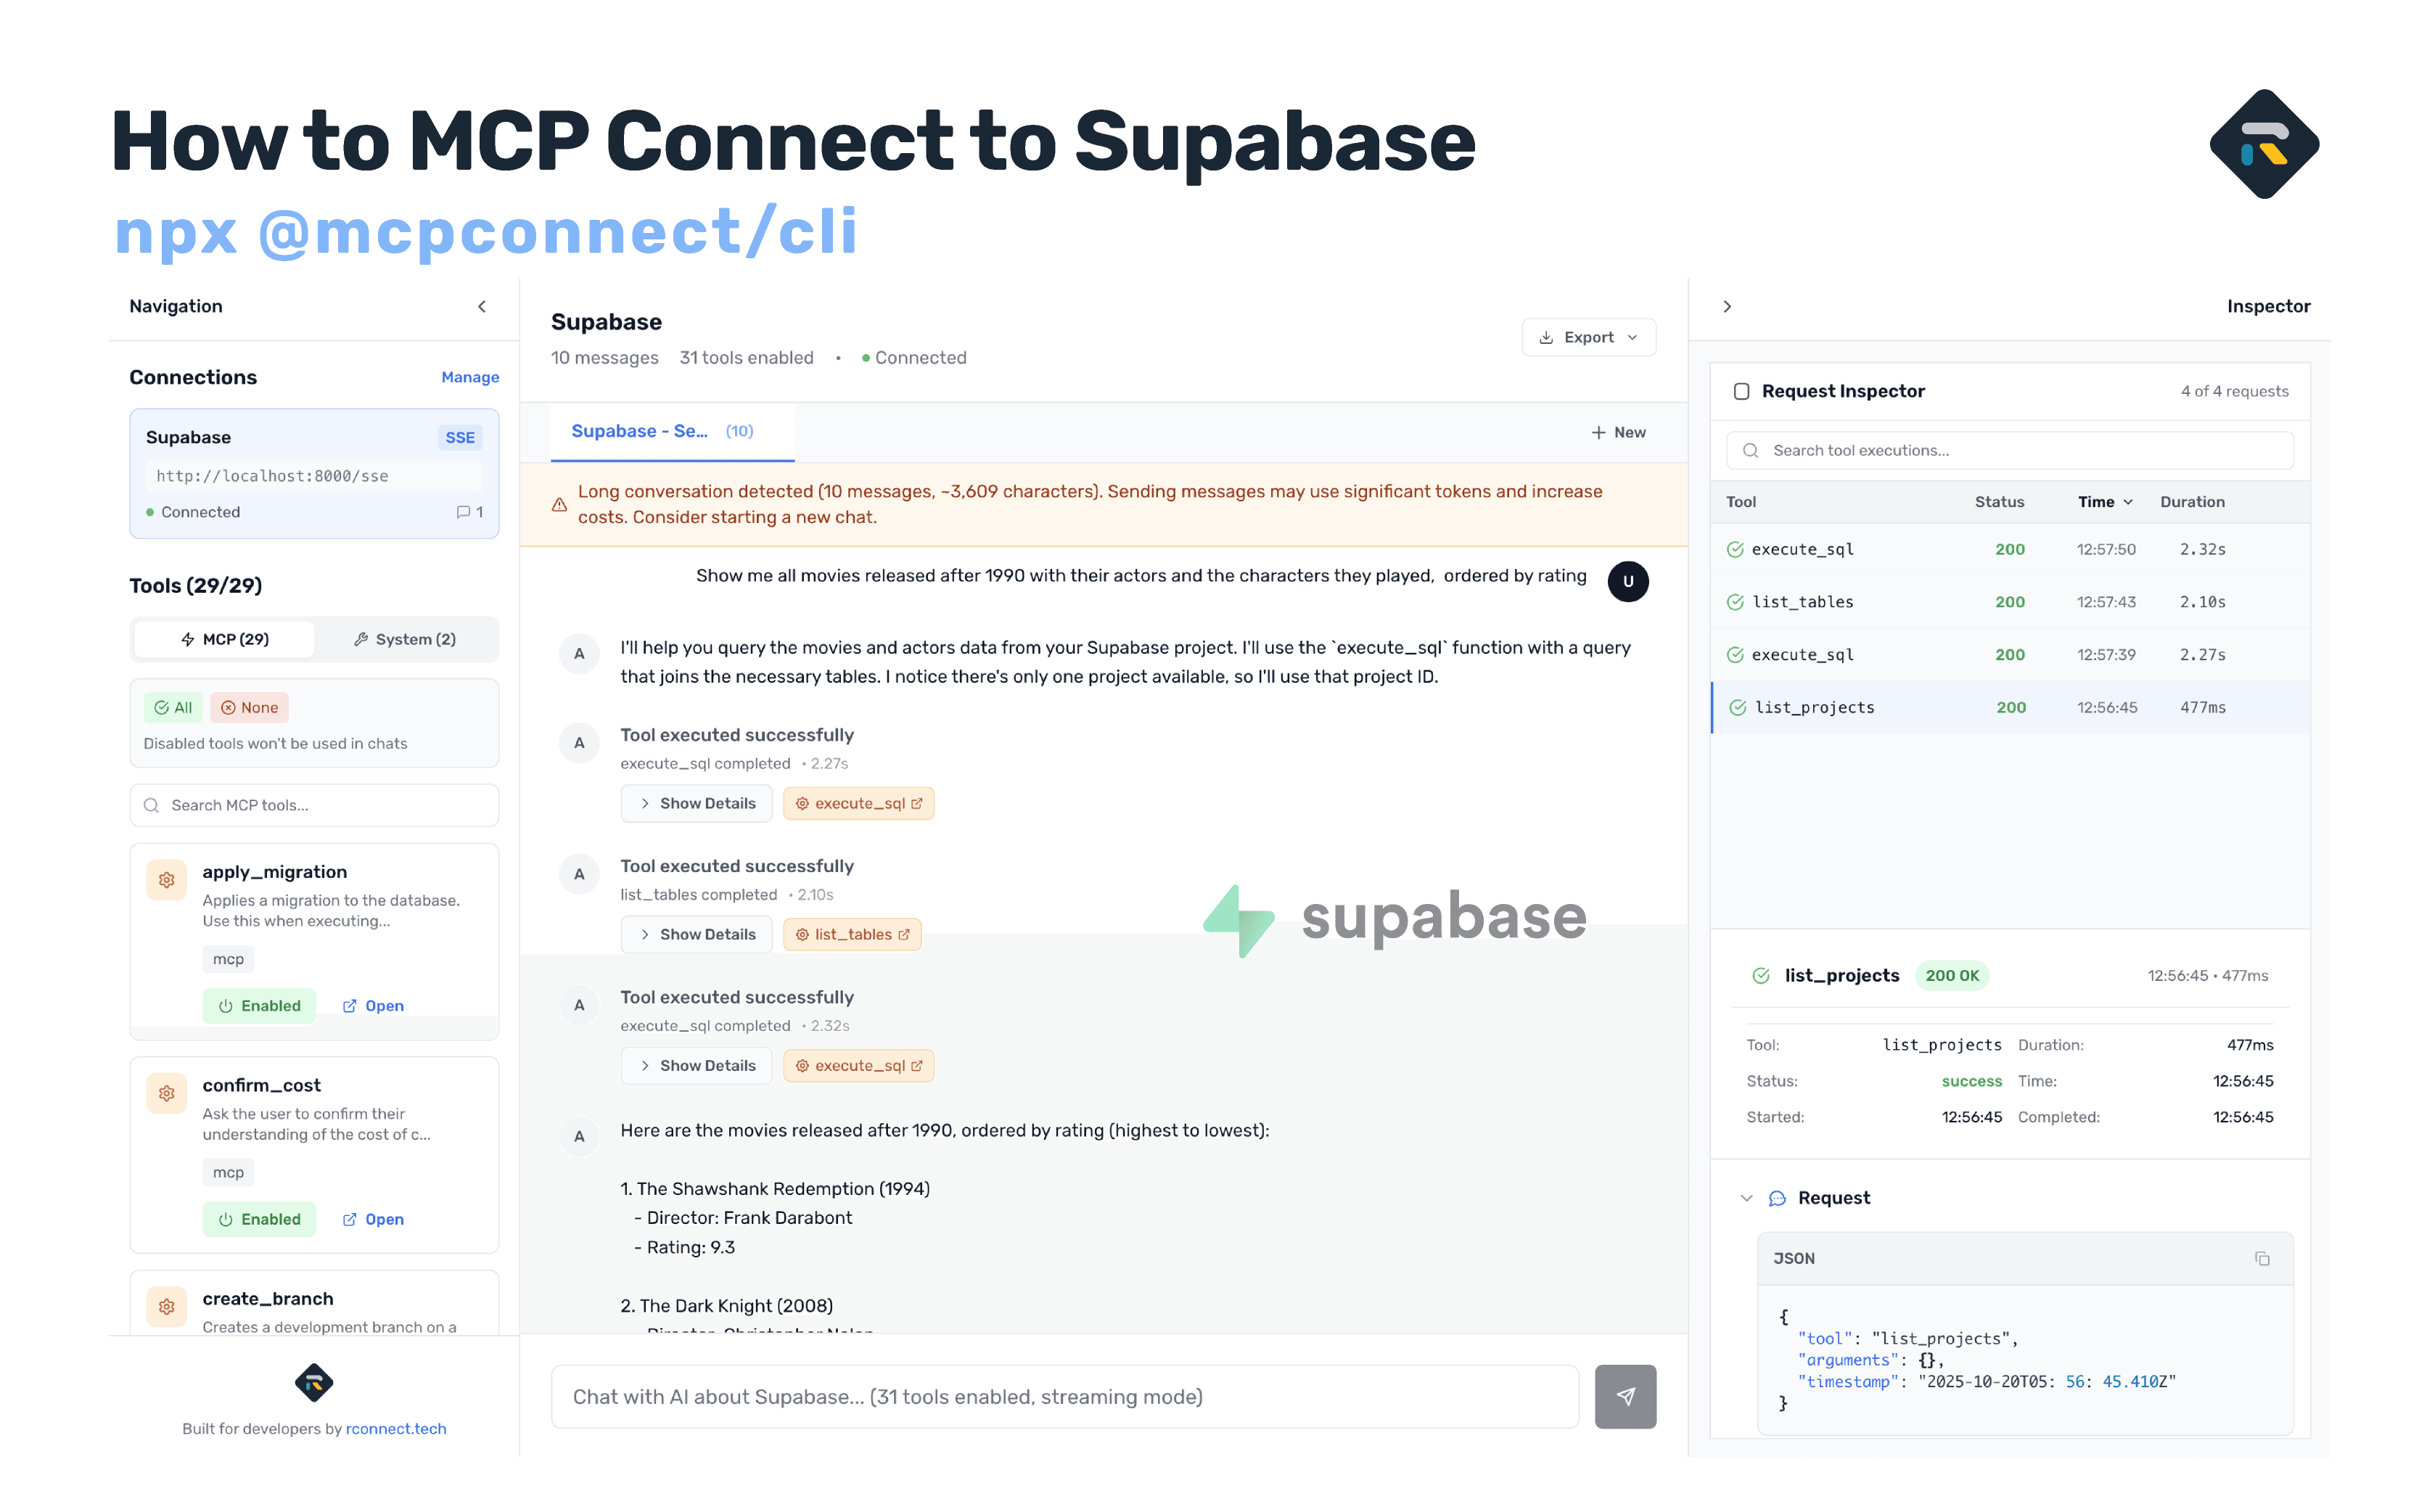
Connecting to MCP Connect
Step 1: Access MCP Connect
Visit mcp.rconnect.tech or run locally:
npx @mcpconnect/cli
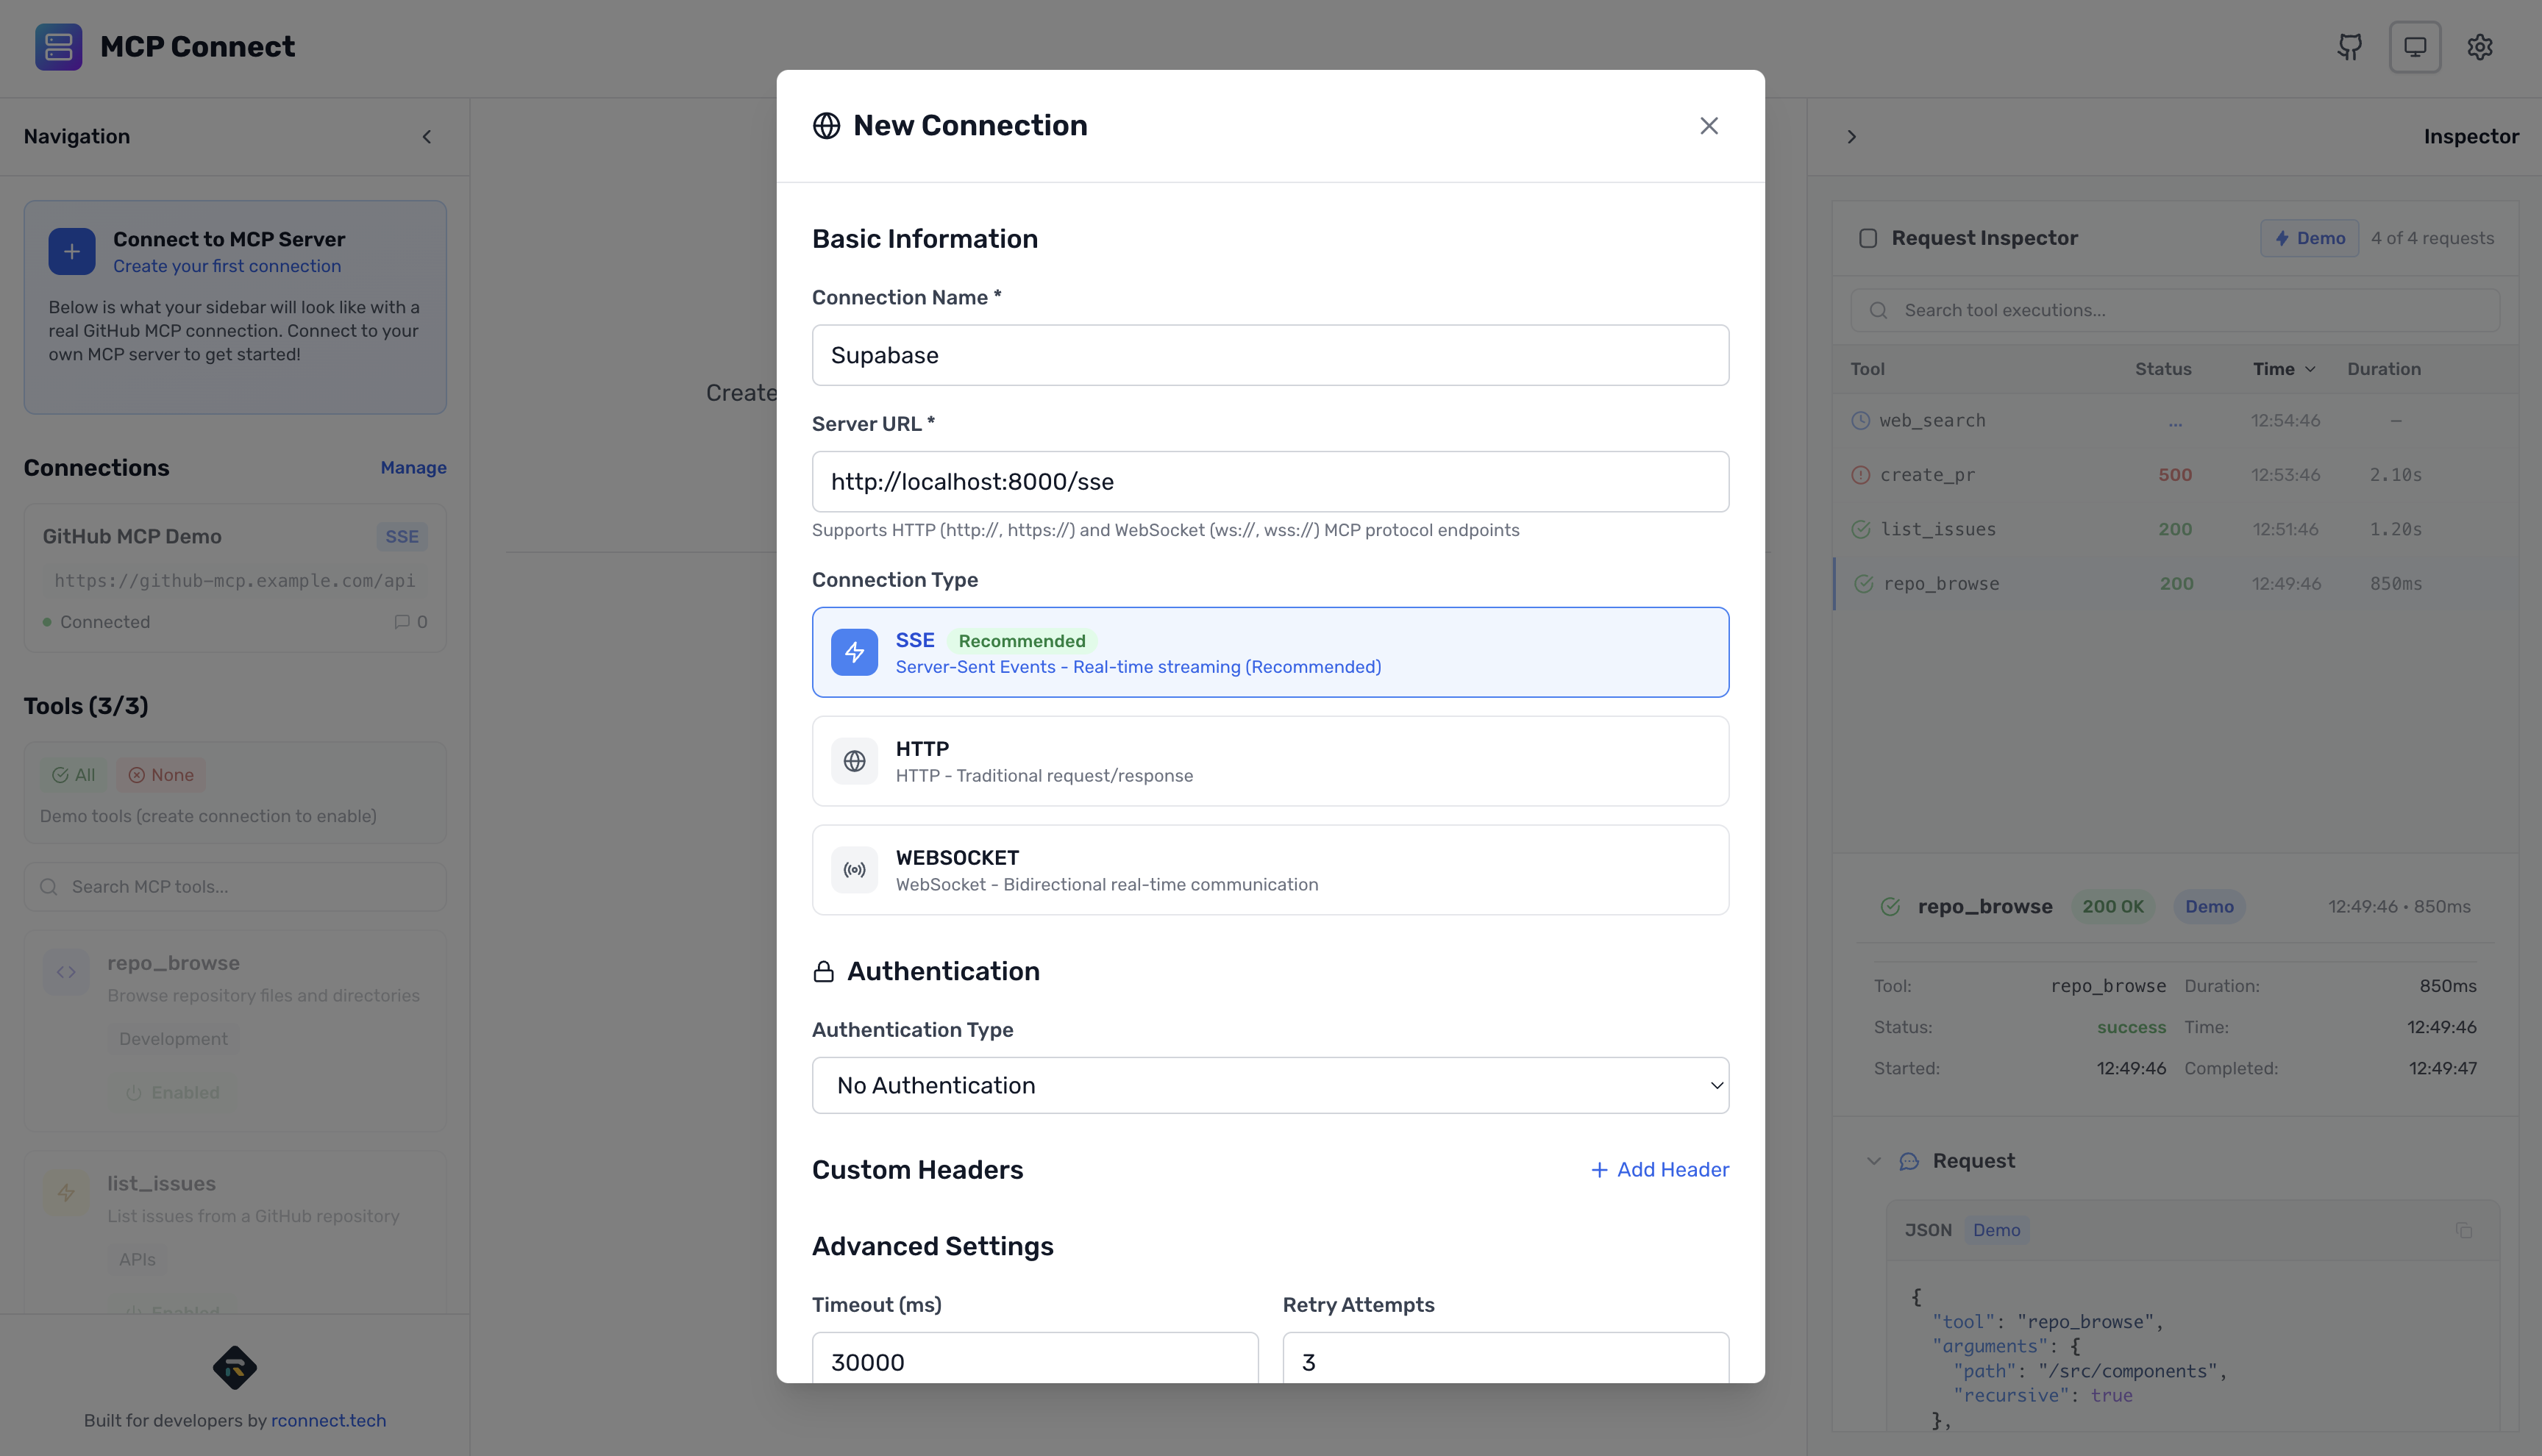
Step 2: Create Connection
- Click "+ New Connection"
- Fill in details:
Name: Supabase MCP Server
URL: http://localhost:8000/sse
Connection Type: SSE
Timeout: 60000ms
Retry Attempts: 3
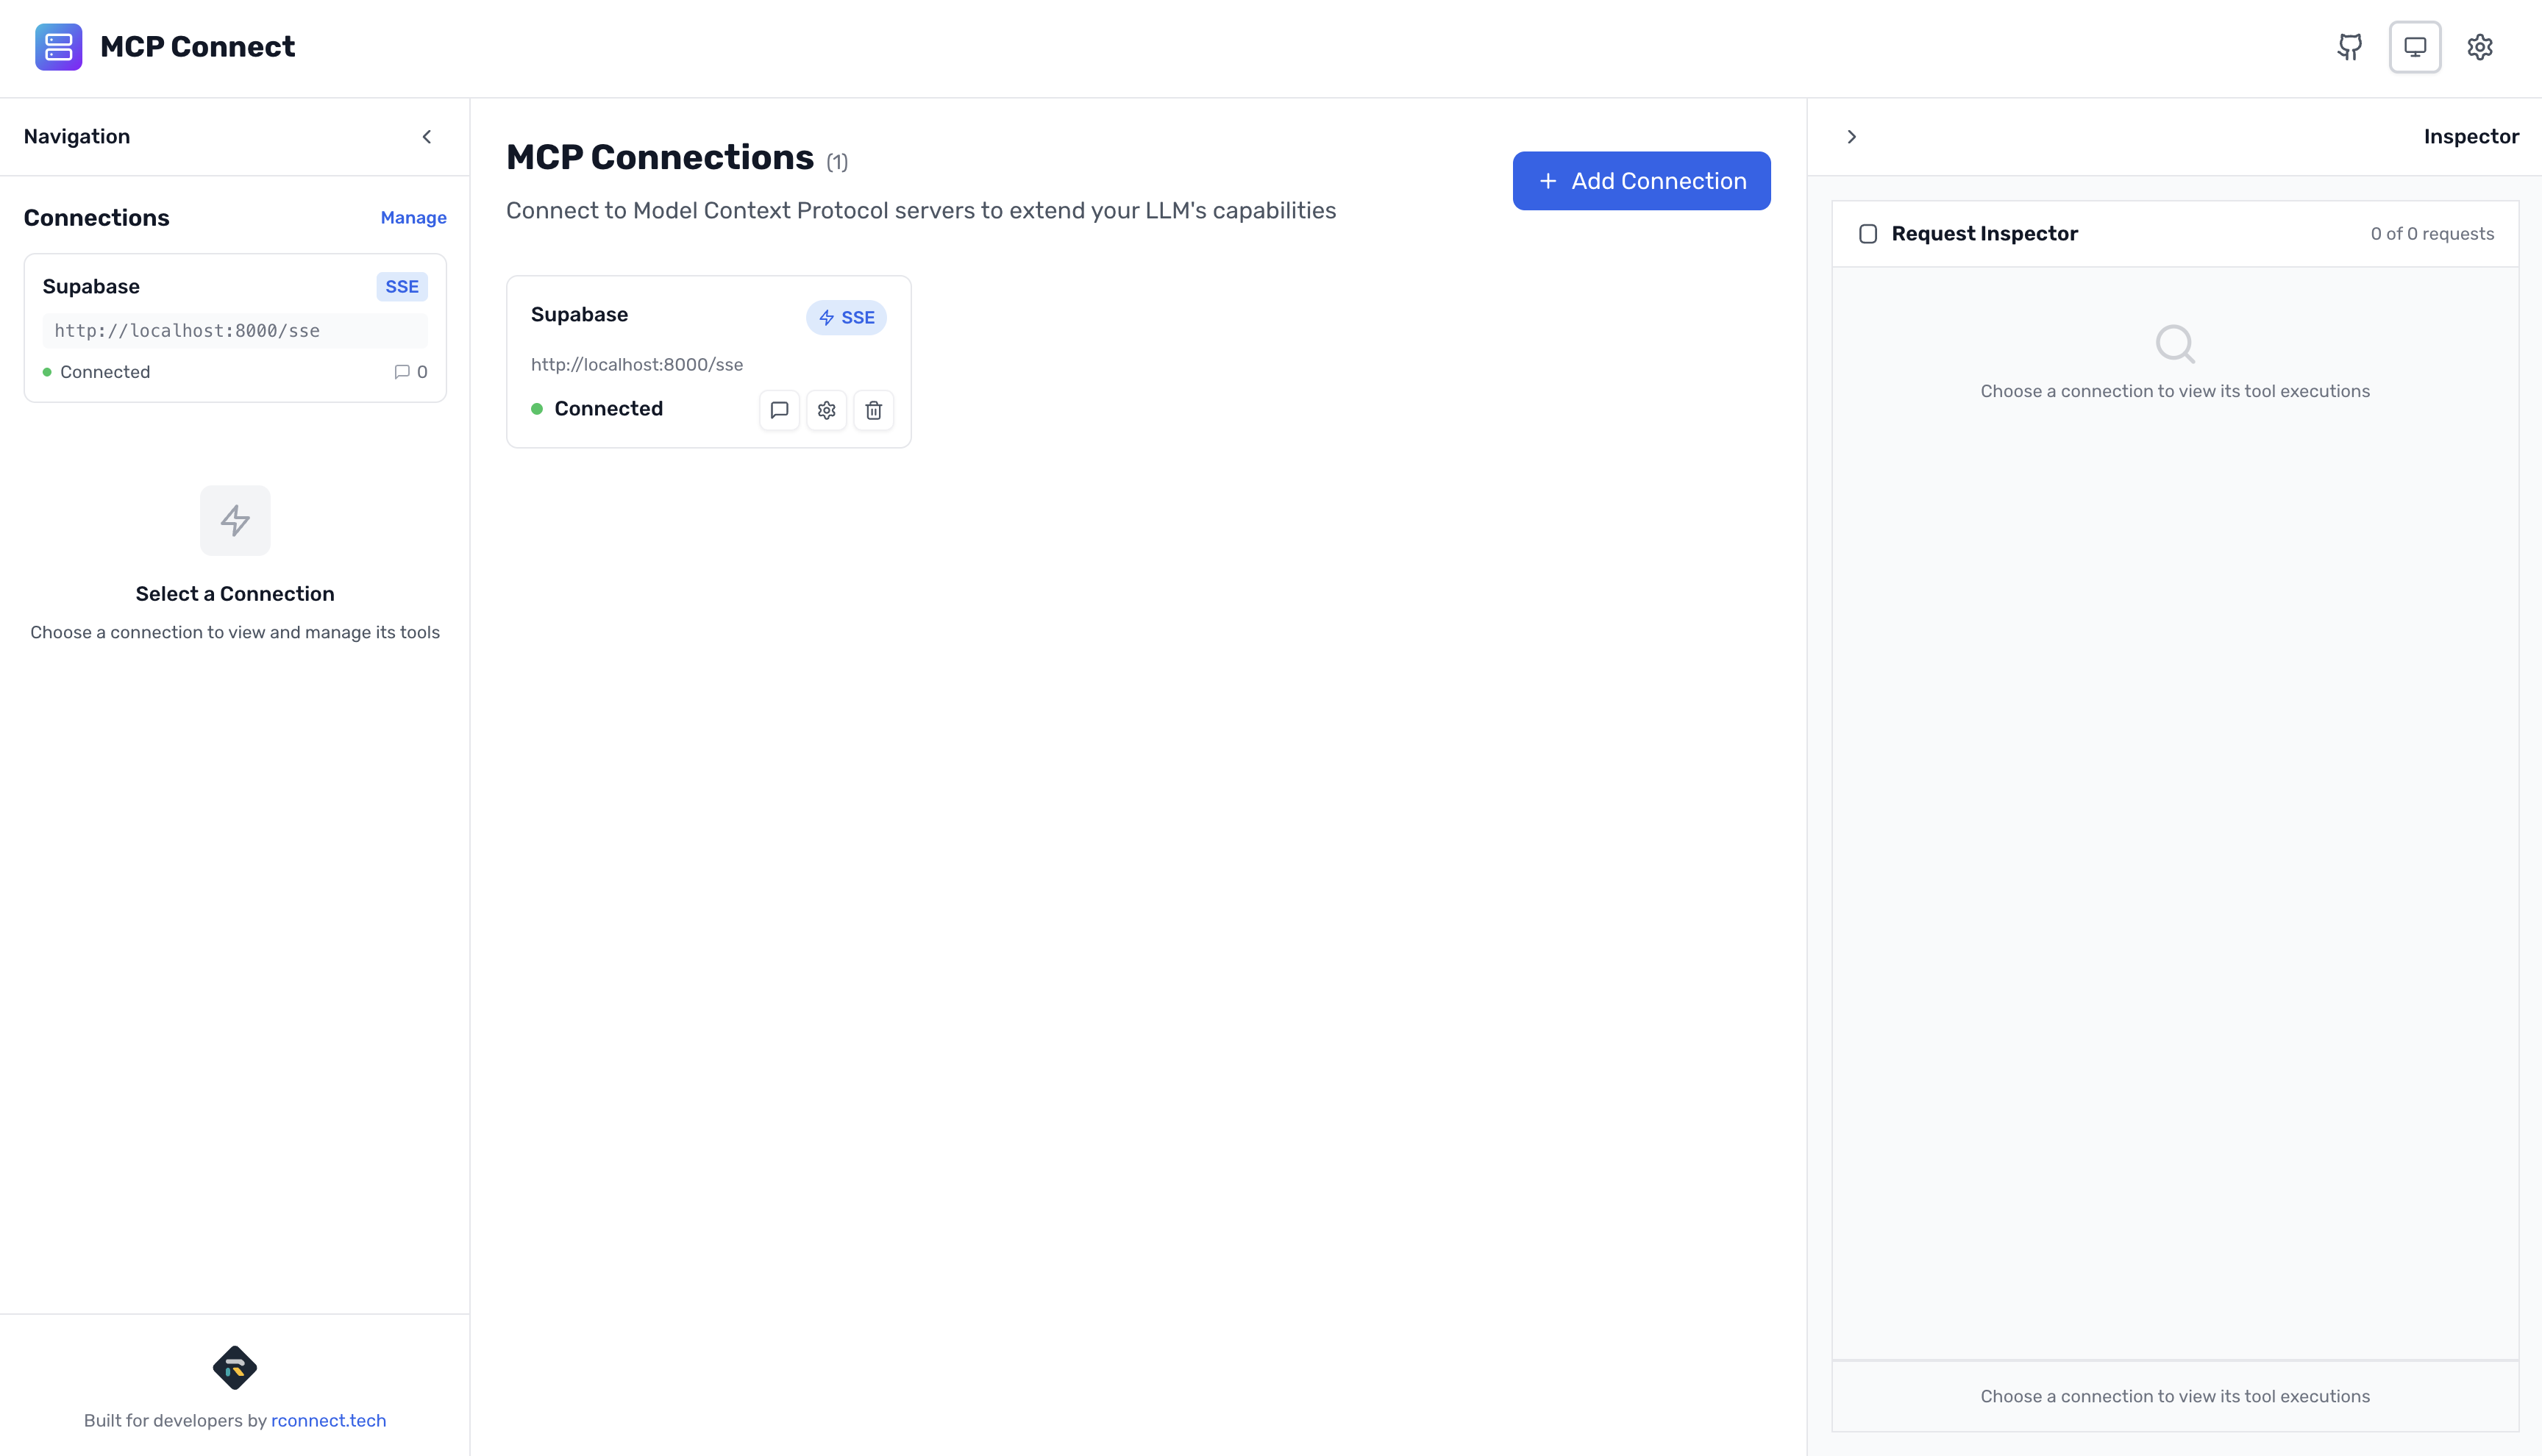
- Click "Test Connection"
- Click "Create Connection"
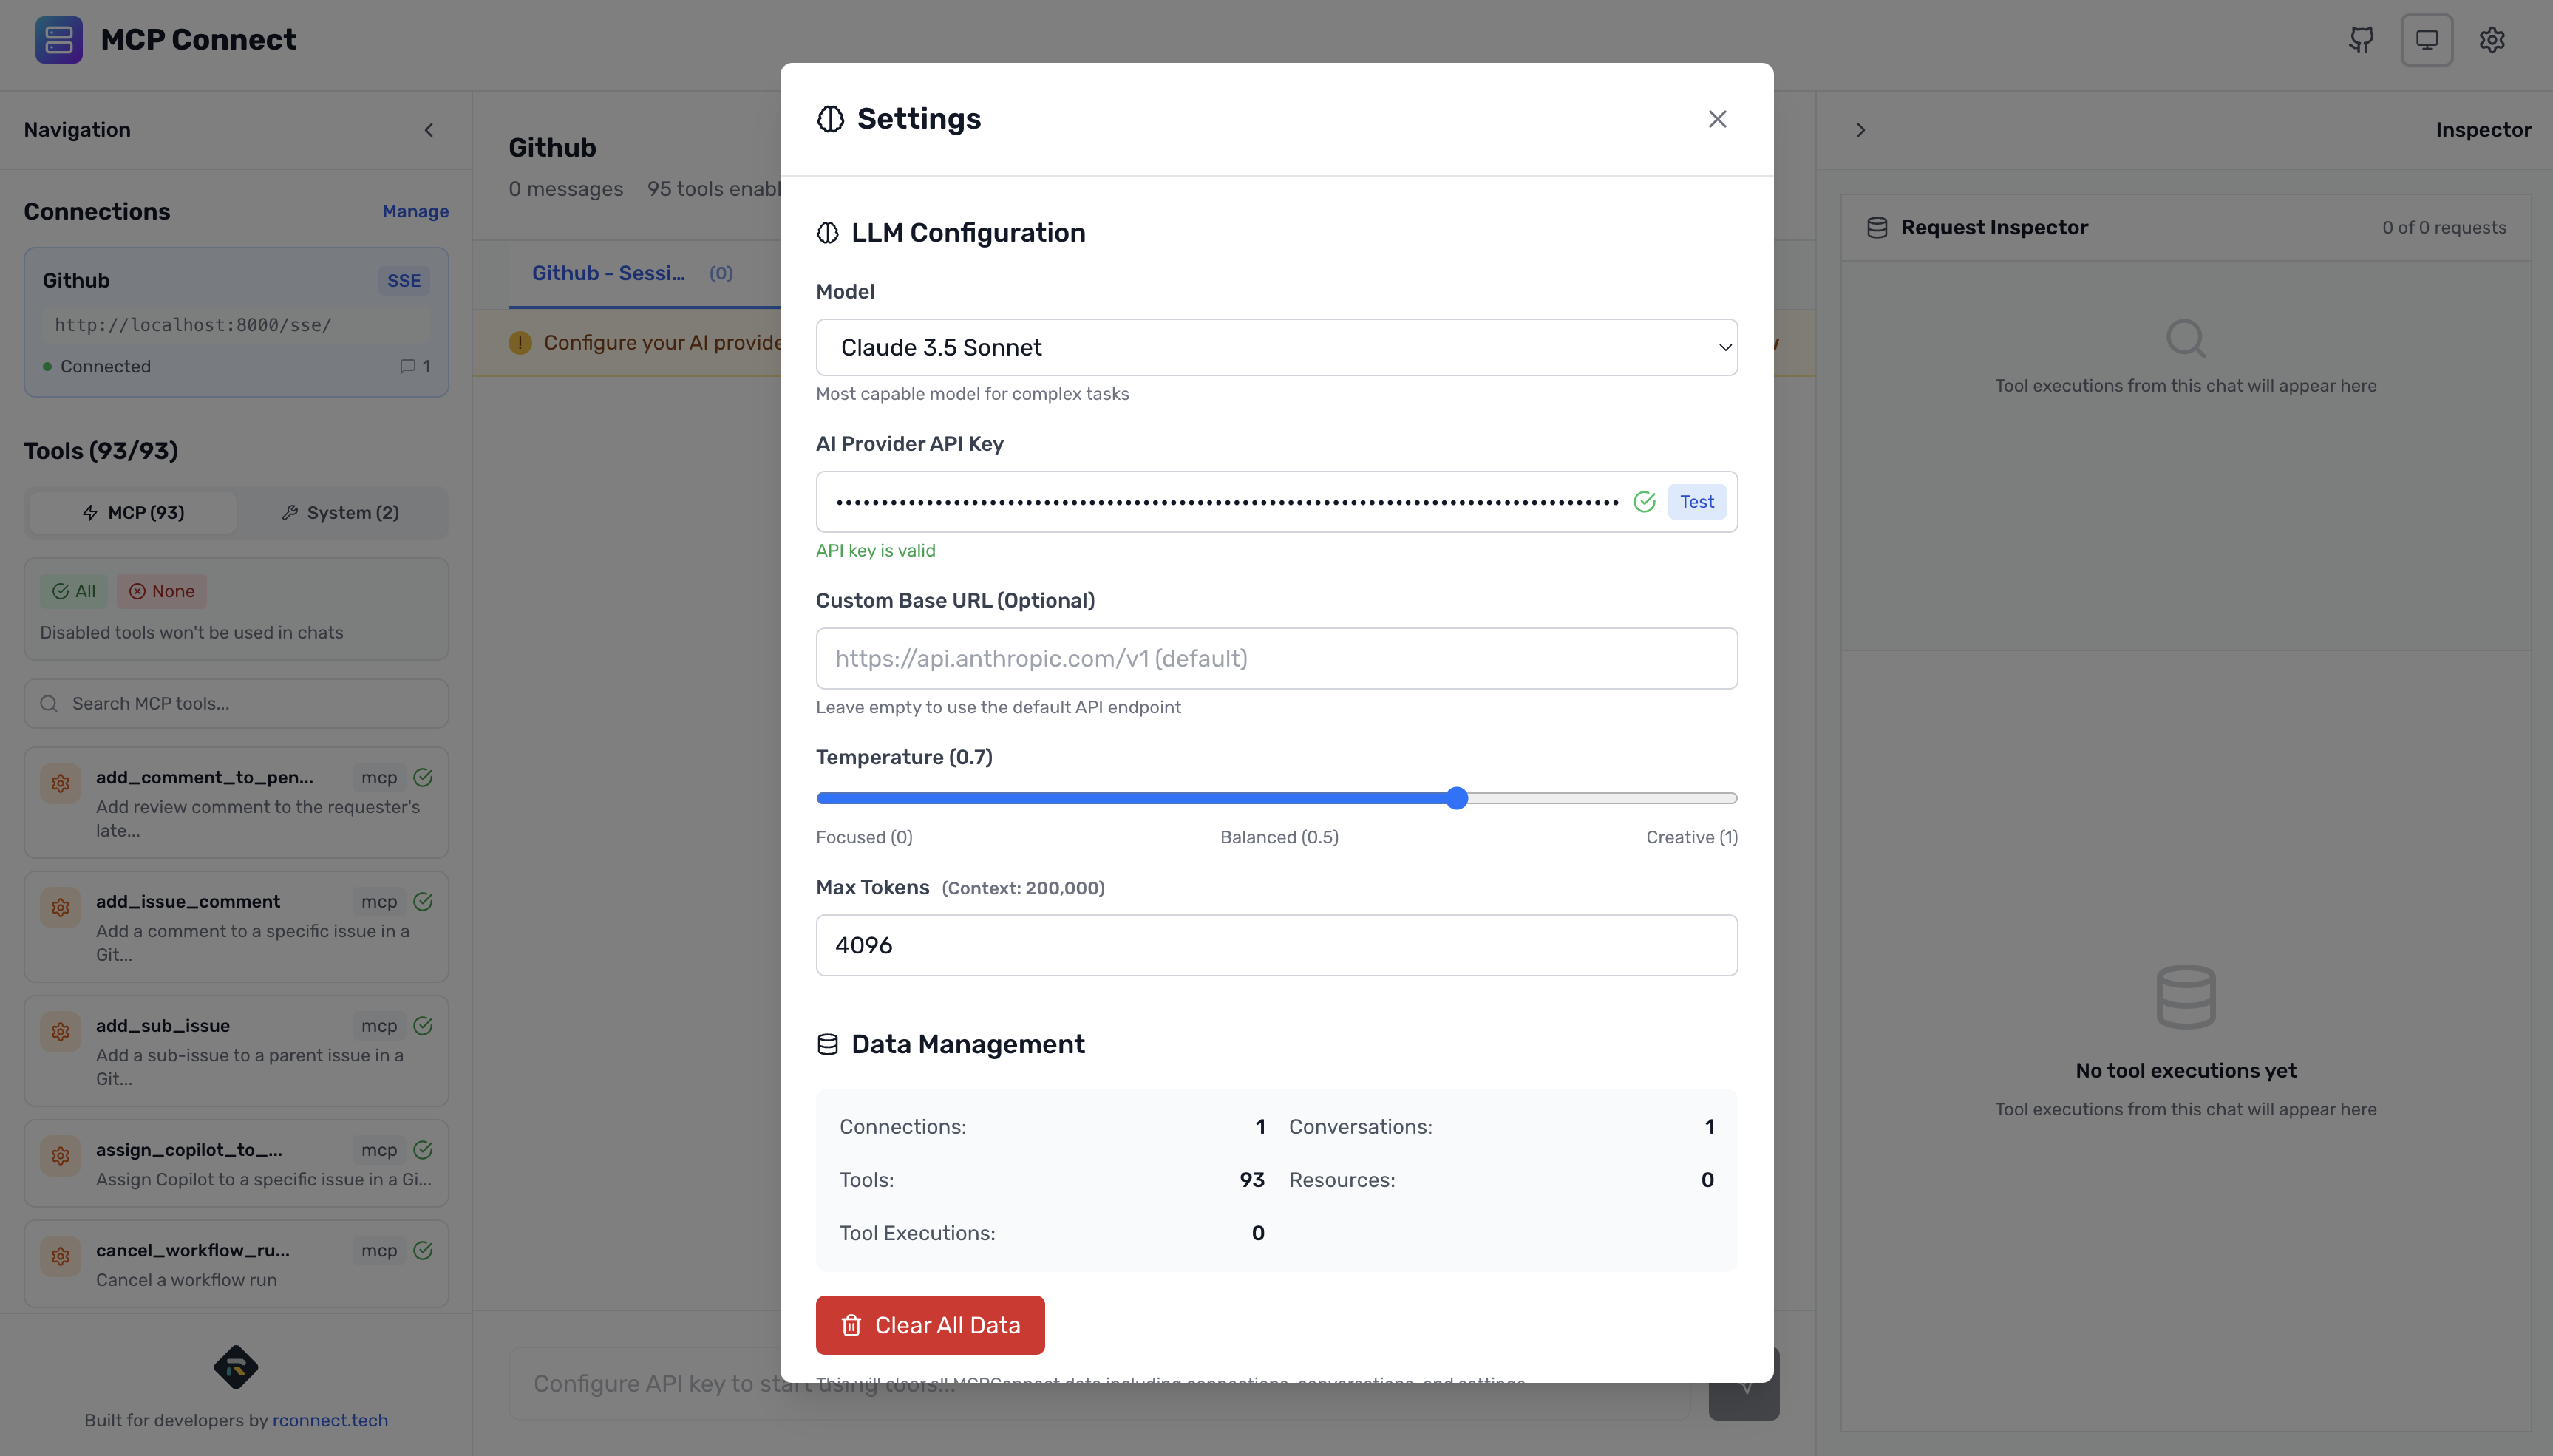
Step 3: Configure AI Provider
- Click Settings
- Select Anthropic
- Enter your API key from console.anthropic.com
- Choose Claude 3.5 Sonnet
- Click Test then Save
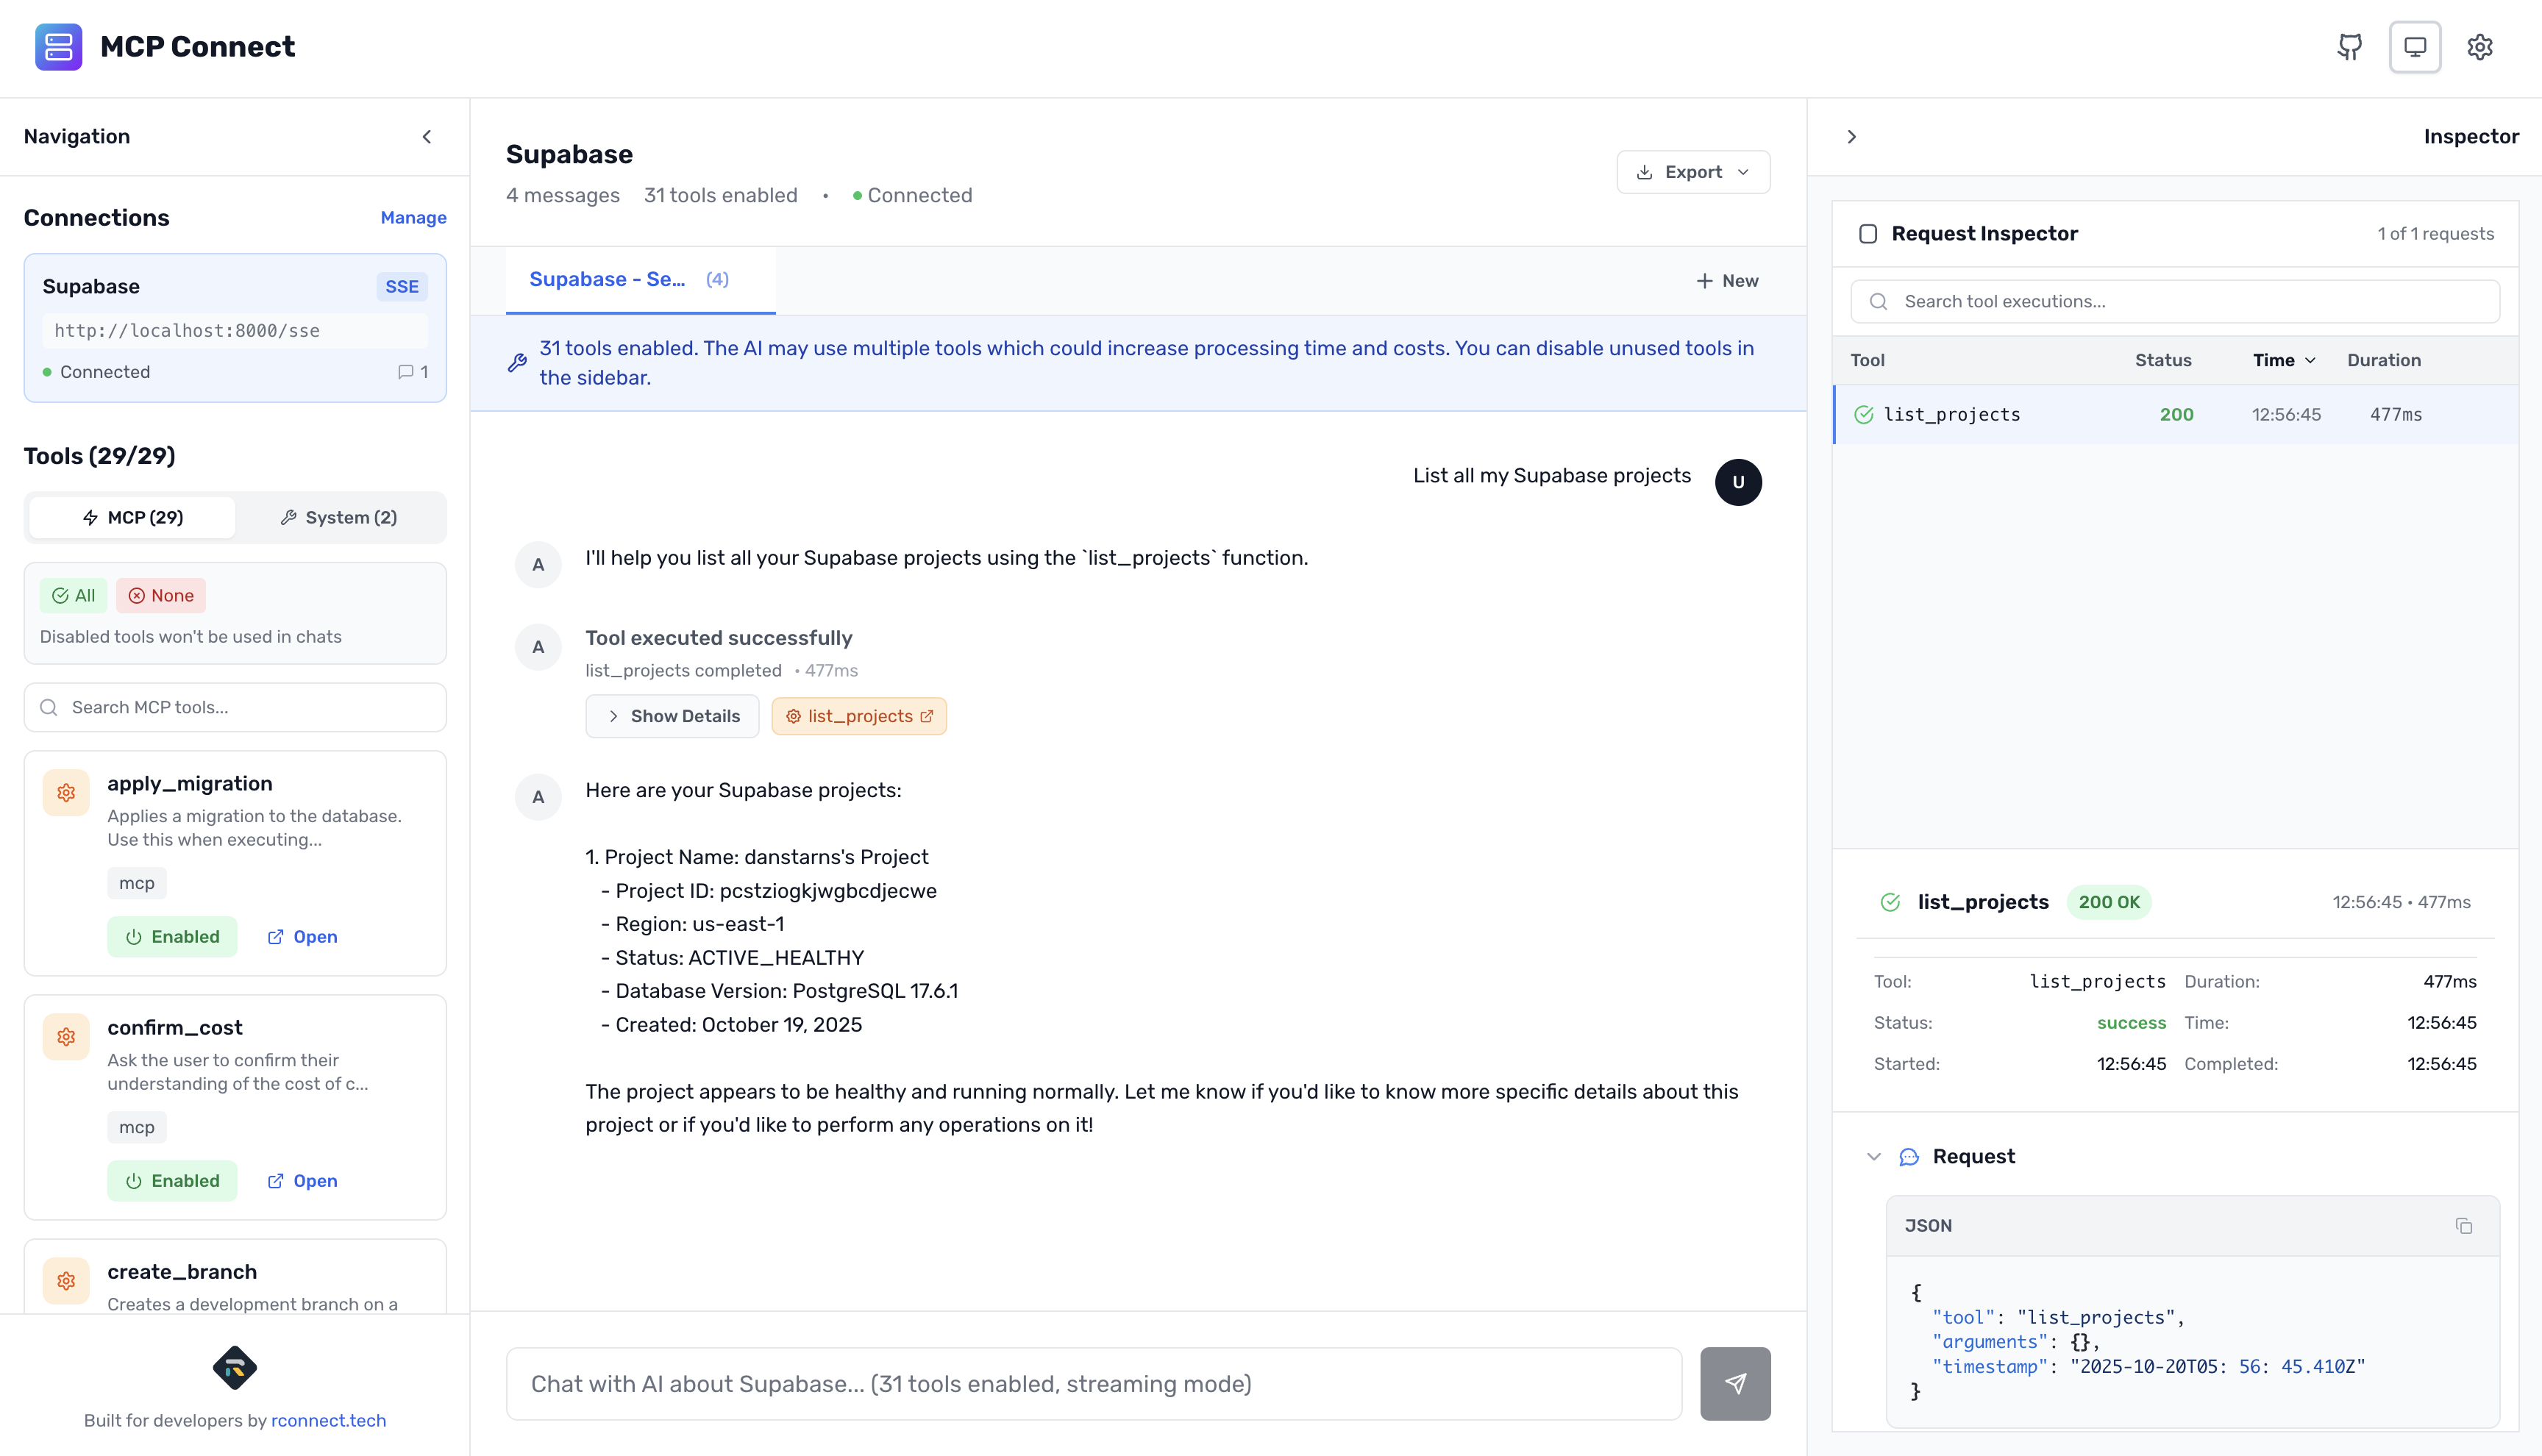
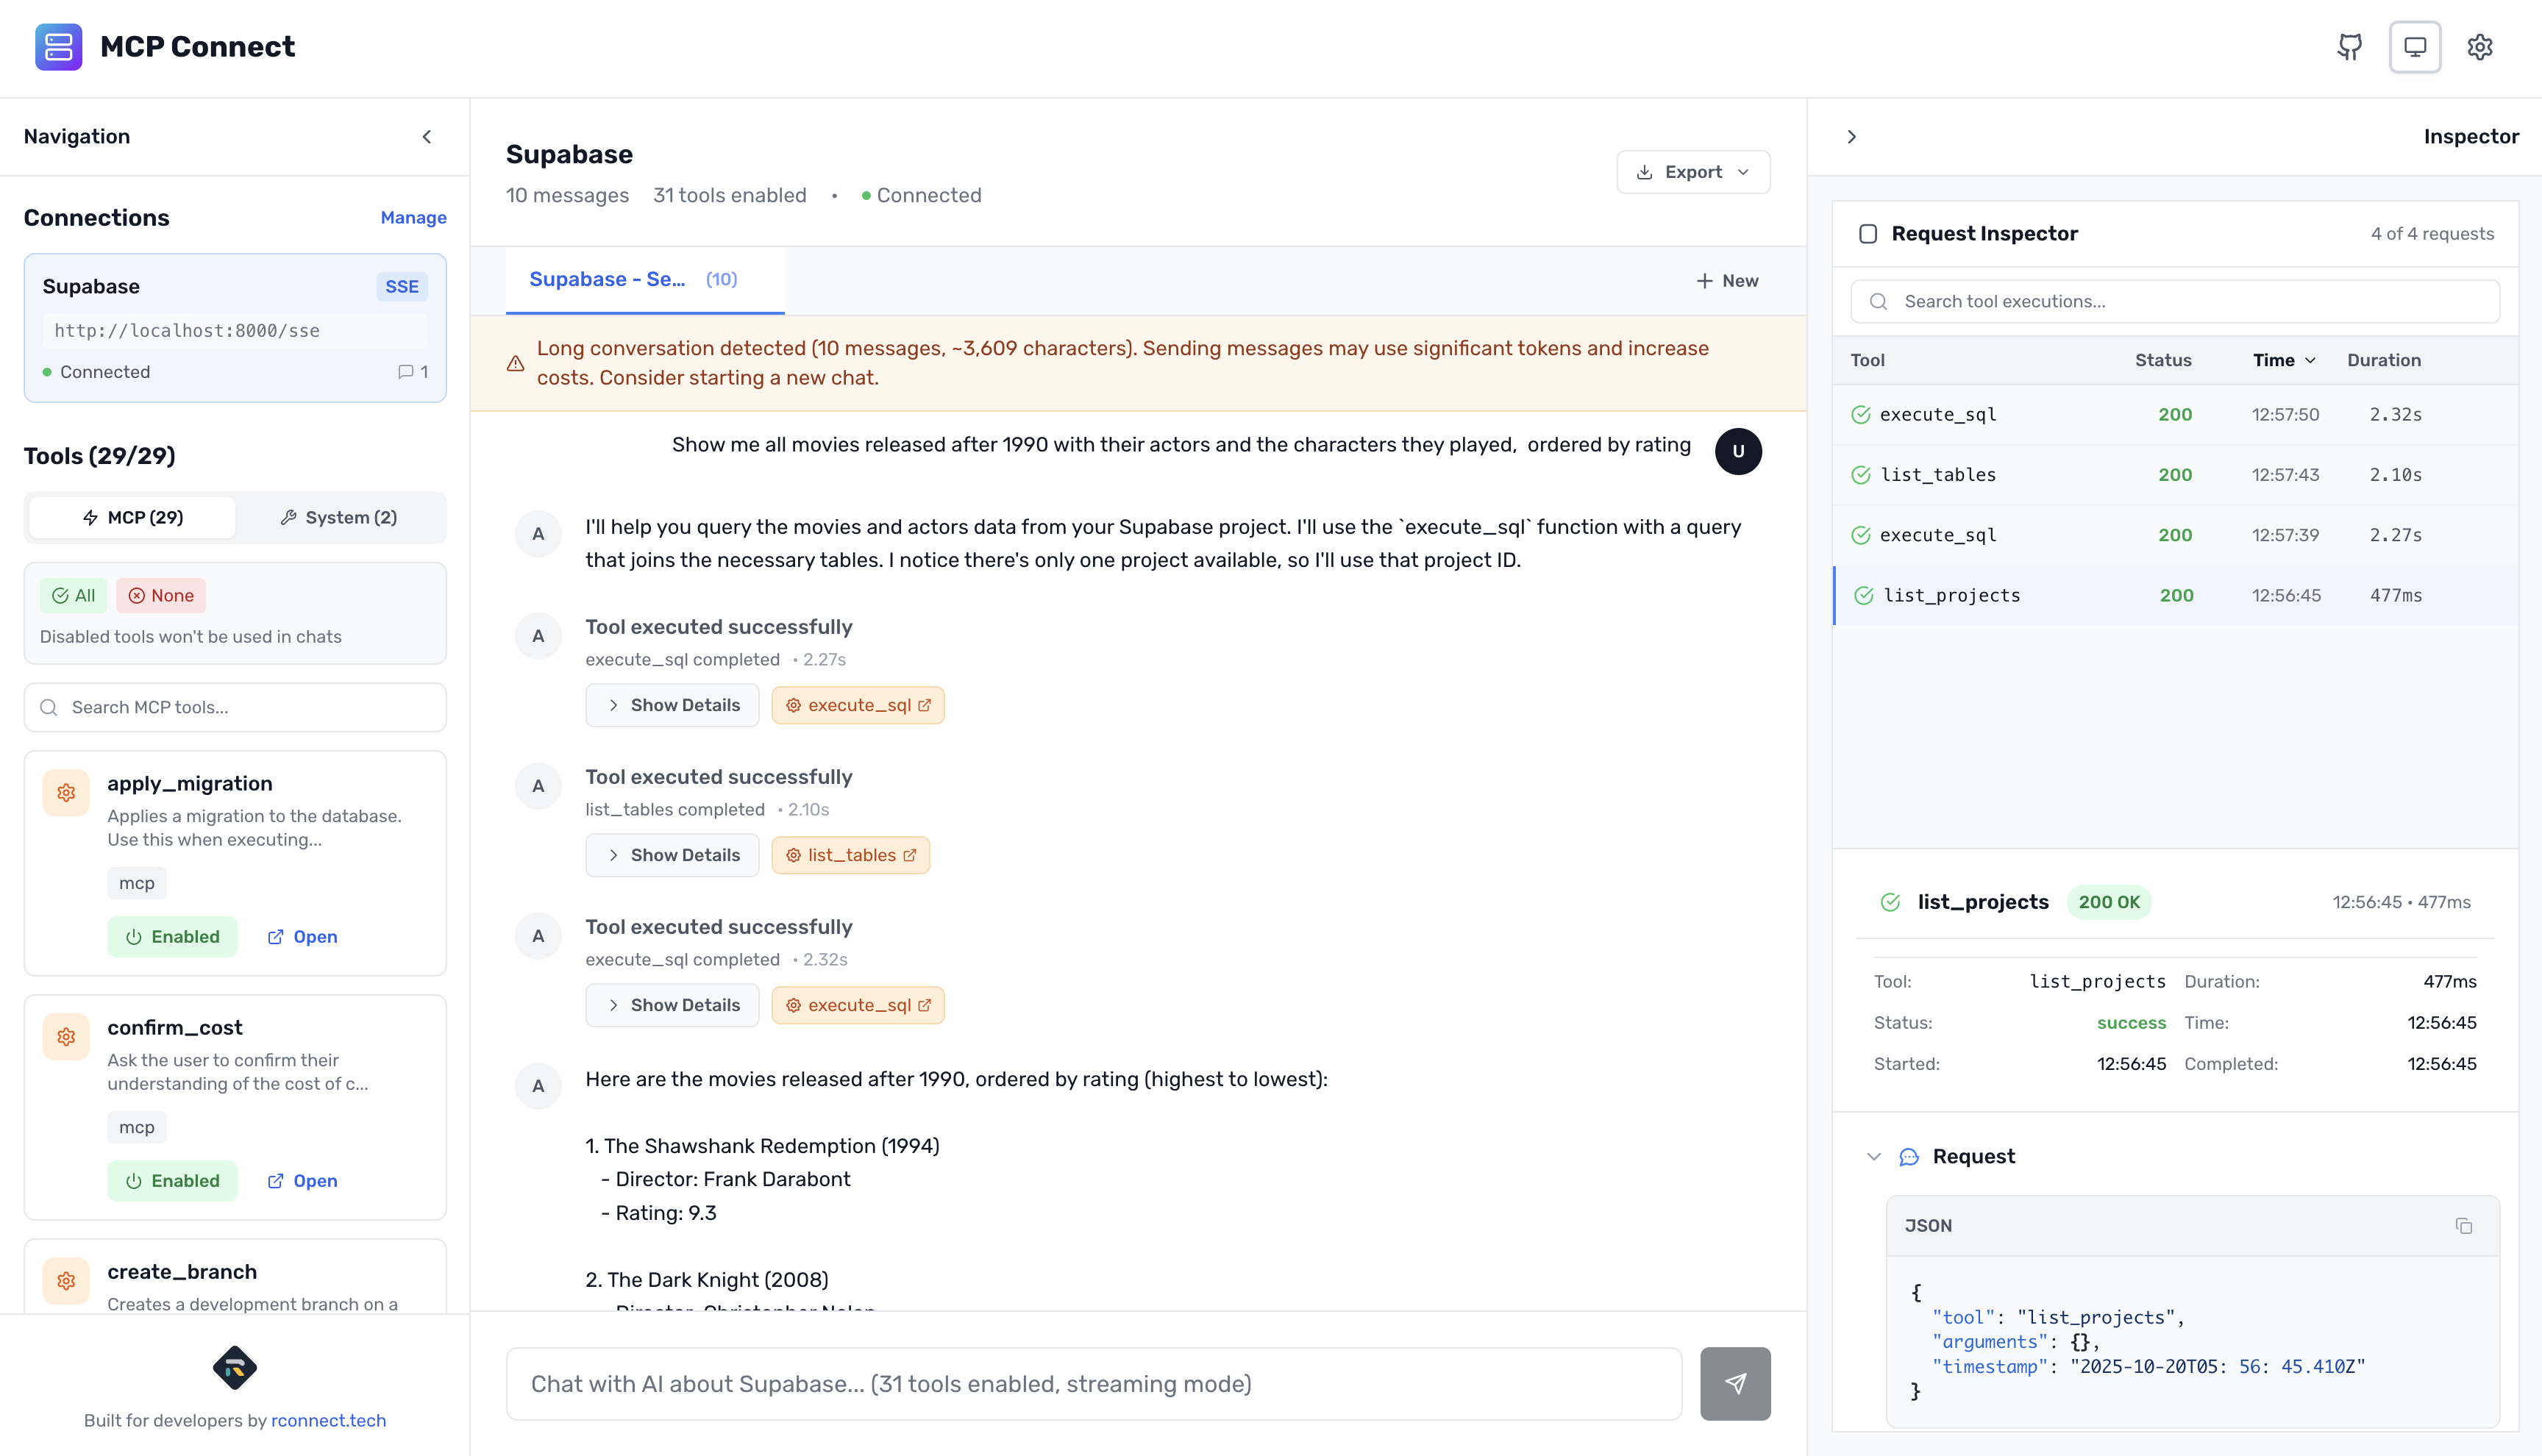
Step 4: Test Your Connection
Try these prompts to verify everything works:
List all my Supabase projects
Show me all movies released after 1990 with their actors and the characters they played,
ordered by rating
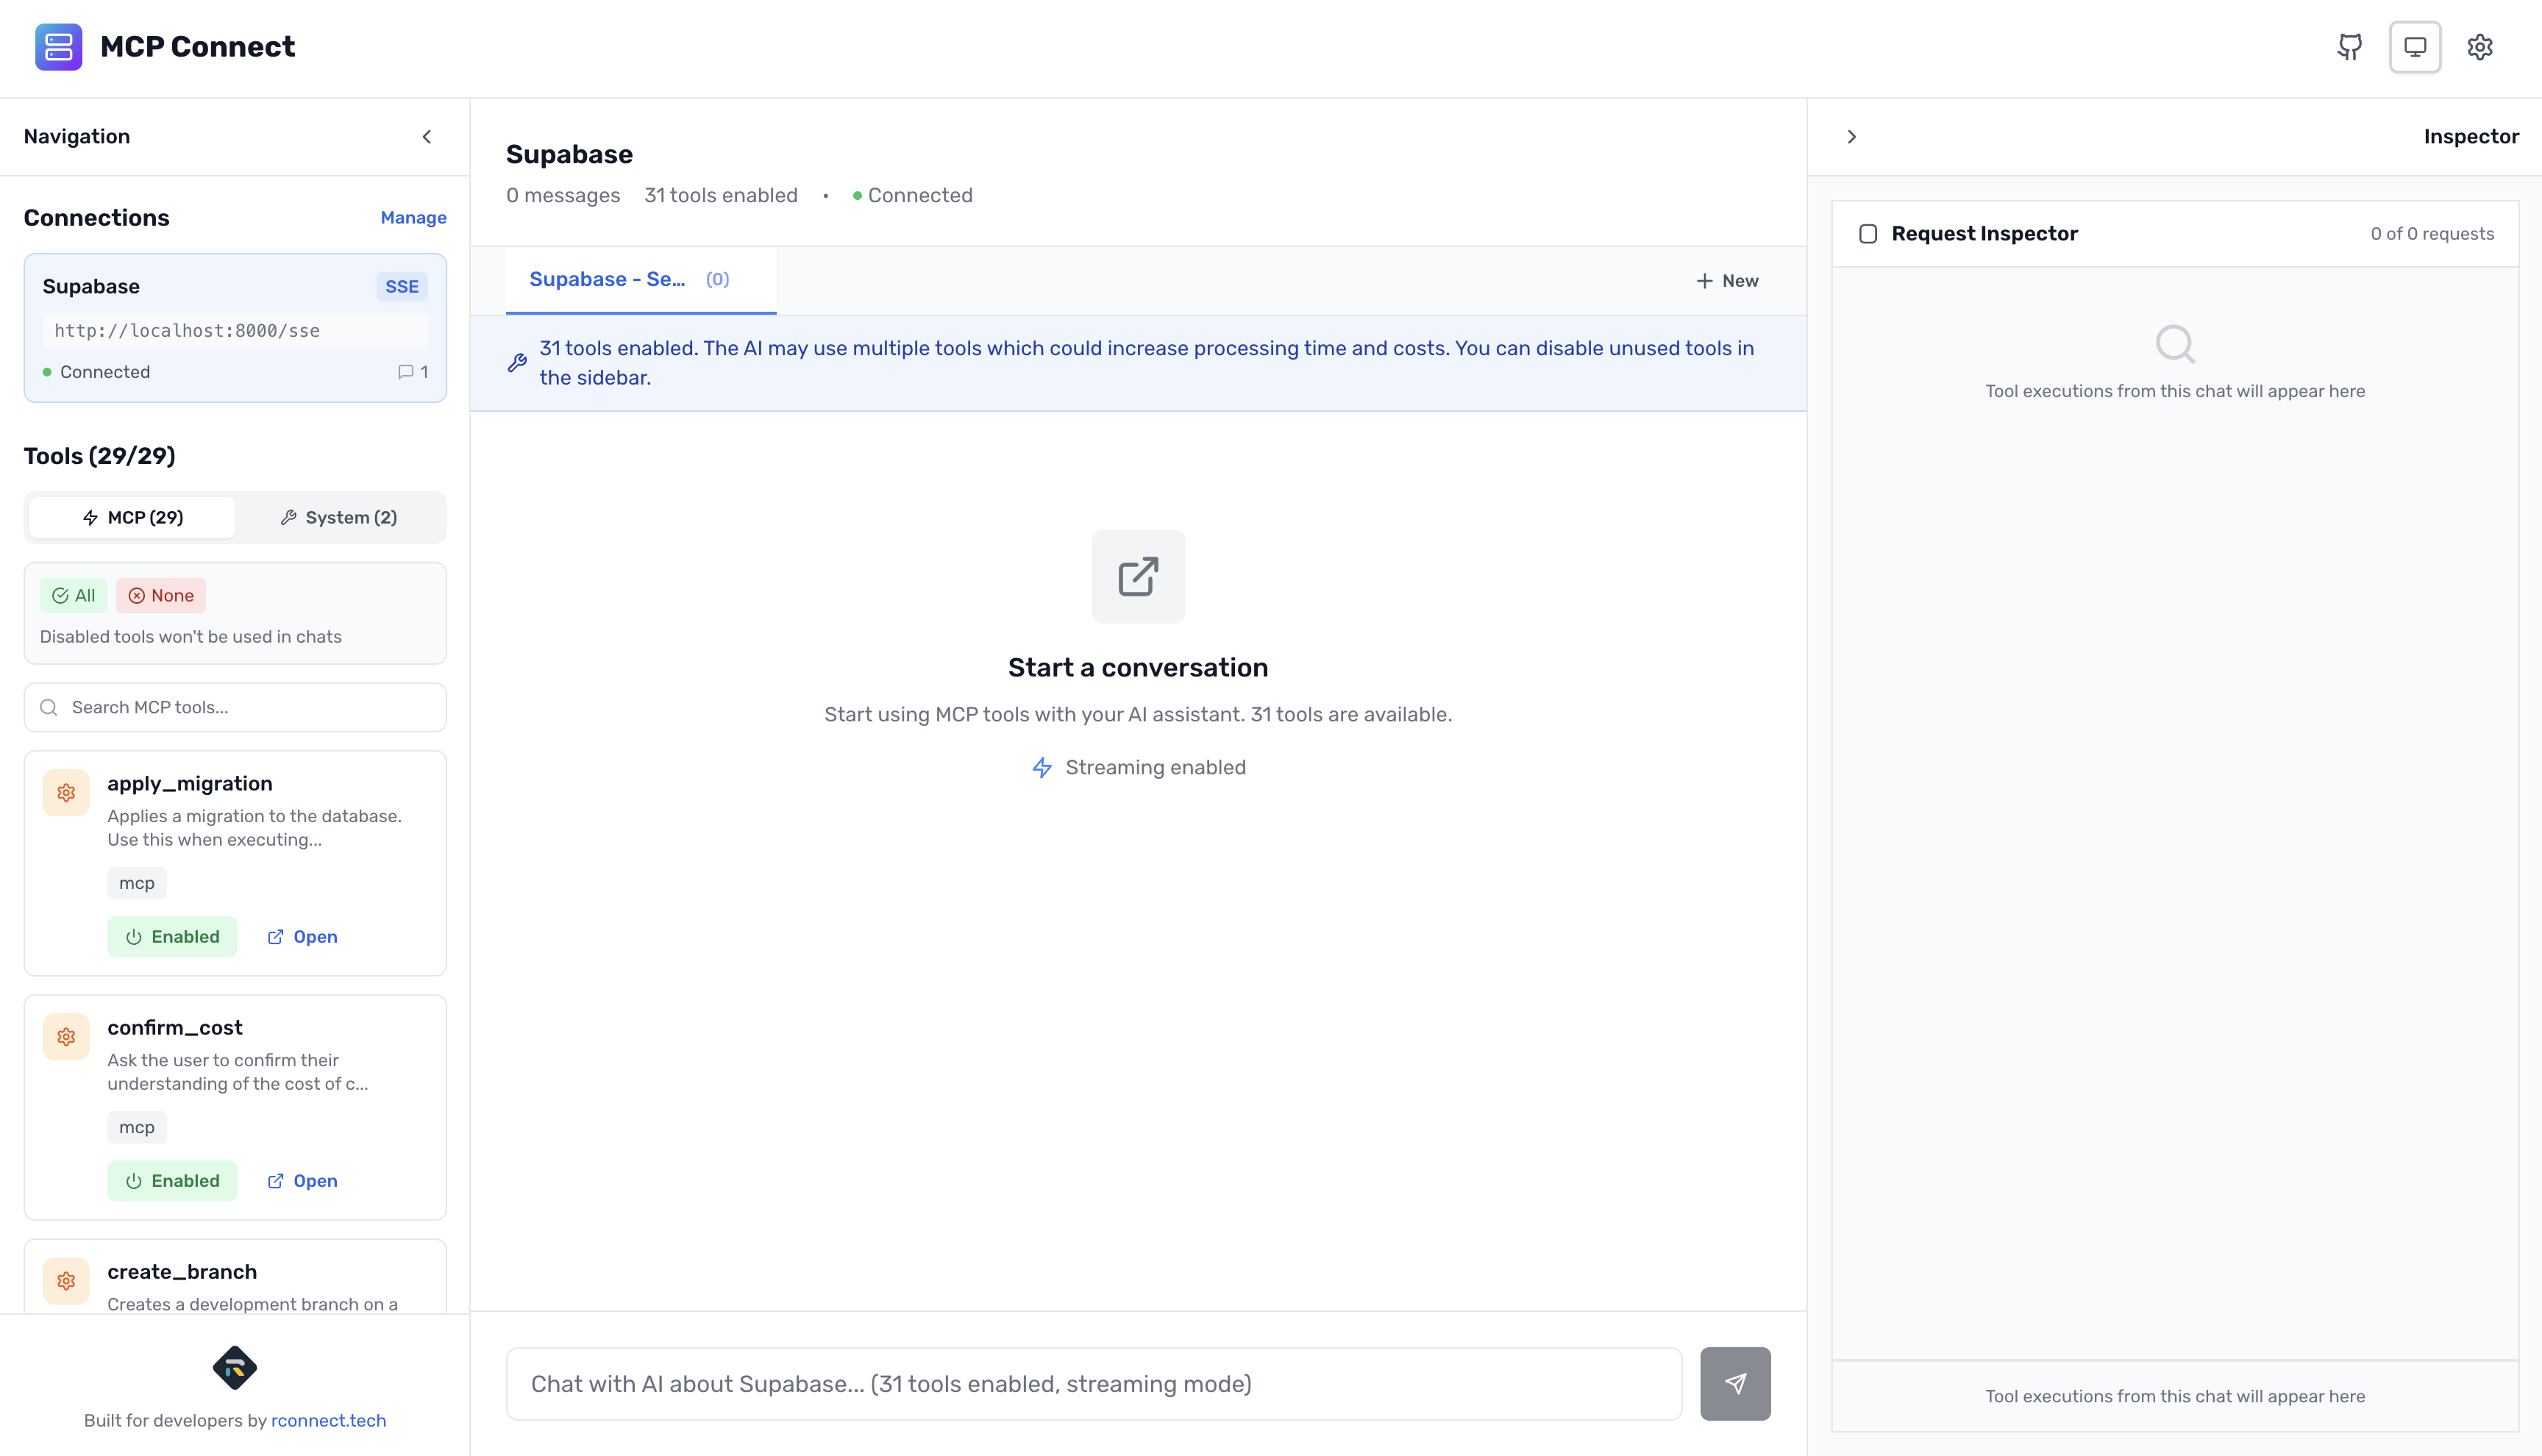
Why MCP Connect for Development?
MCP Connect is purpose-built for development workflows with powerful capabilities:
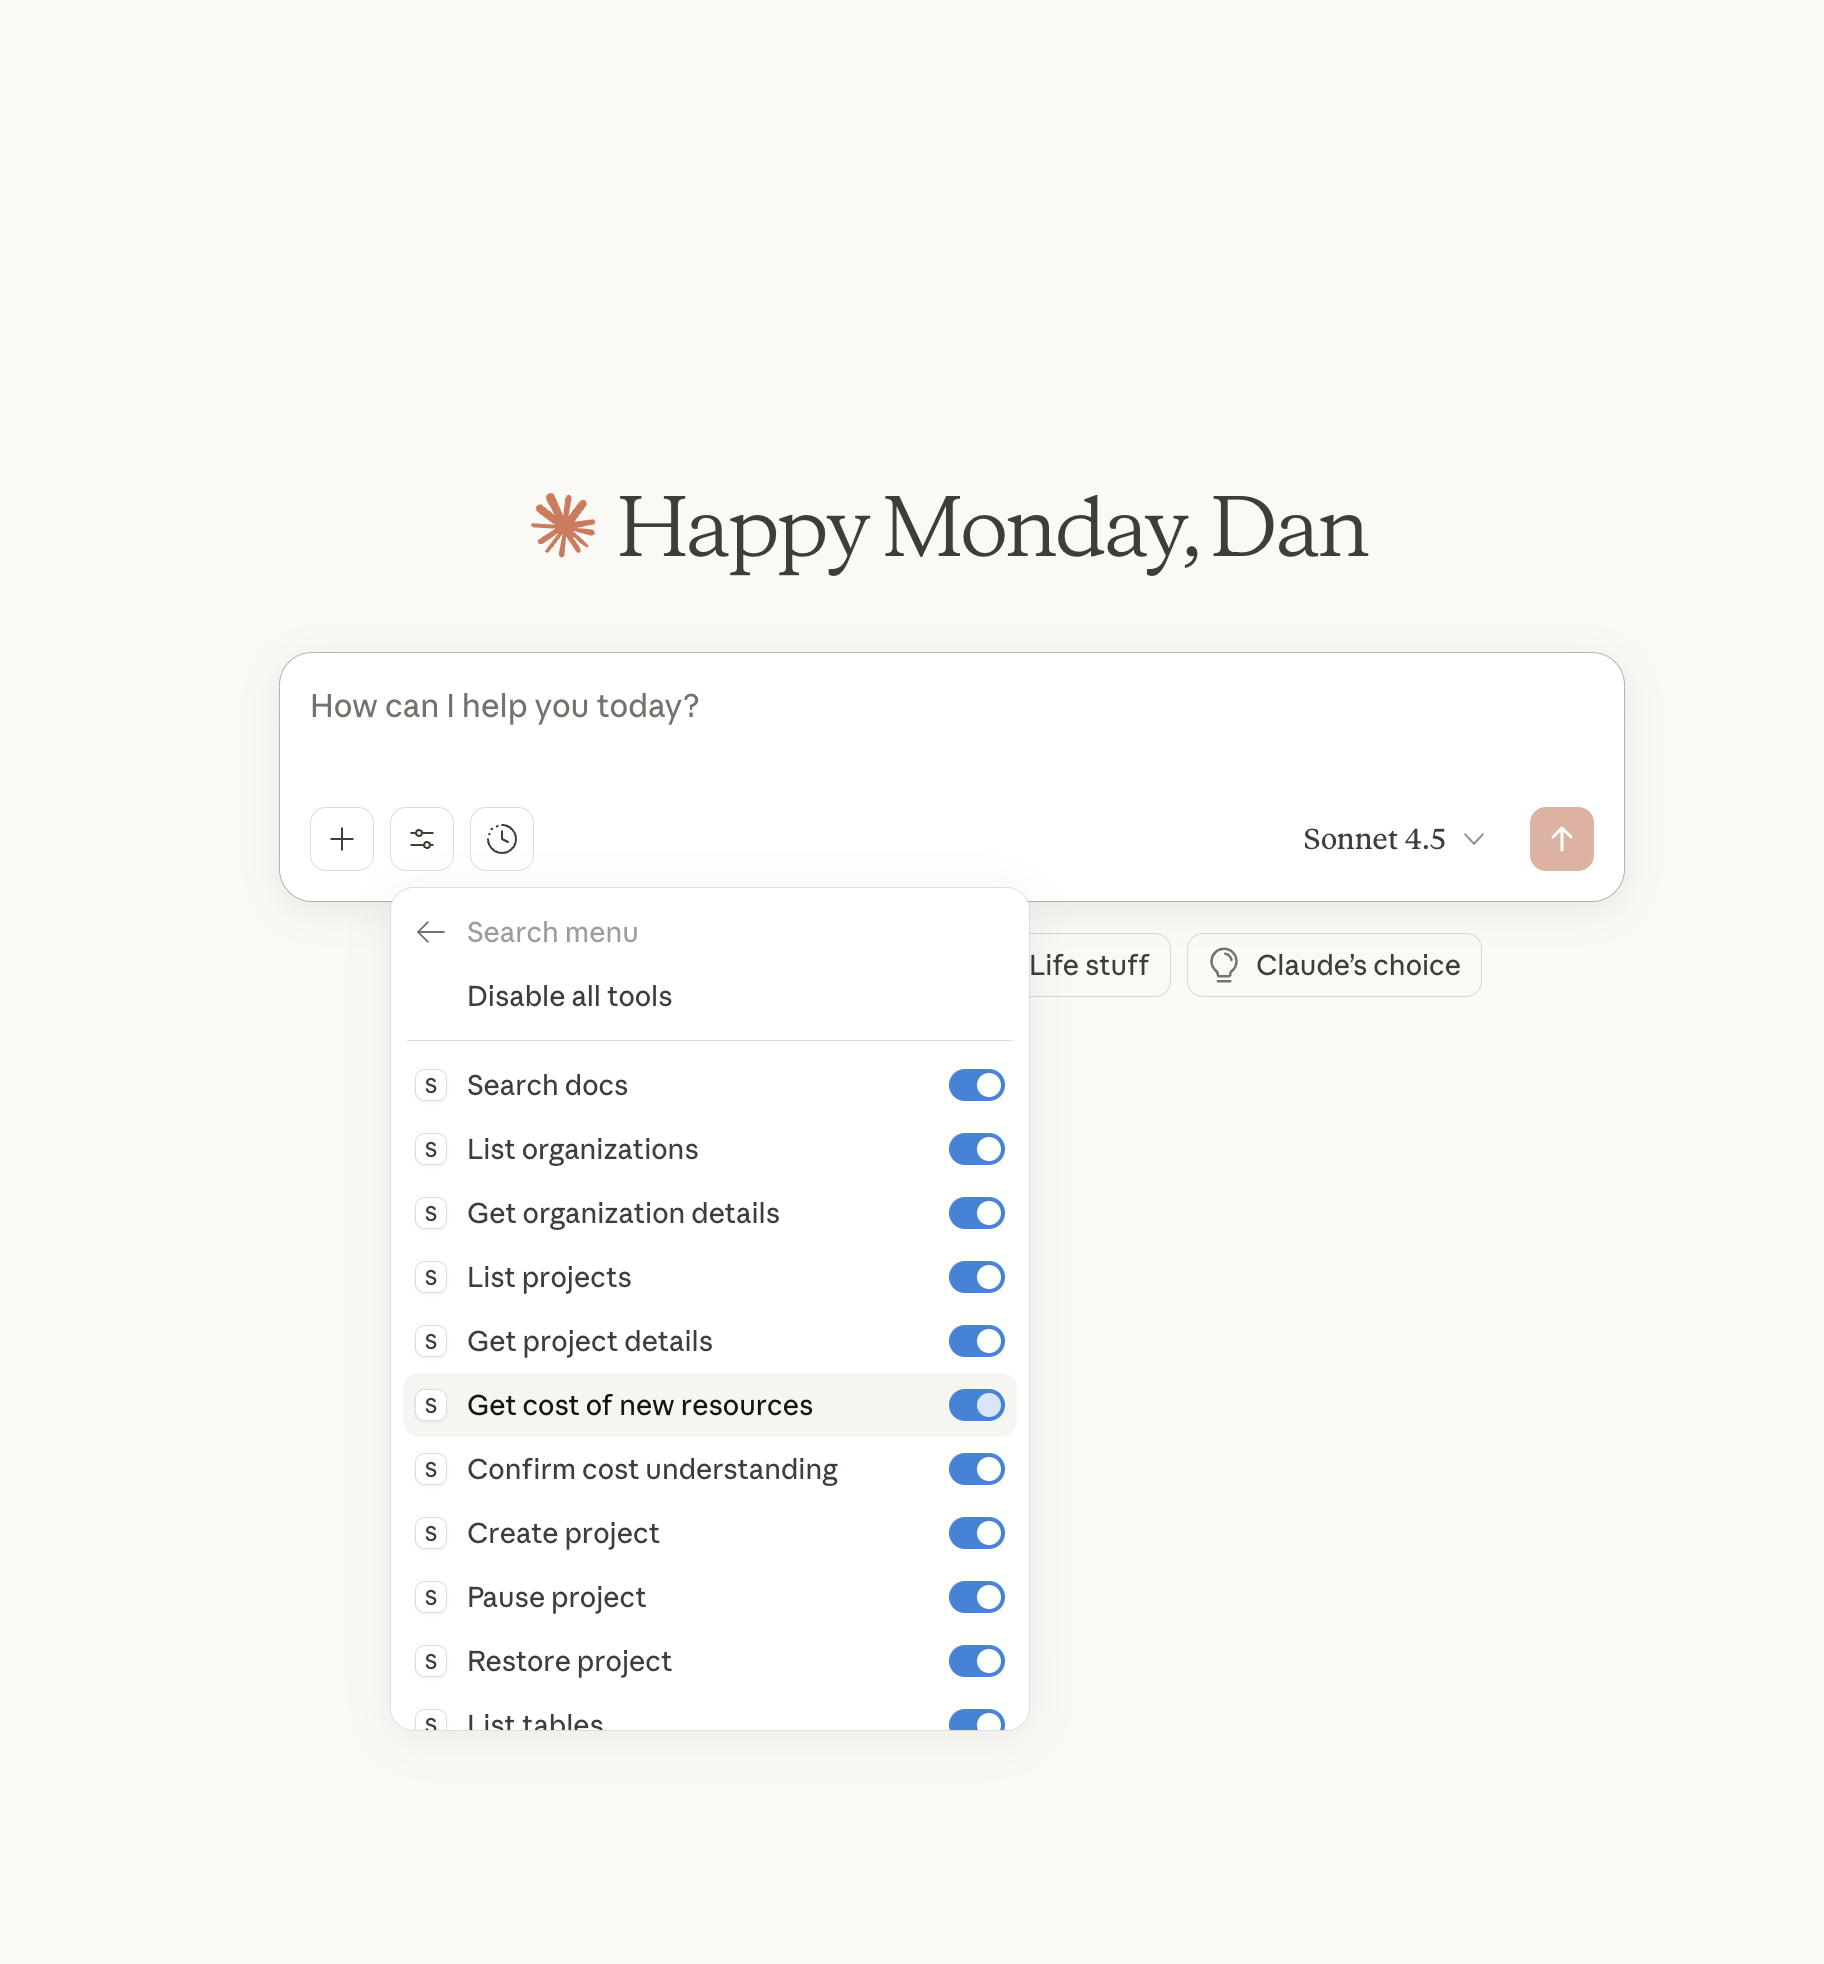
Smart Tool Management
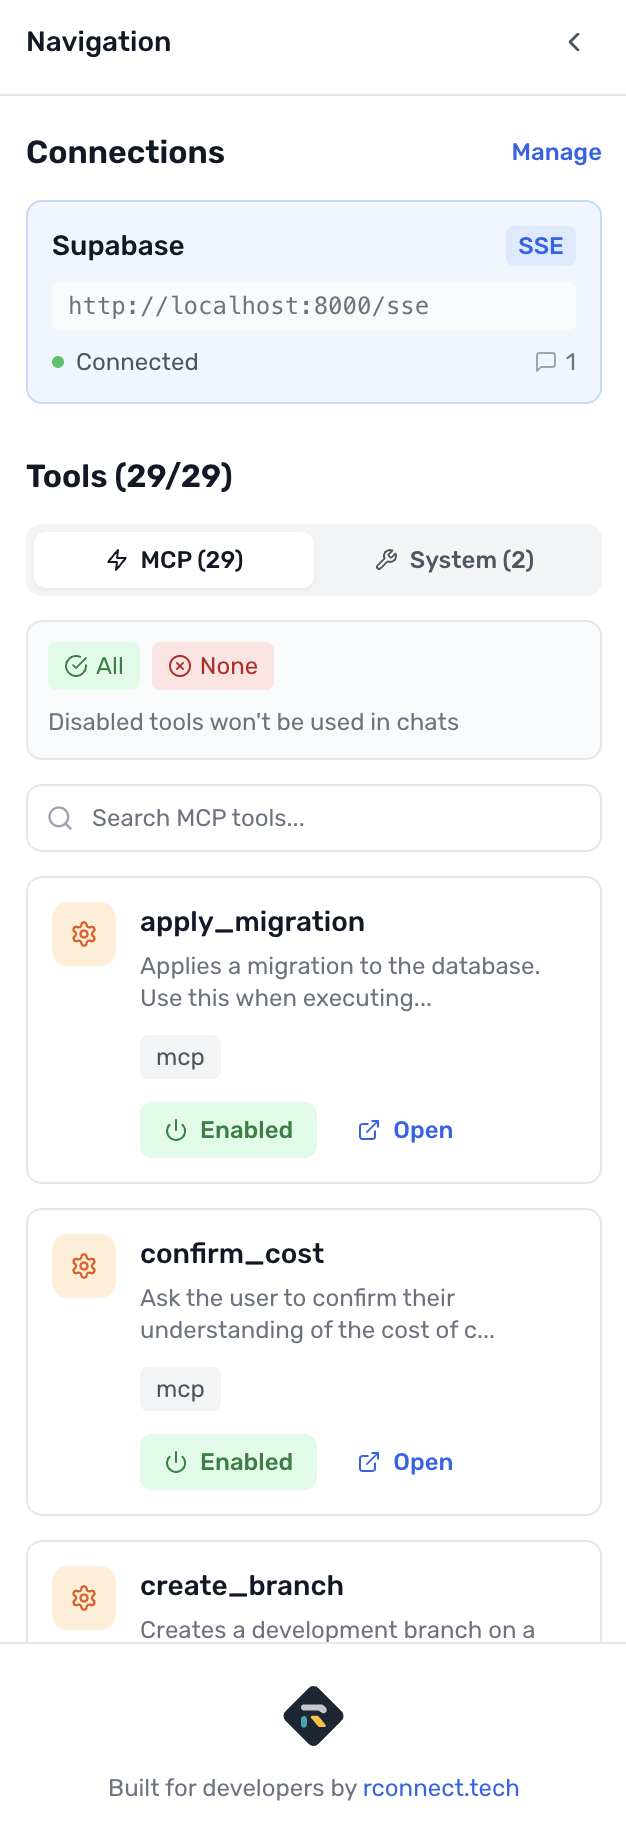
- Visual Control: See all 29+ Supabase tools organized
- One-click Toggle: Enable/disable individual tools
- Token Savings: Reduce API costs by only enabling needed tools
- Real-time Counters: Track enabled vs. disabled status
The Token Challenge
With 30+ tools, each consuming ~200-400 tokens:
- ~8,000+ tokens per request just for tool definitions
- In 10 messages: 80,000+ tokens wasted
- MCP Connect lets you disable unused tools to save costs
Development Features
Protocol Inspection
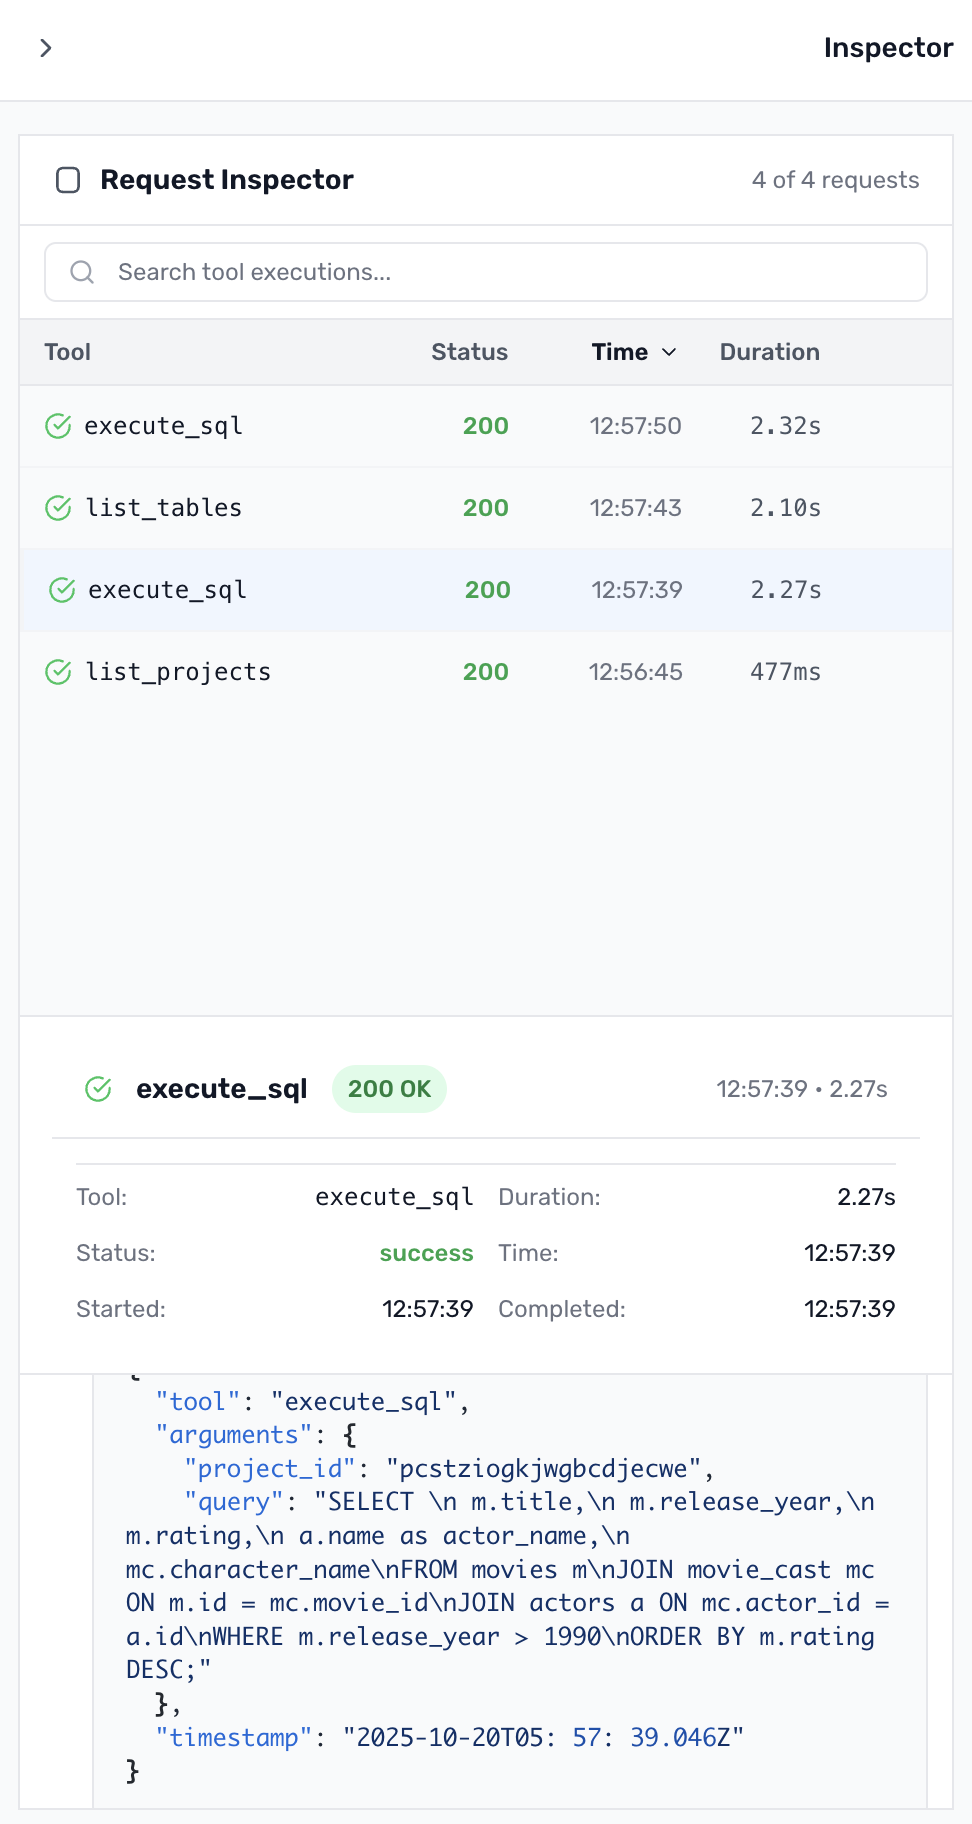
- Raw MCP requests/responses in real-time
- Execution timing for performance optimization
- Debug API interactions before production
Conversation Management
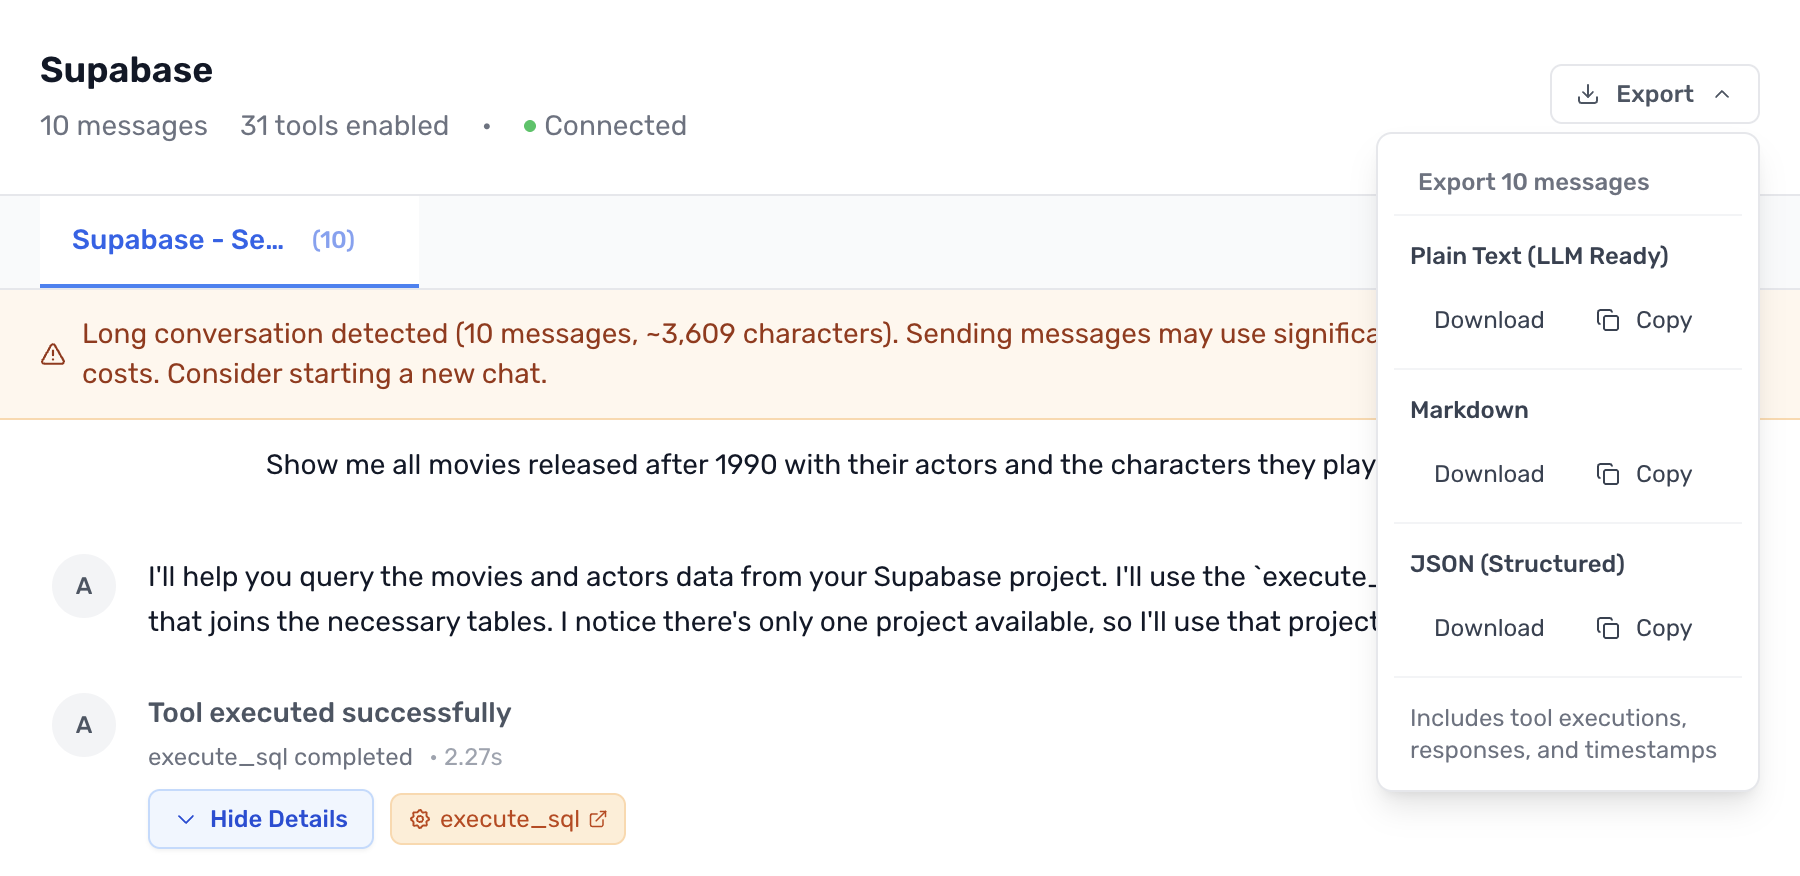
- Multiple chat sessions with different configs
- Export in JSON, Markdown, or Plain Text
- Share debugging sessions with your team
Development Warnings
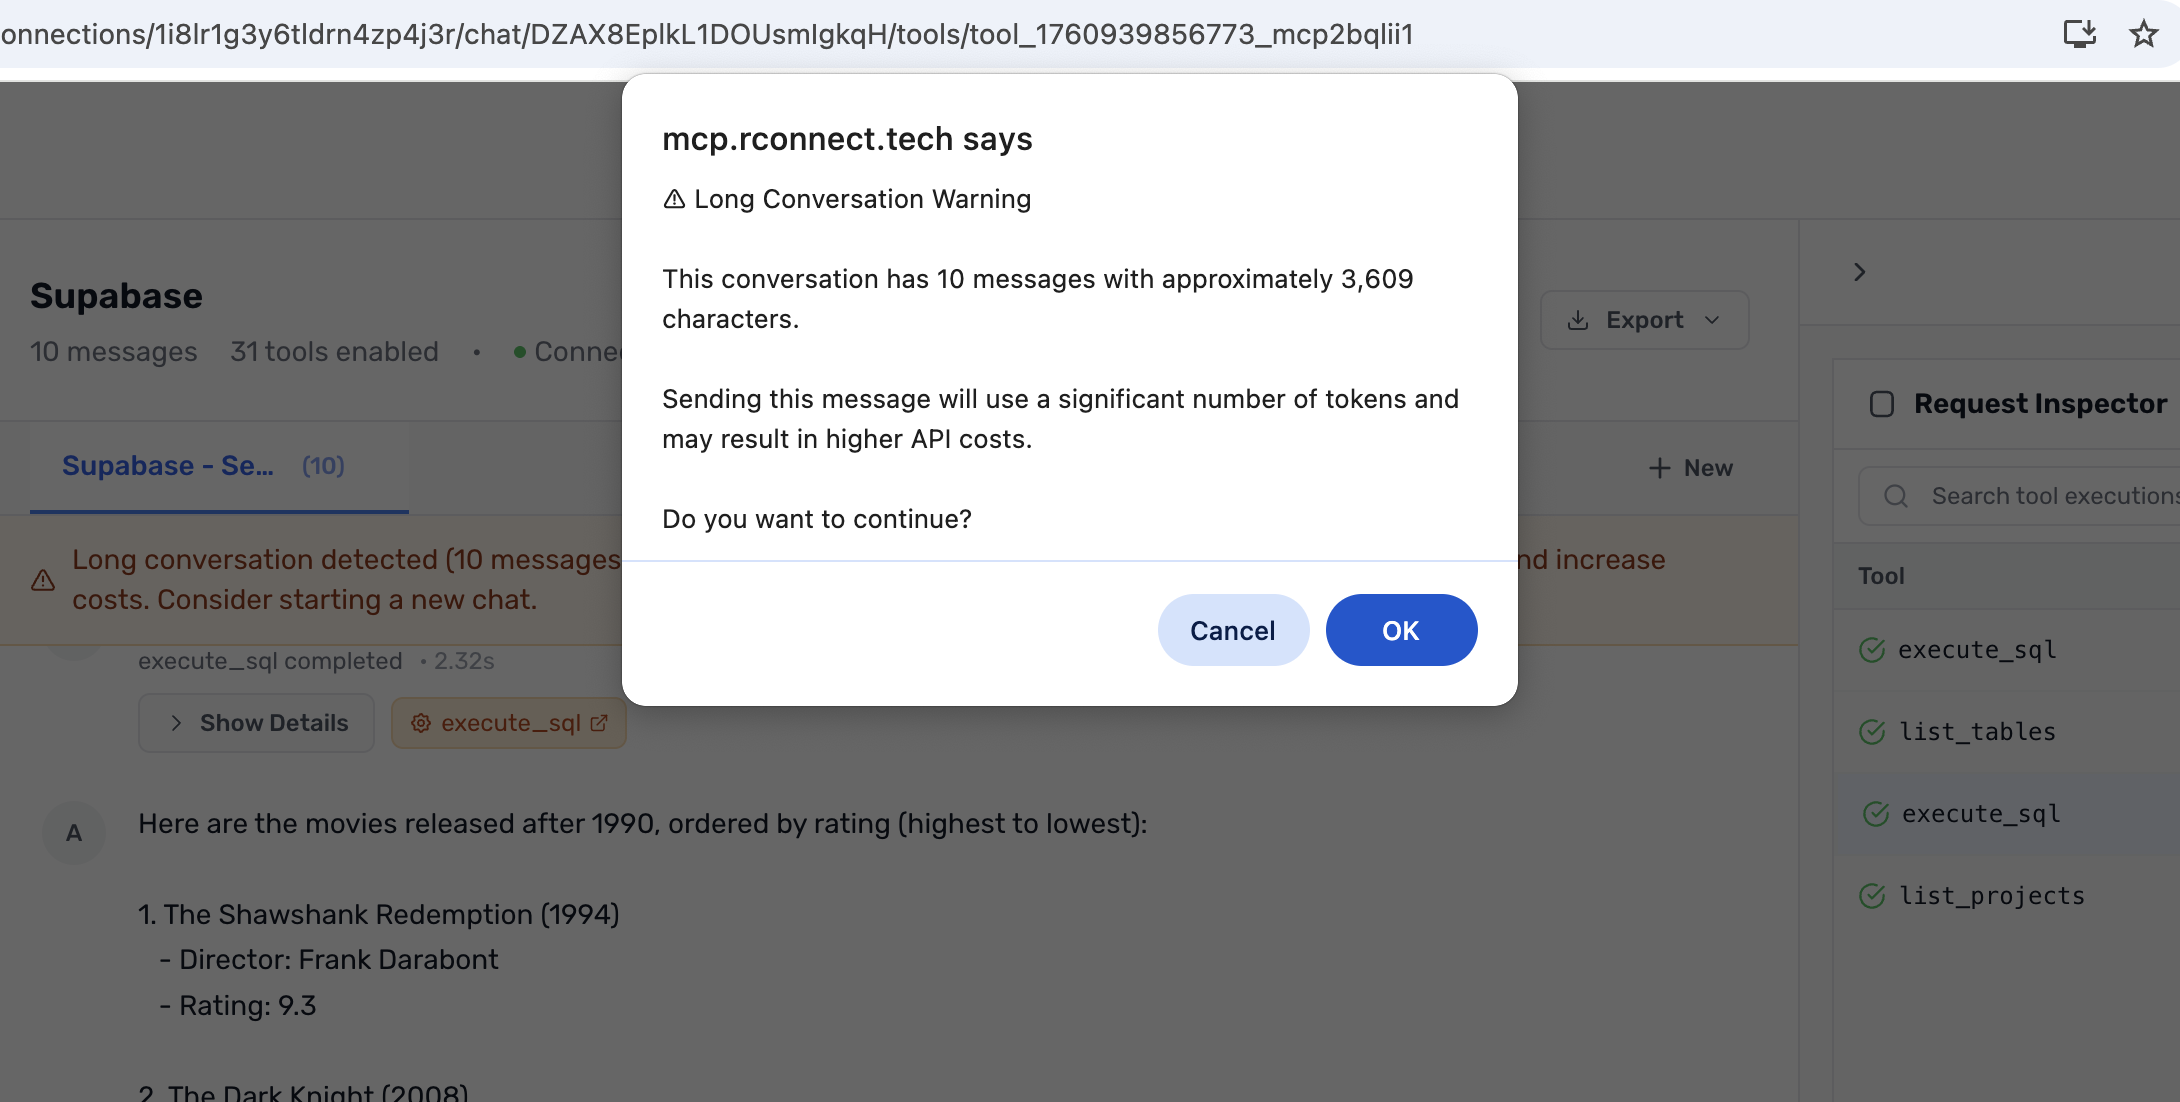
- Long conversation alerts
- Many tools warnings (5+ enabled)
- Real-time token estimates
Understanding Supabase Tools
The MCP server organizes 30+ tools into feature groups:
Account Tools: list_projects, get_project, create_project, list_organizations
Database Tools: list_tables, execute_sql, apply_migration, list_extensions
Development Tools: get_project_url, get_anon_key, generate_typescript_types
Edge Functions: list_edge_functions, get_edge_function, deploy_edge_function
Debugging Tools: get_logs, get_advisors
Knowledge Base: search_docs
Branching (paid): create_branch, merge_branch, delete_branch
Storage (disabled by default): list_storage_buckets, get_storage_config
Enable specific groups with ?features=database,docs or read-only mode with ?read_only=true.
Essential Resources
Tools & Platforms
- MCP Connect Web - Browser-based development
- MCP Connect CLI - Local server
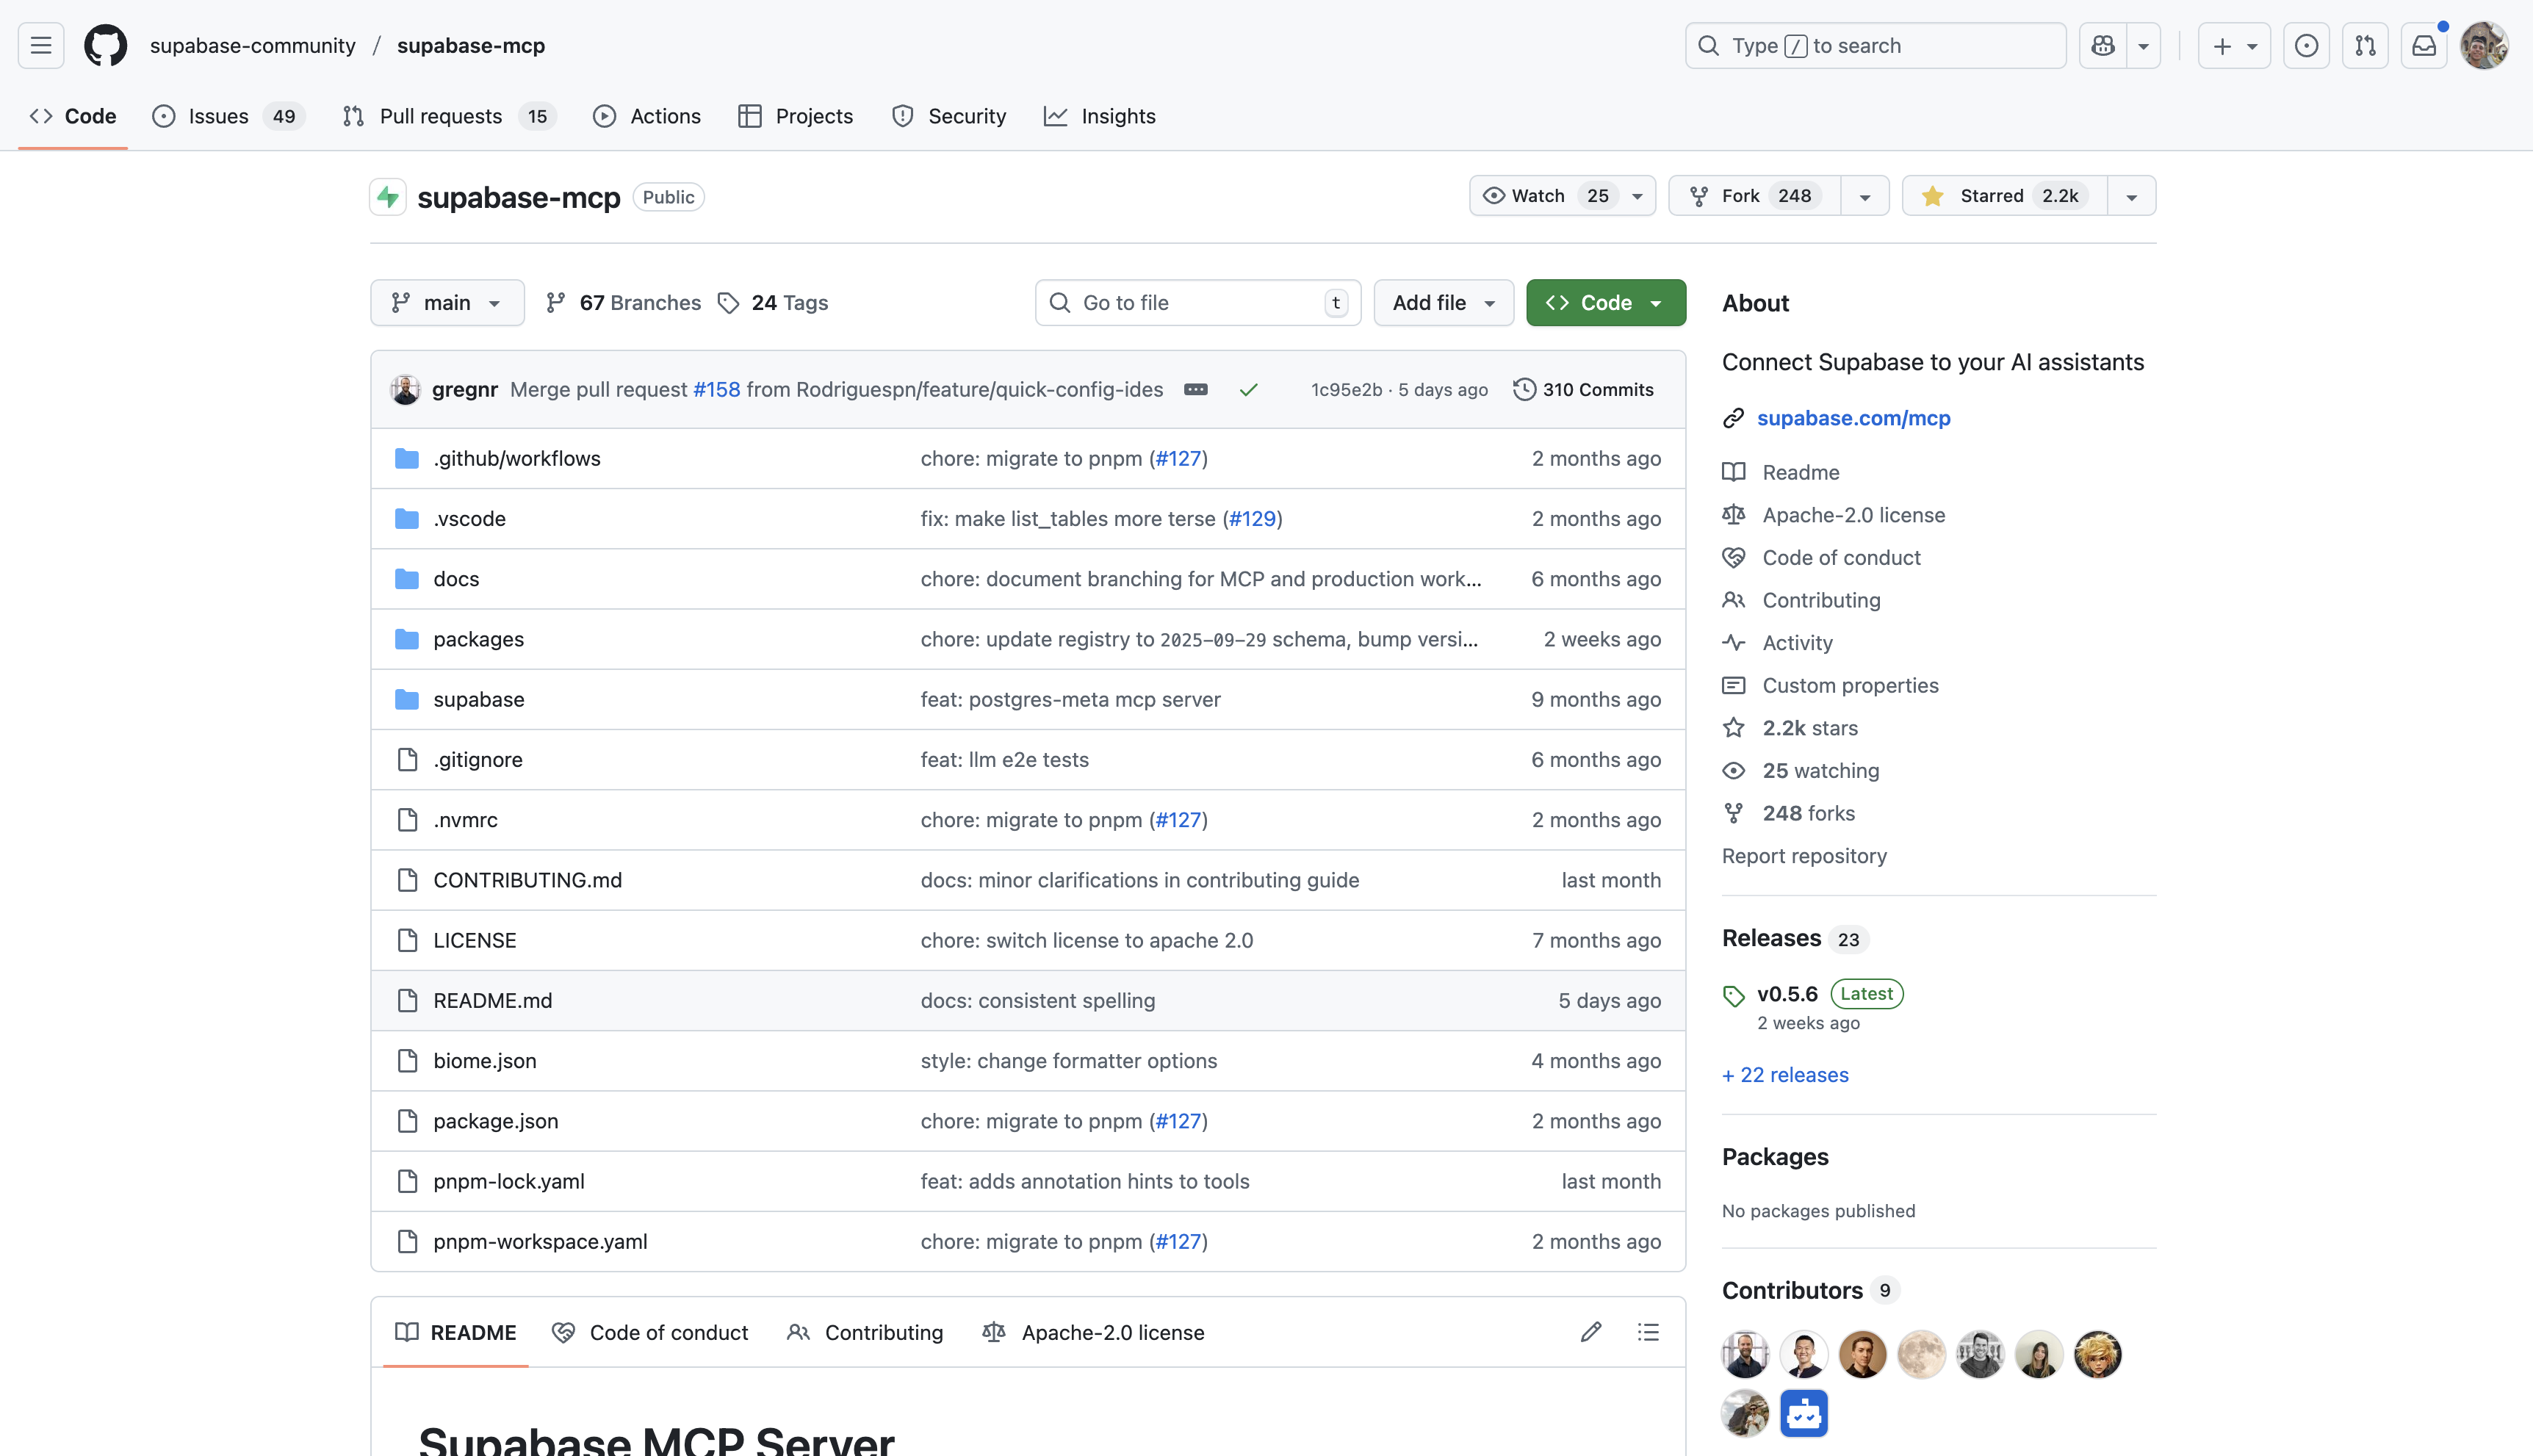
- Supabase MCP Server - Official integration
- Supabase Dashboard - Project management
Documentation
- Supabase Docs - Complete platform reference
- Supabase MCP Docs - MCP-specific guide
- MCP Specification - Protocol details
- Claude Desktop MCP - Integration docs
Connect with Us
We're passionate about connecting people through open source and building developer tools.
Get Involved:
- Try MCP Connect
- Join YouTube
- Follow Twitter/X
- Connect LinkedIn
- Explore GitHub
Ready to collaborate? Contact us and let's build together!